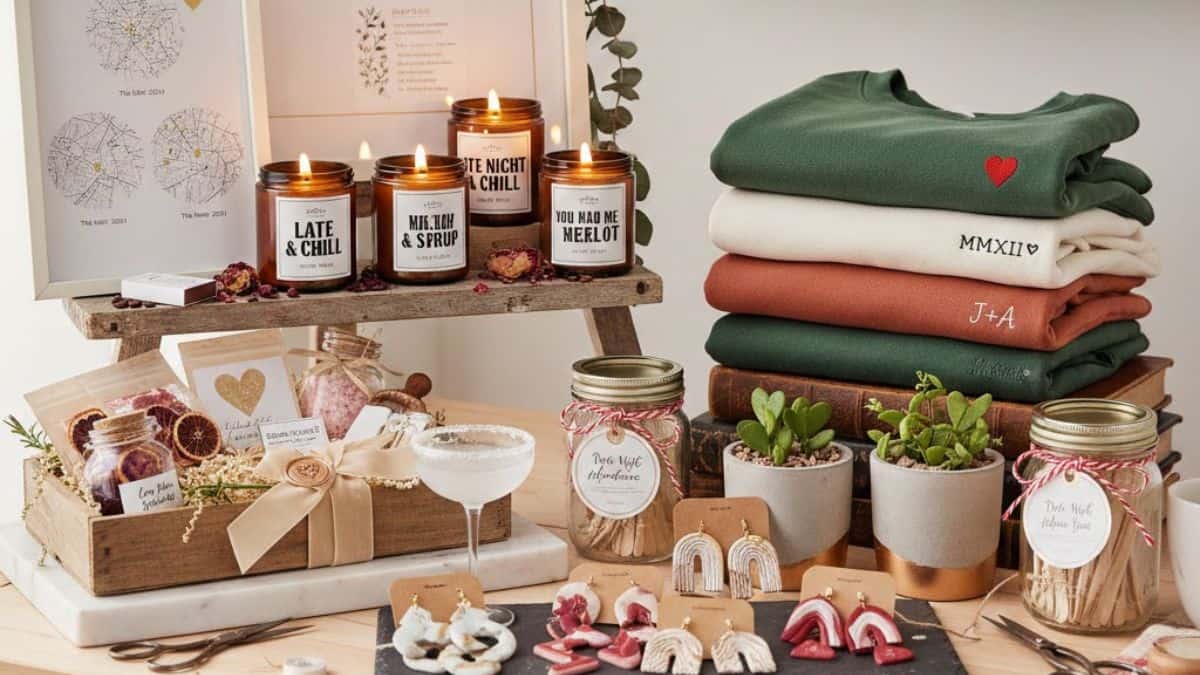
10 Viral Valentine’s Day Crafts That Actually Sell
We’ve all seen it: the “Valentine’s Aisle” at the local drugstore, filled with frantic shoppers, wilted roses, and cards that say exactly what everyone else is saying. But you’re not “everyone else.”
As seasoned artisan looking to stock your shop or a thoughtful partner wanting to create a masterpiece from your kitchen table, you know that the most meaningful gifts aren’t bought they are built. There is a specific kind of magic that happens when you take raw materials like wax, clay, or concrete and transform them into a physical expression of “I love you.”
I have boutique-quality gift ideas that will sell. We aren’t just making crafts; we’re creating sentiments. From “quiet luxury” embroidered sweatshirts to sensory-driven wood wick candles and “date night” jars that solve the dinner argument forever. These gift ideas provide a beautiful and more intentional, creative February 14th.
This website contains affiliate links. As an Amazon Associate, I earn from qualifying purchases. Please read our disclaimer.
1. Wood Wick Soy Candles
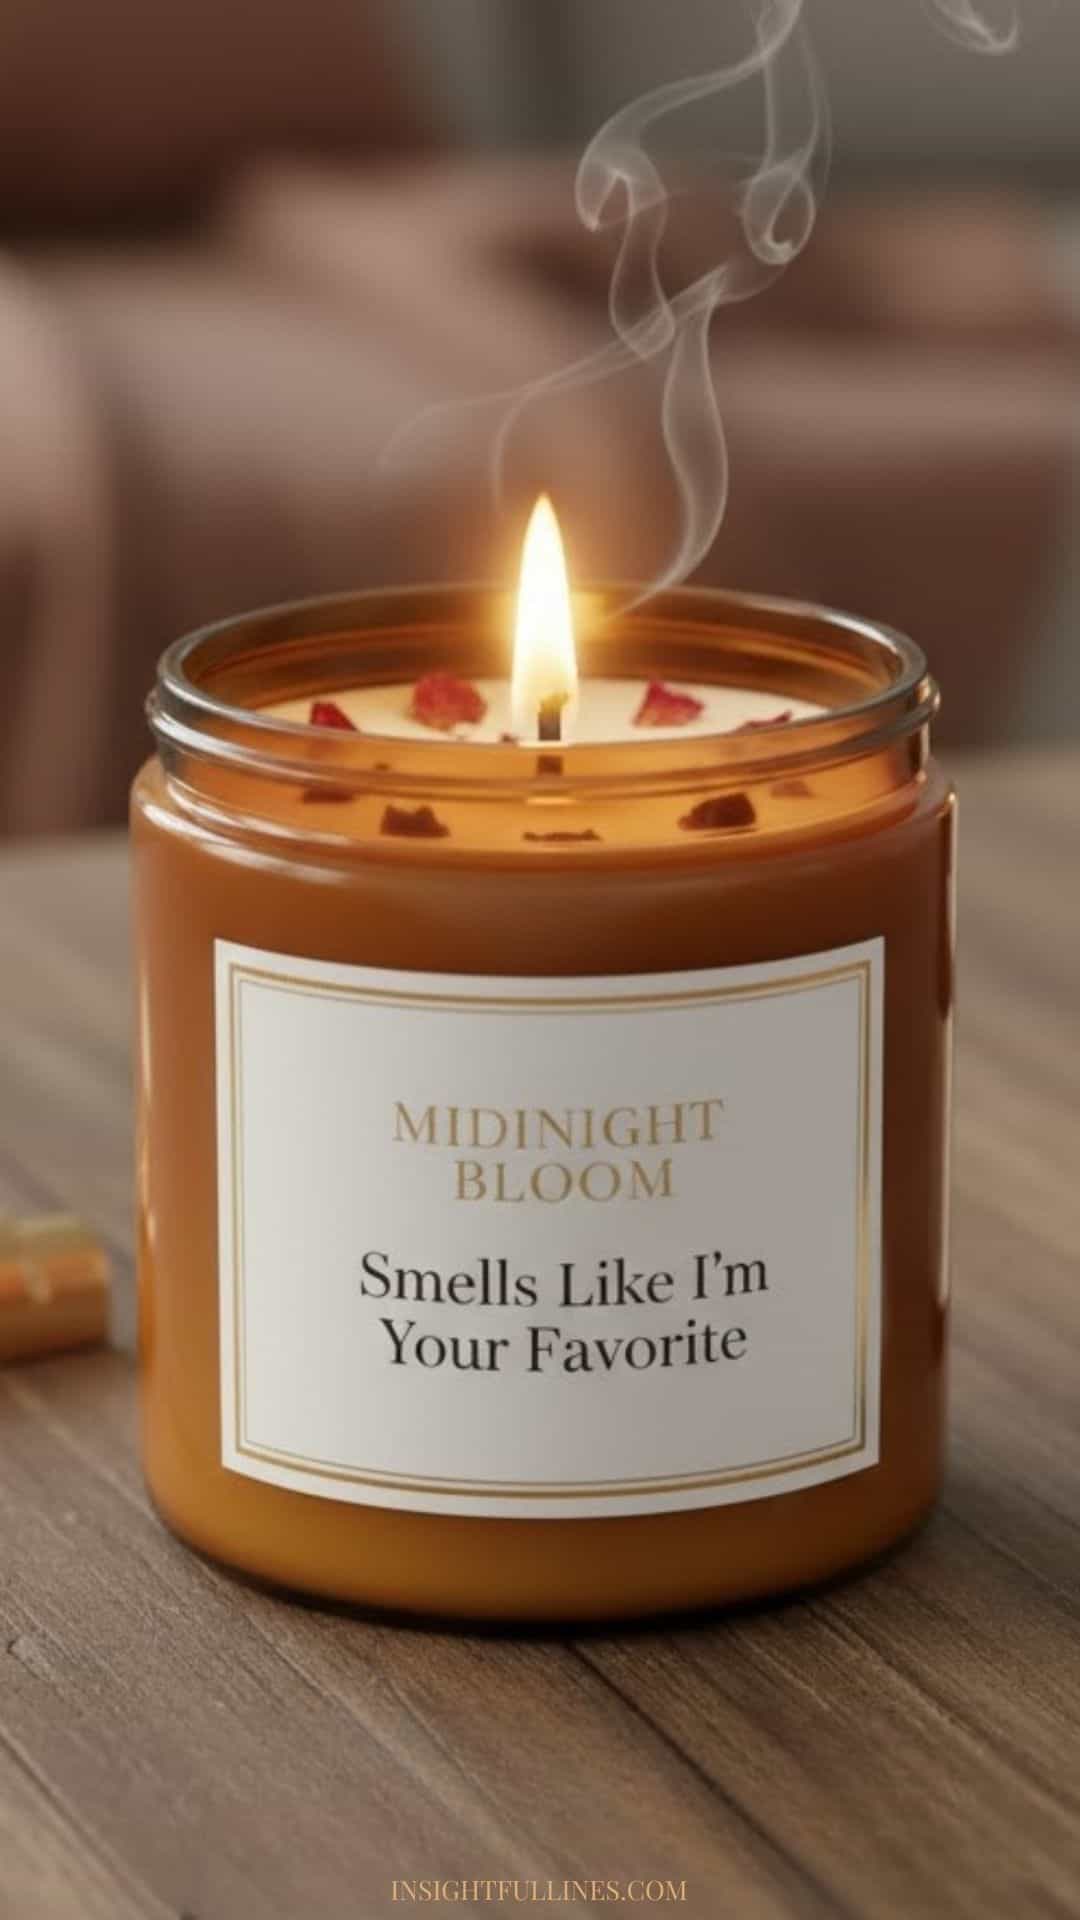
A mini-fireplace in a jar. “Standard candles provide light, but wood wick candles provide an atmosphere. With their signature crackle and slow, even burn, these hand-poured soy candles are the ultimate cozy luxury. We’re going beyond the basics to show you how to blend boutique-quality scents that turn any room into a romantic retreat.”
The Supply List
- Natural Soy Wax: (Flakes are easiest to measure and melt).
- Wood Wicks & Metal Clips: Ensure they are sized correctly for your jar diameter.
- Fragrance Oils: Look for “phthalate-free” to appeal to eco-conscious buyers.
- Glass Jars or Tins: 8oz or 10oz are the standard “giftable” sizes.
- Double Boiler: Or a heat-safe pouring pitcher inside a pot of simmering water.
- Digital Thermometer: This is the secret to a smooth candle top.
- Wick Stickers: To secure the metal clip to the bottom of the jar.
The Step-by-Step Guide
1. Measure Your Wax
A good rule of thumb for soy wax: Use double the volume of your container in wax flakes. For a 10oz jar, you’ll need roughly 20oz of dry flakes.
2. Melt and Monitor
Place wax in your double boiler (affiliate). Use your thermometer to monitor the temperature. You want to heat the wax to approximately 85°C (185°F).
Why? Heating to this temperature ensures the fragrance oil binds perfectly with the wax molecules.
3. Prep the Jars
While the wax melts, slide your wood wick into the metal clip. Use a wick sticker to center the clip at the bottom of your jar. Wood wicks are sturdy, so you won’t need the “centering tools” that cotton wicks require.
4. Add the Fragrance
Once the wax hits 85°C, remove it from the heat and stir in your fragrance oil. Use about 1oz of oil per 1lb of wax (a 6-10% fragrance load). Stir gently but thoroughly for two minutes.
5. The “Perfect Pour”
Let the wax cool to about 57°C (135°F) before pouring. This lower temperature prevents the wax from shrinking too fast, which causes those annoying dips or “wet spots” on the glass. Pour slowly to avoid air bubbles.
6. Trim and Cure
Wait 24 hours for the candle to fully set. Trim the wood wick to about 1/4 inch (6mm) above the wax.
- Crucial Tip: Tell your readers to “cure” the candle for at least 1 week before lighting to let the scent reach its full strength.
Making it “Valentine’s Ready”
- The Label: Use a matte black or cream label with gold foil accents.
- The Scent Story: Give your scents romantic, evocative names. Instead of “Rose,” try “Midnight in Paris” or “Secret Garden.”
- The Add-In: For a Valentine’s edition, you can sprinkle a few dried rosebuds on top just as the wax begins to glaze over.
Safety Note
Always include a warning label on the bottom of your jars. Wood wicks can sometimes produce a slightly larger flame than cotton, so reminding customers to “trim the wick before every burn” is essential for safety and brand credibility.
This is just one example there are plenty more ideas shared in this post about DIY recycled glass jar candles and the scents that sell.
2. DIY Cocktail (or Mocktail) Kits
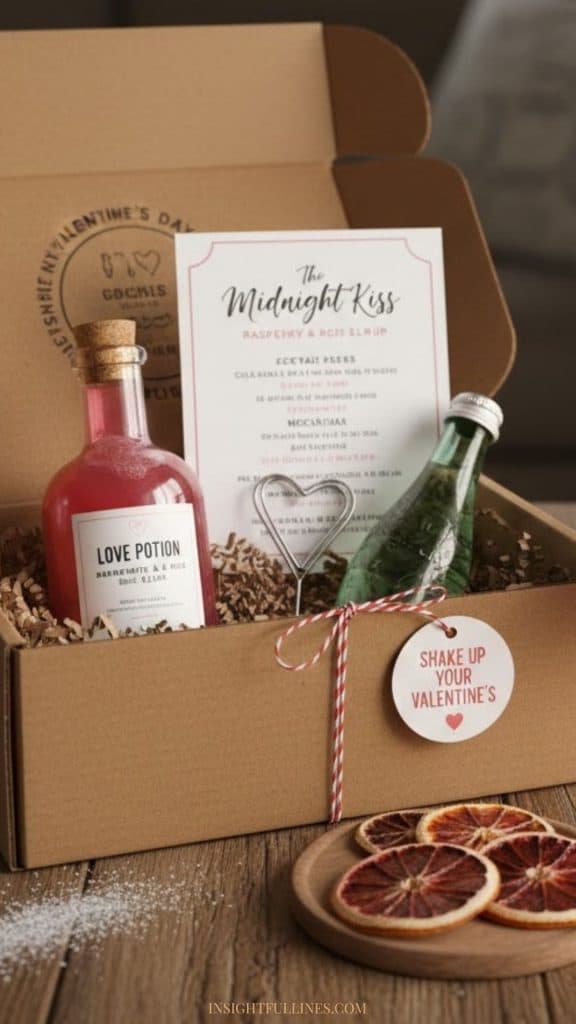
Valentine’s Day often falls on a weekday, and sometimes the best “reservation” is the one on your couch. A DIY Cocktail Kit provides the luxury of a craft bar experience in a curated, giftable box. We’re going to show you how to assemble a “Love Potion” kit that looks as good as it tastes.
The Component List
- The Base: A high-quality 4oz or 8oz glass jar for a custom syrup.
- The Garnish: Dehydrated citrus wheels (lemon, lime, or blood orange) or edible dried flowers.
- The “Mixer”: A small glass bottle of high-end tonic, club soda, or a flavored sparkling juice.
- The Tool: A mini bar spoon or a custom wooden muddler.
- The Recipe: A beautifully printed card with step-by-step instructions.
- The Box: A sturdy cardboard mailer or a wooden crate lined with shredded kraft paper.
The Step-by-Step Guide
1. Craft Your Signature Syrup
The syrup is the “soul” of the cocktail. A standard simple syrup is 1 part sugar to 1 part water, but for Valentine’s, we want to level up.
- Recipe Idea (Raspberry & Rose): Simmer 1 cup sugar, 1 cup water, and 1/2 cup fresh raspberries. Strain and add a drop of rose water once cooled.
- The “Shelf Life” Factor: If you’re selling these, ensure your syrups are boiled, bottled in sterilized jars, and labeled with an “enjoy by” date (usually 2-4 weeks refrigerated).
2. Dehydrate Your Garnishes
Fresh fruit wilts; dehydrated fruit is “art.”
- Slice blood oranges or lemons thin (about 3mm).
- Bake at 95°C (200°F) on a wire rack for 2-4 hours until crisp.
- These add a beautiful, professional look and a concentrated aroma to the drink.
3. Design the Recipe Card
Don’t just list ingredients tell a story.
- The “Shopping List”: Clearly state which spirit the user needs to buy (e.g., “Best paired with 2oz of Gin or Vodka”).
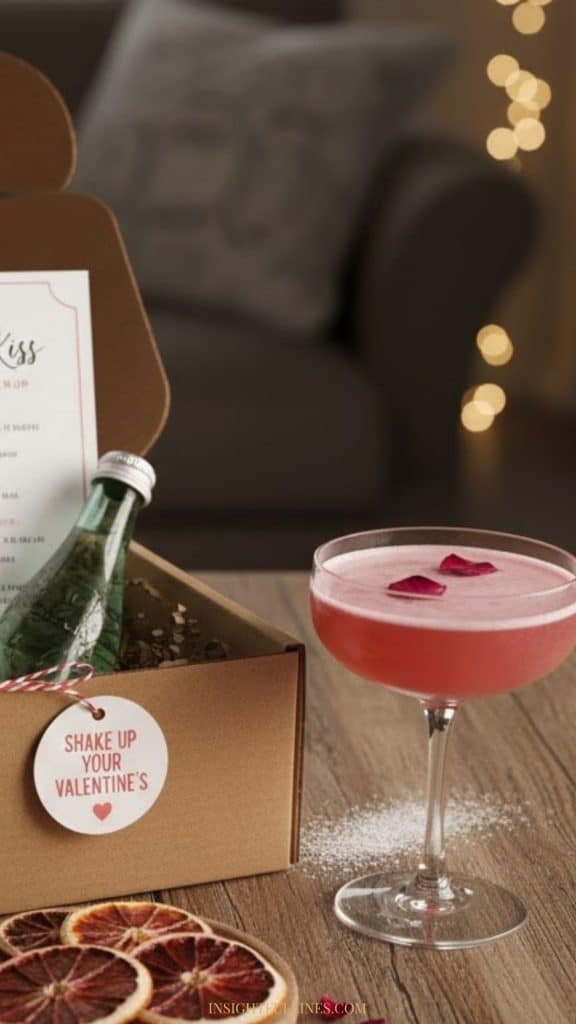
- The Method: Use terms like “Shake over ice,” “Strain into a chilled glass,” and “Express the citrus over the rim.”
4. The “Mocktail” Pivot
Always include a “Mocktail” variation on your recipe card (e.g., “Swap the Gin for 2oz of Seedlip or extra Sparkling Water”). This doubles your potential customer base!
Making it “Valentine’s Ready”
- The Theme: Name your kits! “The Heartbreaker” (Spicy Marg), “The First Date” (Floral Spritz), or “Midnight Kiss” (Espresso Martini kit).
- The Packaging: Use red or pink baker’s twine to tie the cinnamon sticks or garnishes to the outside of the syrup jar.
- The Add-on: Sell a pair of vintage-style coupe glasses as an optional “deluxe” upgrade to the kit.
Shipping & Legal Tip
Important: Do not include mini-bottles of alcohol unless you have a specific retail liquor license. Focus on being the “expert curator” of the flavors, and let the customer provide the spirits. It keeps your costs down and your business legal!
If this caught your eye, you might enjoy reading about 20+ Deliciously Easy Valentines Drinks to Celebrate Love next.
3. Custom Embroidered Sweatshirts
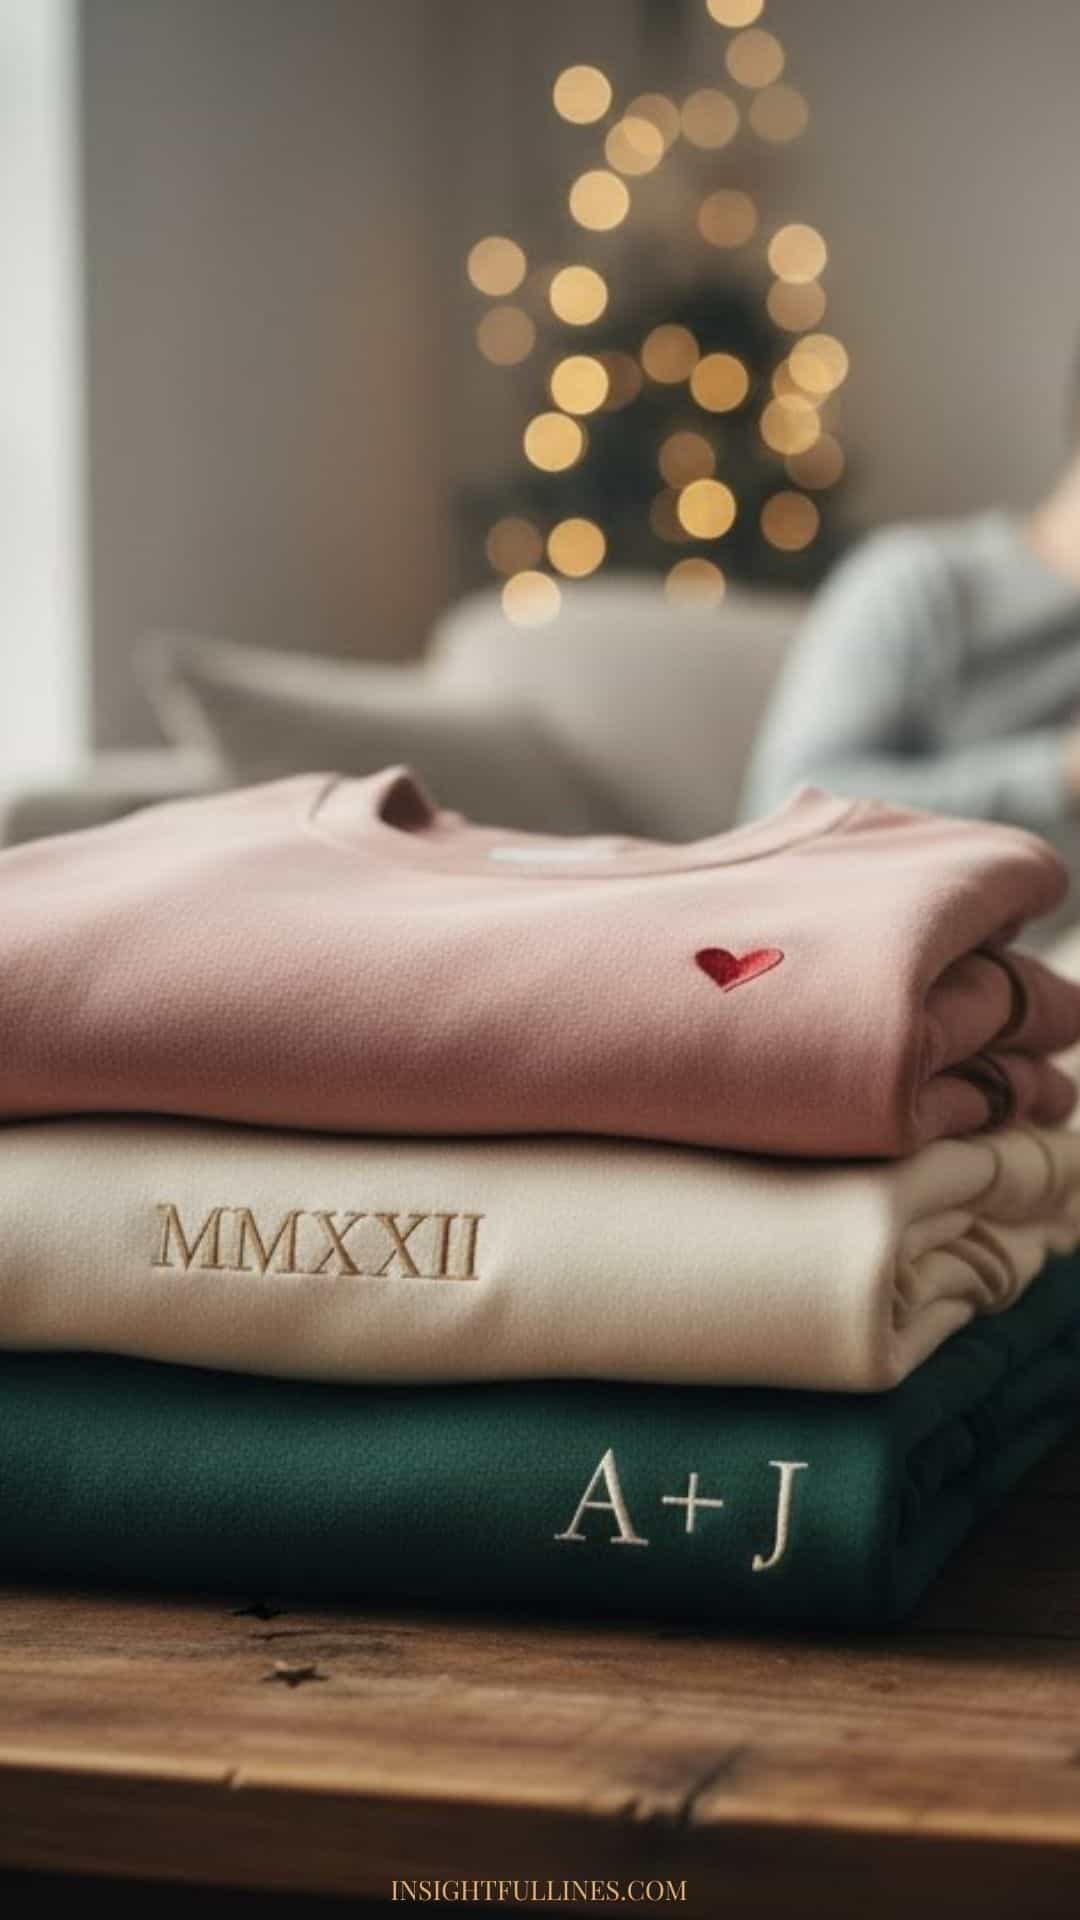
Custom apparel doesn’t have to be loud or flashy. This year, the “quiet luxury” of minimalist embroidery is taking over Valentine’s Day. From Roman numeral anniversary dates to tiny initials on the cuff, we’re showing you how to turn a basic sweatshirt into a boutique-quality personalized gift.
The Supply List
- High-Quality Blank Sweatshirt: Look for a heavy-weight cotton blend (oversized fits are trending).
- Embroidery Hoops: To keep the fabric taut while you work.
- Stabilizer: (Water-soluble or tear-away). This is the secret to preventing the fabric from “puckering.”
- Embroidery Thread (Floss): Stick to high-contrast colors (e.g., cream thread on a forest green shirt).
- Embroidery Machine OR Hand Needles: Depending on your preferred method.
- Marking Pen: A heat-erasable or water-soluble pen to trace your design.
The Step-by-Step Guide
1. Choose Your “Secret” Placement
The most popular spots for Valentine’s Day are:
- The Sleeve Cuff: Perfect for small initials or a tiny heart that “peeks” out.
- Above the Heart: For dates in Roman numerals (e.g., $MMXXII$ for 2022).
- Center Chest: For a tiny, minimalist 1-inch design.
2. Prep the Fabric
Sweatshirt material is stretchy, which can be a nightmare for embroidery.
- The Fix: Place a piece of stabilizer on the inside of the shirt before you hoop it. This holds the fibers still so your stitches stay crisp.
3. Trace the Design
If you are doing this by hand, use your erasable pen to write the initials or date.
- Pro Tip: For Roman numerals, use a ruler to ensure the tops and bottoms of the letters are perfectly aligned.
4. The Stitching Process
- For Hand Embroidery: Use a “backstitch” for a solid, clean line. It’s the easiest for beginners and looks like a continuous thread.
- For Machine Embroidery: Ensure your tension is set correctly for knit fabrics to avoid “nesting” (thread bunching up underneath).
5. Finish and Clean Up
Once finished, remove the hoop. If you used a heat-erasable pen, a quick hit with a hairdryer will make the ink disappear. If you used water-soluble stabilizer, rinse the area with lukewarm water.
Making it “Valentine’s Ready”
- The “Hidden Message”: Offer to embroider a small “I love you” or a heart on the inside of the collar or the bottom hem a secret just for the wearer.
- Thread Choice: Use a subtle tone-on-tone color (e.g., light pink thread on a dark pink sweatshirt) for an ultra-premium, sophisticated look.
- Photography: When selling these, style the sweatshirts with a pair of “boyfriend” jeans and a coffee cup. People buy the “vibe” as much as the shirt.
Pricing Strategy
Because these are personalized, you can charge significantly more than a standard graphic tee.
- Base Cost: $15–$20 (Quality blank).
- Your Time/Customization: $20–$30.
- Retail Price: $45–$60.
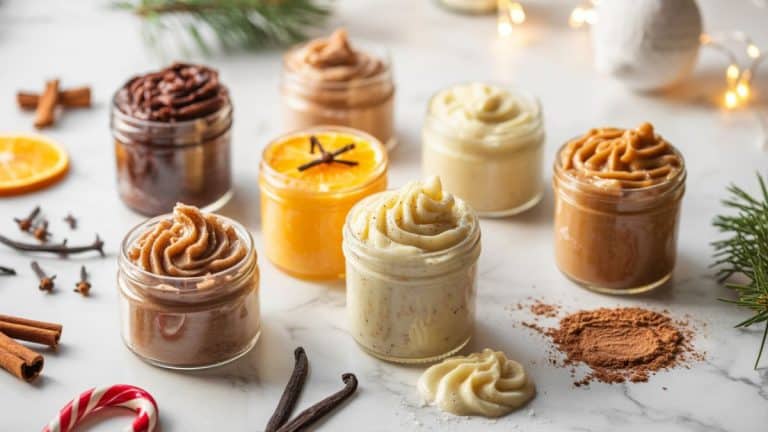
4. Luxury Bath Bombs & Salts
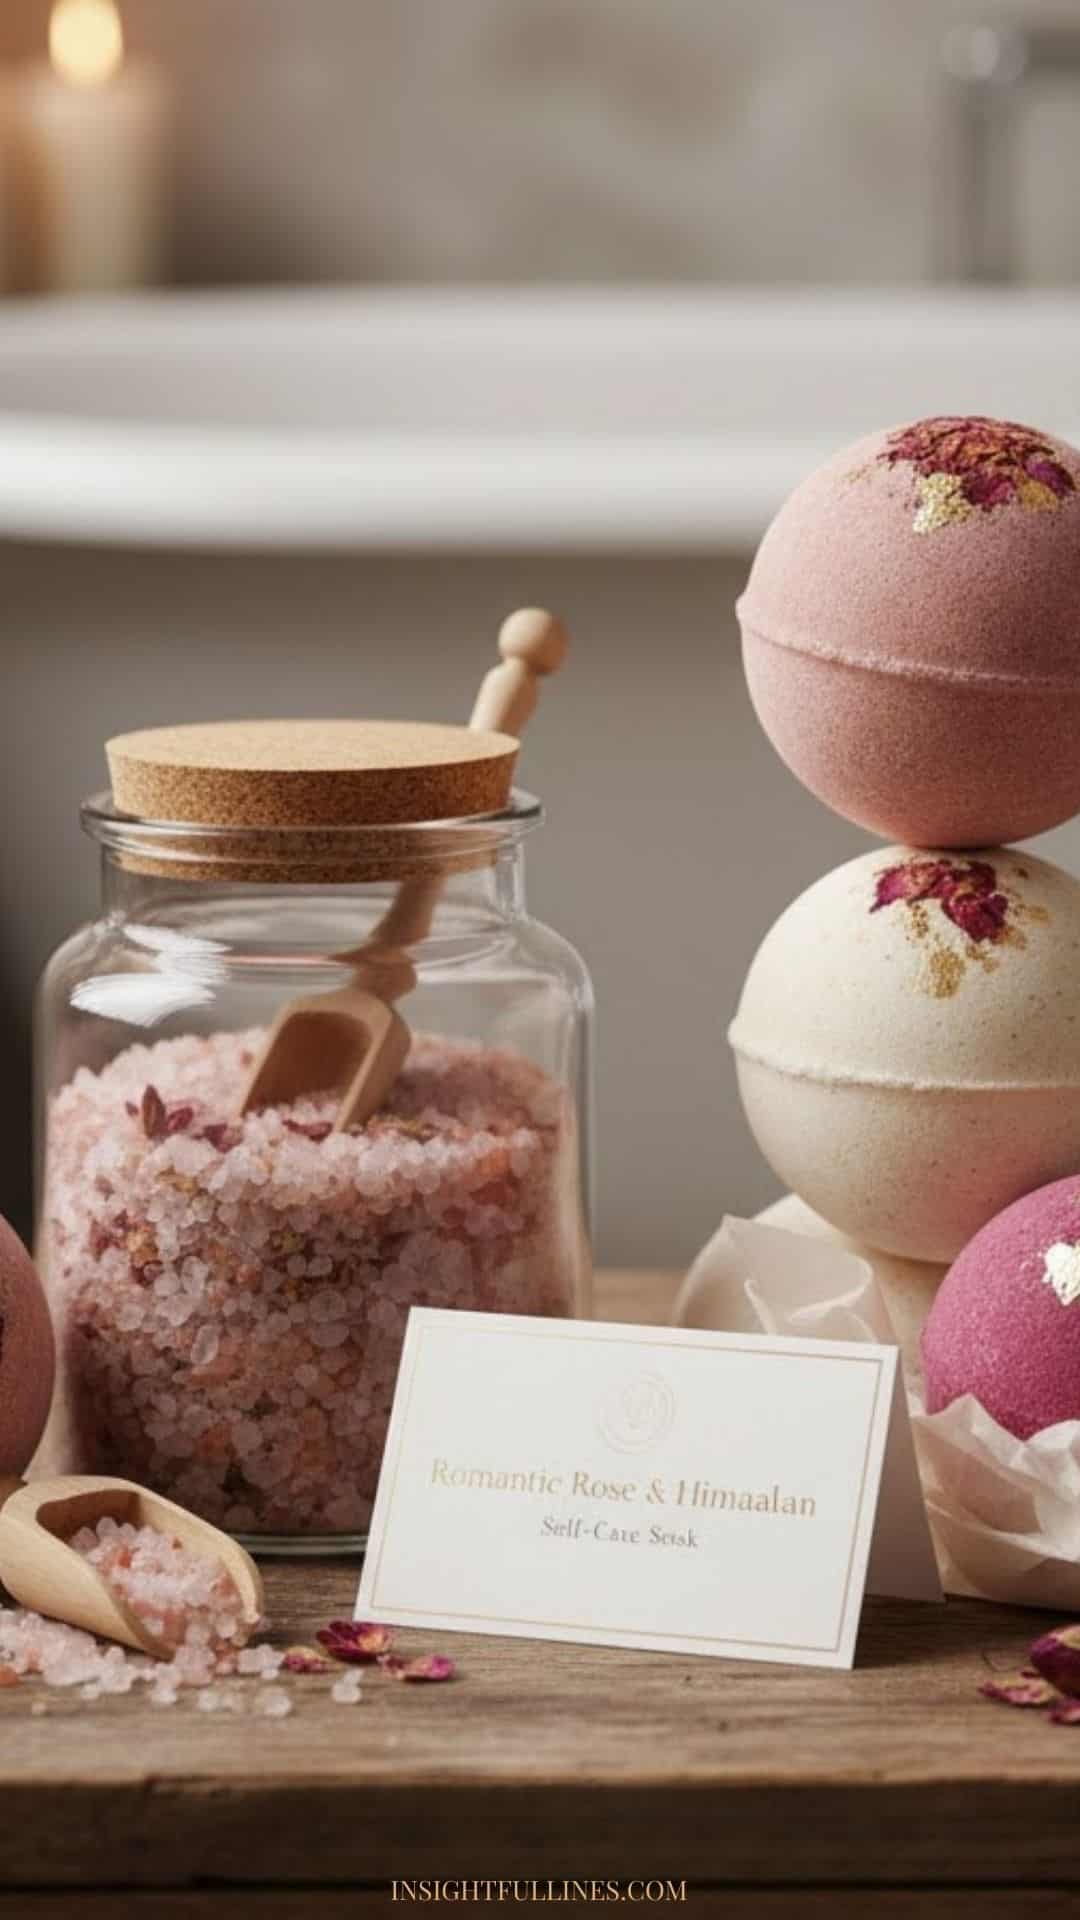
Valentine’s Day isn’t just for couples; “Galentine’s” and self-care gifts are a massive market. A high-end bath product shouldn’t just fizz it should leave the skin feeling silky and the bathroom smelling like a five-star retreat. Today, we’re making “Romantic Rose & Himalayan” bath sets that look stunning on a shelf and feel even better in the tub.
The Supply List
- The “Fizz” Base: 1 cup Baking Soda & 1/2 cup Citric Acid.
- The “Silk” Factor: 1/2 cup Cornstarch (or Kaolin Clay for a more premium feel).
- Skin Nourishment: 2-3 tbsp melted Coconut Oil or Cocoa Butter.
- Botanicals: Dried rose petals, lavender buds, or jasmine flowers.
- The Scent: 15–20 drops of high-quality essential oils (e.g., Rose Geranium, Sandalwood, or Ylang Ylang).
- Colorant: Pink Himalayan salt (for texture) or a pinch of beet root powder for a natural blush.
- Binder: A spray bottle of Witch Hazel (water causes premature fizzing!).
The Step-by-Step Guide
1. Mix Your Dry Ingredients
In a large bowl, whisk together the baking soda, citric acid, cornstarch, and Epsom salts. Ensure there are zero lumps whisking is key to a smooth finish that won’t crack.
2. Incorporate the “Luxury” Oils
In a small separate bowl, combine your melted cocoa butter and essential oils.
- The Technique: Slowly drizzle the oil into the dry mix while whisking constantly. You want the texture of damp sand it should hold its shape when you squeeze a handful, but crumble if you poke it.
3. The “Sandcastle” Test
If the mix is too crumbly, spritz it 2–3 times with Witch Hazel. Do not over-spritz, or you’ll hear the dreaded “hiss” of the reaction starting too early.
4. The Floral Layering
Place a few dried rose petals (affiliate) or a pinch of Himalayan salt into the bottom of your mold. Pack the bath bomb mixture on top, pressing firmly.
- Pro Tip: Overfill both halves of the mold slightly before pressing them together with a “twist and click” motion.
5. Let Them Set
Leave your bath bombs in a cool, dry place for at least 24 hours. If the air is humid, they may take longer to harden. Once dry, they should feel like solid stones.
Making it “Valentine’s Ready”
- The “Bath Tea” Variation: Don’t want to deal with molds? Mix the same dry ingredients (minus the citric acid) with extra salts and botanicals. Put them in a beautiful glass jar with a wooden scoop this is a “Bath Salt Soak” and is often even more popular than bombs.
- The Packaging: Wrap each bomb in biodegradable shrink wrap or silk tissue paper. Place them in a “Self-Love” gift box with a silk eye mask.
The Business Side: Labeling 101
If you are selling these, transparency is your best marketing tool.
- Ingredient List: Always list everything from most to least (e.g., Sodium Bicarbonate, Citric Acid, Cocoa Butter…).
- Safety First: Include a note: “Caution: Oils may make the tub slippery!”
- The “Botanical” Warning: Remind users to use a drain catcher if they are using heavy amounts of dried flowers (affiliate).
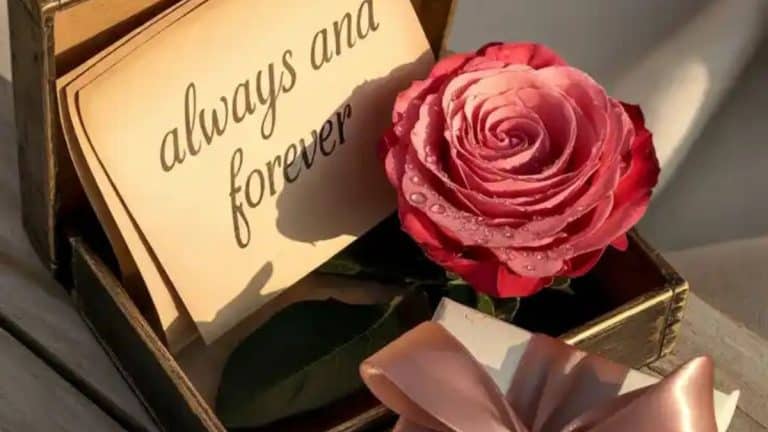
5. “Open When” Letter Bundles
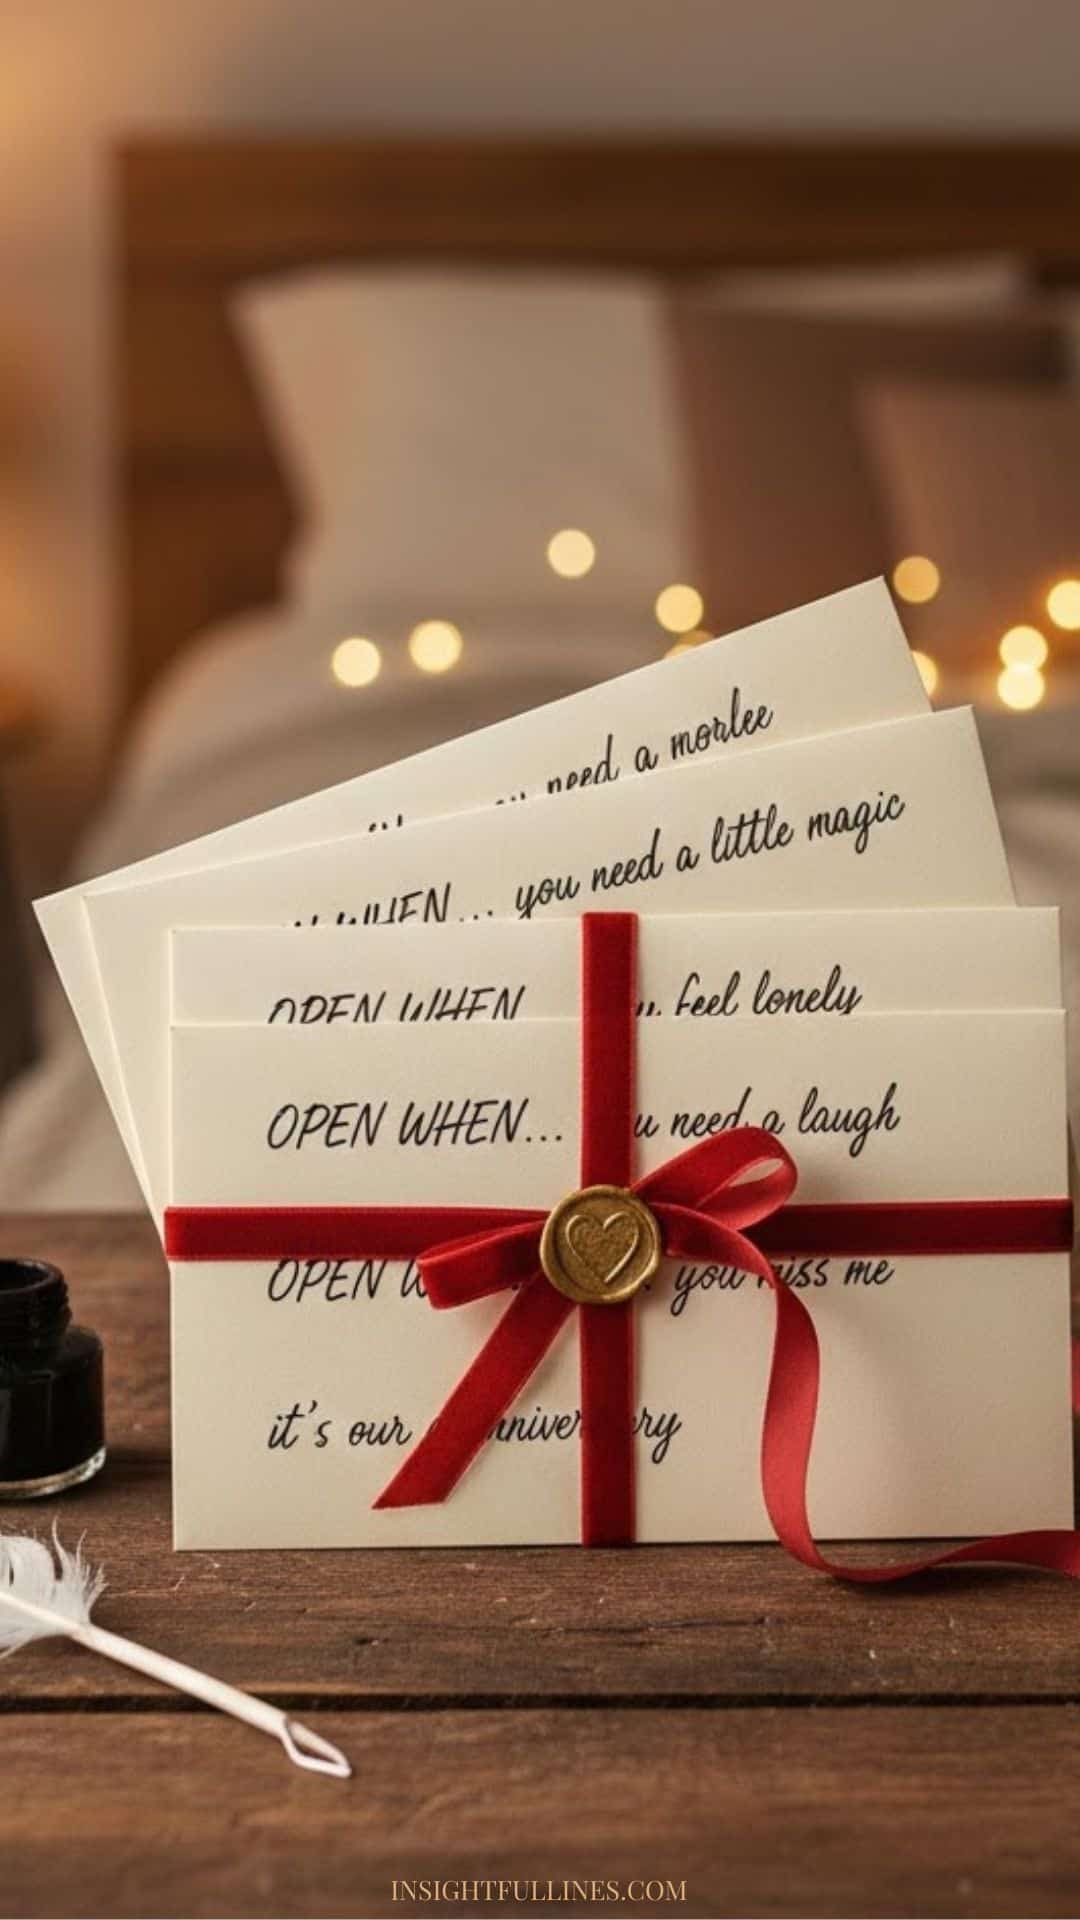
In a world of instant DMs and disappearing stories, a handwritten letter feels like a luxury. An “Open When” bundle is a series of letters intended to be opened at specific moments in the future giving the recipient a piece of encouragement or love exactly when they need it most. It’s the ultimate long-distance or “sentimental” Valentine’s gift.
The Supply List
- A Set of Premium Envelopes: (10–12 envelopes). Kraft paper, jewel tones, or soft pastels work beautifully.
- High-Quality Stationery or Cardstock: To write the letters on.
- Calligraphy Pens or Fine-liners: For the envelope titles.
- Wax Seal Kit: (Wax beads, a melting spoon, and a stamp heart or botanical shapes are best).
- Twine or Silk Ribbon: To bundle the set together.
- Optional Fillers: Small flat items like tea bags, pressed flowers, or printed photos.
The Step-by-Step Guide
1. Curate the “Moments”
The power of this gift is in the prompts. If you are selling these as a “DIY Kit,” provide the prompts for the customer. If you are selling a “Pre-Written” version, use heartfelt, universal messages.
- Common Prompts:
- Open when… you’ve had a long day.
- Open when… you need a laugh.
- Open when… we’ve had our first fight.
- Open when… you’re feeling lonely.
- Open when… it’s your birthday.
2. Master the Envelope Art
The envelope is the “packaging.” Use your best handwriting (or a stencil) to write the “Open When…” prompt on the front.
- Design Tip: Use a different ink color for the “Open When” and the “Prompt” to make the text pop.
3. Add “The Extras”
To make these feel like more than just paper, include a tiny physical “hug” in each one:
- For a “Bad Day”: Include a single luxury tea bag.
- For “Need a Laugh”: Include a printed “inside joke” or a silly photo.
- For “Missing Me”: Spritz the paper with a hint of perfume or cologne.
4. Seal with Wax
This is where the “Luxury” factor comes in. Melt 2–3 wax beads, pour them onto the envelope flap, and press your seal. It adds a tactile, old-world romance that people adore.
5. The Bundle
Stack the envelopes in chronological order (start with “Open Now”) and tie them together with a thick velvet ribbon or rustic twine.
Making it “Valentine’s Ready”
- The “Open Now” Letter: Always include a lead letter that explains the rules (e.g., “No peeking!” and “Only one per day”).
- Customization: If you’re a calligrapher, offer to hand-write the recipient’s name on the ribbon tag for that extra personal touch.
Selling Tip: Two Ways to Profit
- The Finished Product: You write and design the letters based on the customer’s specific memories (Premium price).
- The “Blank” Kit: You provide the beautifully hand-lettered envelopes and wax seals, but the customer writes the letters themselves. This is great for people who want to be sentimental but aren’t “crafty.”
6. Custom “Our Story” Map Art

Celebrating the geography of your love. “Every great love story has its own coordinates. From the street corner where you first met to the doorstep of your first home, these locations are the landmarks of your life together. Today, we’re learning how to turn simple maps into minimalist, framed masterpieces that tell your unique story at a single glance.”
The Supply List
- Graphic Design Software: (Canva, Adobe Illustrator, or even specialized map-generating sites).
- High-Quality Cardstock: A heavy-weight (200gsm+) matte paper looks most professional.
- A Multi-Opening Frame: A “triple-aperture” frame (one with three window cutouts) works best.
- Photo Editing Access: To pull clean map screenshots.
- Optional: A heart-shaped paper punch or a laser cutter for a 3D effect.
The Step-by-Step Guide
1. Curate the Locations
If you’re making this for a client, ask for three specific addresses or landmarks:
- “The Hello”: Where they first met.
- “The Yes”: Where they got engaged (or a favorite travel spot).
- “The I Do” or “The Home”: Their wedding venue or current residence.
2. Generate the Maps
Use a tool like Snazzy Maps (for Google Maps) or Mapbox to create clean, minimalist map styles.
- The Look: For a Valentine’s theme, try a “Light & Airy” style with soft greys and whites, or a “Night Sky” style with dark blues and gold accents.
- The Zoom: Ensure all three maps are at the same “zoom” level so they look cohesive when placed side-by-side.
3. Design the Layout
In your design software, create three circles or hearts. Place your maps inside these shapes.
- The Labels: Underneath each map, add the coordinates or a simple text line: “San Francisco, 2018” or “The Coffee Shop on 5th.”
- The Font: Use a clean sans-serif font for a modern look, or a delicate script for something more traditional.
4. The “Focal Point” Heart
To make it clear exactly where the “spot” is, place a small red heart icon directly over the specific street address on each map.
5. Print and Assemble
Print your design on high-quality matte paper. If you want a 3D “shadowbox” effect, you can print the maps separately, cut them out, and use foam adhesive dots to “pop” them off the background before framing.
Making it “Valentine’s Ready”
- The Metallic Touch: If you have a foil quill or a Cricut, you can foil the names and dates in rose gold or copper for a premium finish.
- Personalization: Offer to include the couple’s names at the bottom of the piece (e.g., “The Millers: A Journey of Love”).
Pro-Tip for Scalability
If you want to sell these without the hassle of shipping glass frames, offer a “Digital Download Only” option. You design the file, email it to the customer, and they print and frame it themselves. It’s 100% profit with zero shipping costs!
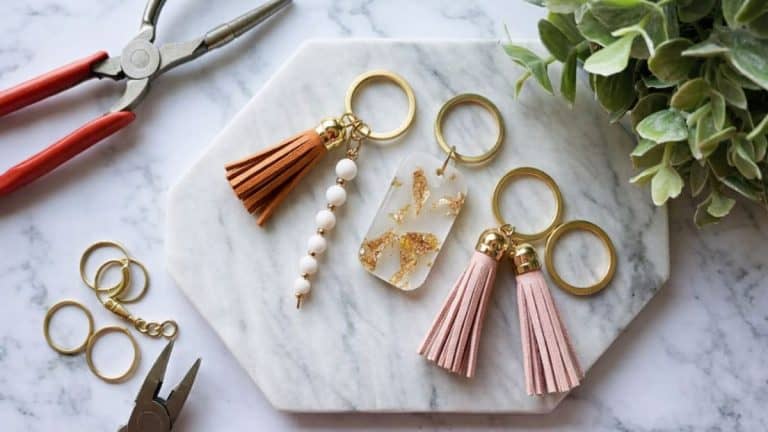
7. Polymer Clay Statement Earrings
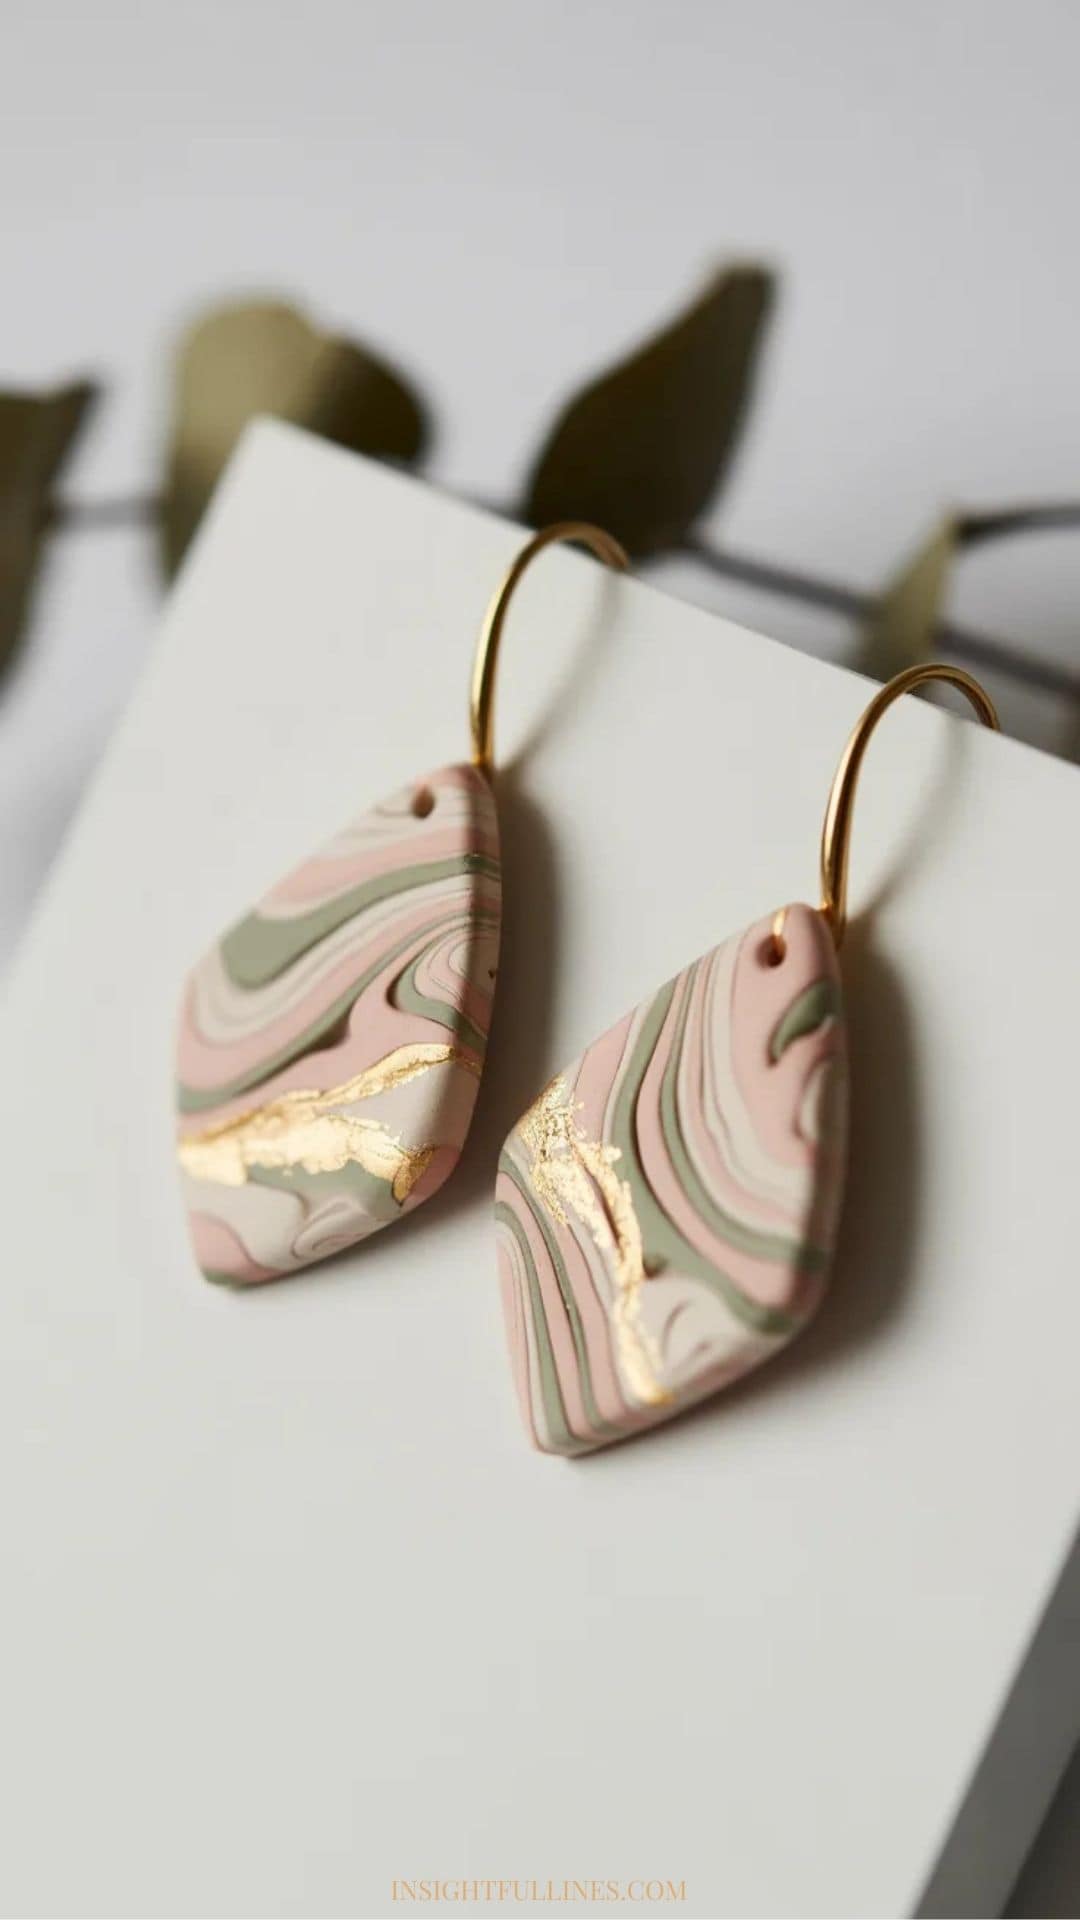
Polymer clay earrings have taken the craft world by storm, but the secret to standing out is in the details. This Valentine’s Day, we’re skipping the bright, “crafty” red hearts and opting for a sophisticated palette of terracotta, blush, and gold. These are statement pieces that look like they were plucked from a high-end gallery.
The Supply List
- Polymer Clay (affiliate): (Fimo or Sculpey Premo). Look for “Soufflé” for a beautiful matte finish.
- Acrylic Roller: To get an even thickness.
- Clay Cutters: Heart shapes, arches, and organic ovals.
- Texture Tools: A piece of lace, a sponge, or a specialized texture mat.
- Gold Leaf Sheets: For a touch of elegance.
- Earring Findings: Hypoallergenic (gold-plated or surgical steel) studs and jump rings.
- Hand Drill or Needle Tool: To make the holes.
- Sandpaper: 400 to 1000 grit for a silky edge.
The Step-by-Step Guide
1. Condition the Clay
Don’t skip this! Warm the clay in your hands and roll it out repeatedly until it’s supple and doesn’t crack when folded. This ensures your earrings won’t be brittle after baking.
2. Create the “Marble” or “Gold Leaf” Effect
- For Marbling: Roll two thin snakes of different colors (e.g., White and Blush), twist them together, fold, and roll out again. Stop before the colors blend completely.
- For Gold Leaf: Lay a small piece of gold leaf on your rolled-out clay slab and roll over it gently with your acrylic roller to “press” it in.
3. Cut Your Shapes
Press your cutters firmly into the clay. For a professional look, try “Negative Space” designs cut a small heart out of the center of a larger arch.
Pro Tip: Place a piece of plastic wrap over the clay before cutting. This gives the earrings a beautiful, “pillowed” rounded edge.
4. The “Pre-Bake” Holes
Use your needle tool or a small hand drill to poke holes where the pieces will connect. Make sure the hole isn’t too close to the edge, or it might snap later.
5. Bake Like a Pro
Follow the package instructions exactly (usually 130°C / 275°F).
- The Secret: Bake them on a piece of cardstock or a ceramic tile to prevent “shiny spots” on the back of your clay.
6. Sanding and Assembly
Once cooled, sand the edges under a little bit of running water to remove any fingerprints or rough cuts. Use pliers to open your jump rings, attach your pieces, and add your earring hooks.
Making it “Valentine’s Ready”
- The Palette: Stick to “Dusty Rose,” “Deep Wine,” and “Champagne.” It feels romantic without being cliché.
- The Packaging: Use a custom earring card with a quote like “Handmade with Love” or a simple, minimalist logo.
- The Bundle: Offer a “Galentine’s 3-Pack” so friends can buy matching (but slightly different) pairs for their group.
Why Clay is a “Maker’s Dream”
The material cost for one pair of earrings is often less than $1.00, but a well-designed, sanded, and professionally assembled pair can retail for $25–$40. It’s one of the highest profit-margin crafts you can start!
If you’re looking for even more ideas like this, you’ll love this article air-dry clay projects starting simple and end stunning.
8. Custom Pet Portraits
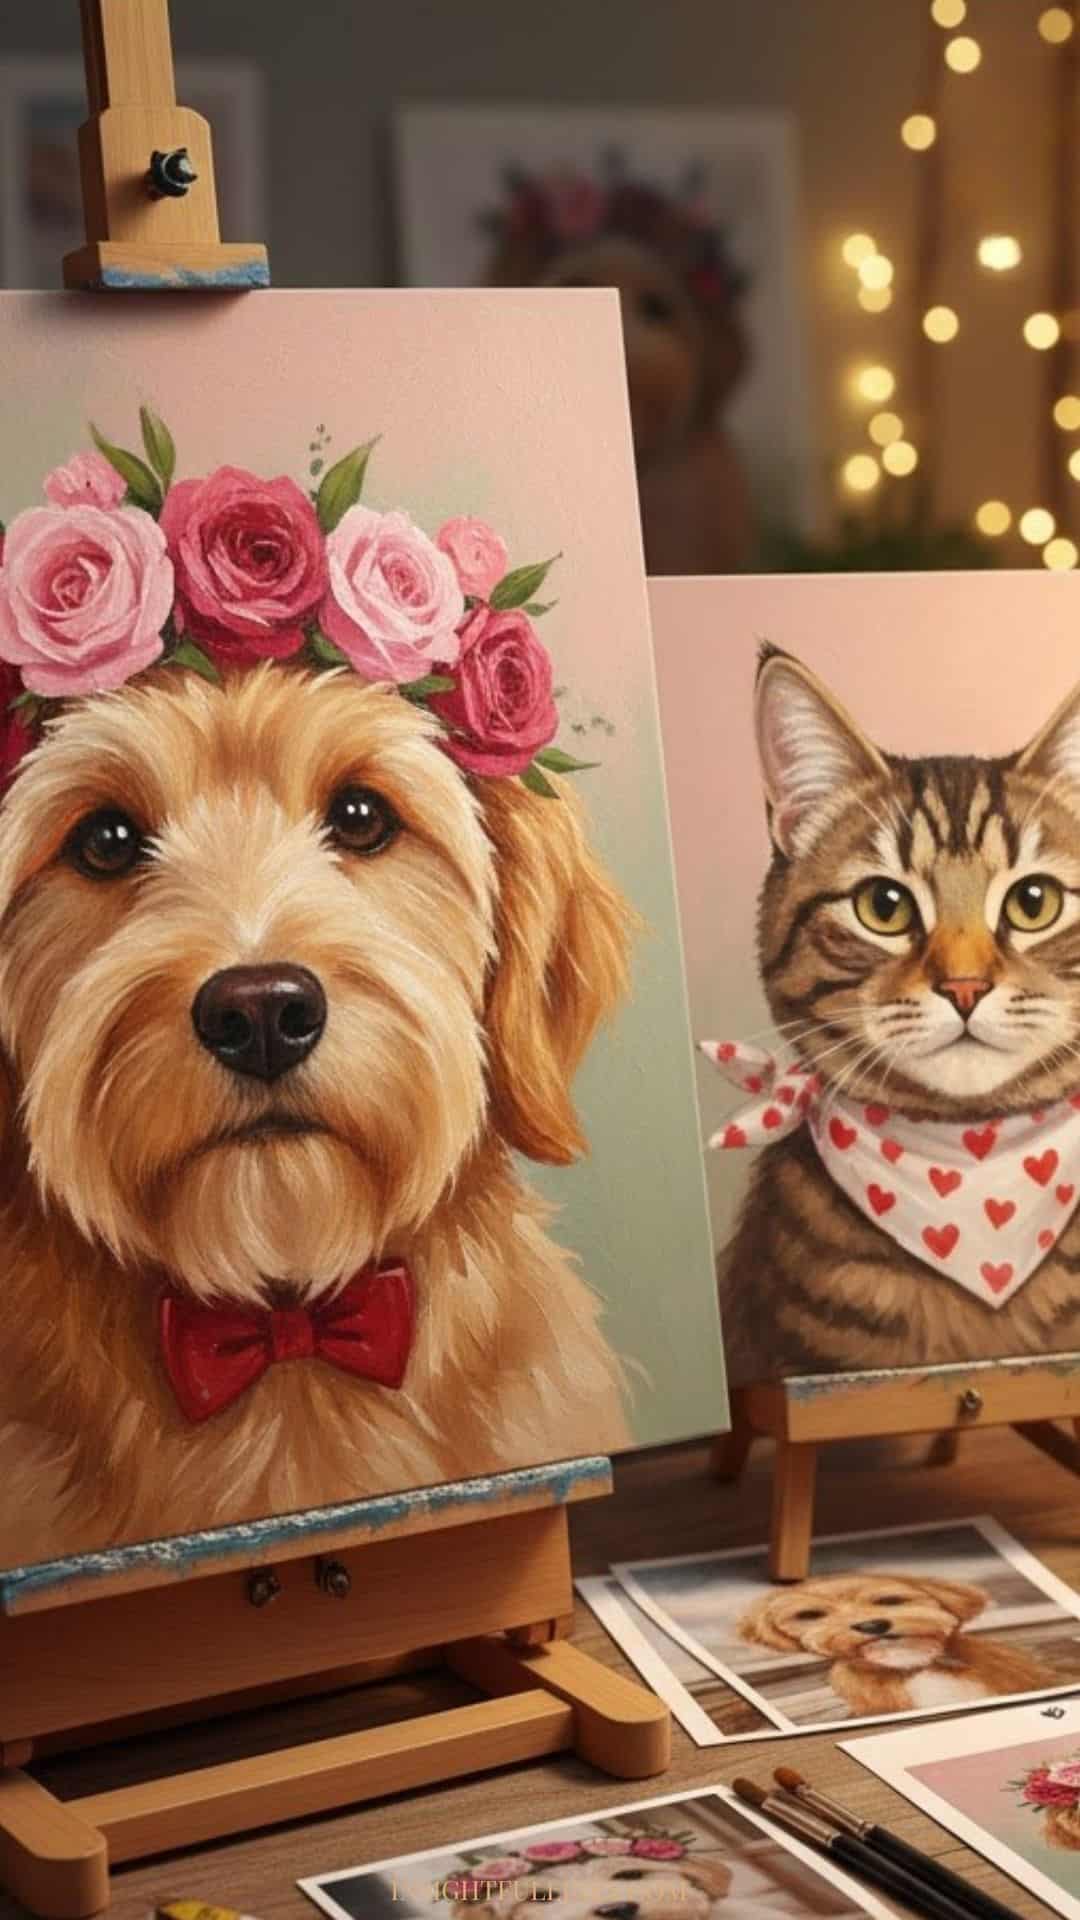
They don’t talk back, they’re always happy to see you, and they never steal the covers it’s no wonder pets are often the real stars of Valentine’s Day. A custom pet portrait is a thoughtful, high-value gift that celebrates the bond between a human and their “fur-baby.” You don’t have to be a digital artist or a traditional painter, this guide will help you turn a pet photo into a work of art.
The Supply List
- For Digital Artists: A tablet (like an iPad) and a stylus, plus software like Procreate or Photoshop.
- For Traditional Artists: High-grade watercolor paper or canvas, and your medium of choice.
- Photo Reference: Clear, high-resolution photos from your customer (natural lighting is best!).
- Editing Software: Tools like Remove.bg or Canva to clean up backgrounds.
- Packaging: Rigid mailers or protective tubes to ensure the art arrives unbent.
The Step-by-Step Guide
1. The “Valentine” Stylization
For this series, add a romantic twist.
- The Flower Crown: Add a digital or painted crown of roses or peonies around the pet’s head.
- The Bowtie/Bandana: Illustrate a little red bowtie or a heart-patterned bandana.
- The Color Palette: Use soft, “blushing” backgrounds like sage green, dusty pink, or cream to make the pet pop.
2. Mastering the Eyes
The secret to a portrait that feels “alive” is in the eyes.
- The Highlight: Always add a tiny white “catchlight” (a small dot of white paint or digital ink) in the upper corner of the eyes. This gives the portrait a soulful, realistic look.
3. Simplify the Background
A busy background distracts from the pet.
- The Technique: Remove the living room or backyard from the photo. Place the pet against a solid, textured color or inside a simple floral wreath. This makes the portrait look like a deliberate piece of home decor rather than just a printed photo.
4. The Digital-to-Physical Workflow
If you work digitally, you have two ways to sell:
- Digital File Only: You email a high-res JPG. (Zero shipping, instant delivery!)
- Fine Art Print: You use a professional printing service to print on “Giclée” or “Cold Press” paper for a museum-quality feel.
Making it “Valentine’s Ready”
- The Caption: Add the pet’s name at the bottom in a beautiful, hand-lettered script with a small heart.
- The “Twin” Portrait: Offer a discounted price for couples who have two pets that need to be featured in one frame.
- The Tagline: Market these with slogans like “For the one who actually holds your heart” or “A Valentine that never sheds (on the art, at least).”
Pro-Tip for Fast Turnarounds
If you aren’t an illustrator, you can use “digital painting” filters in apps like Adobe Fresco or BeFunky, then manually go in and touch up the fur and eyes to give it a “hand-painted” soul. This allows you to produce high volumes during the busy Valentine’s rush!
9. DIY Date Night Jar for Valentine’s Day
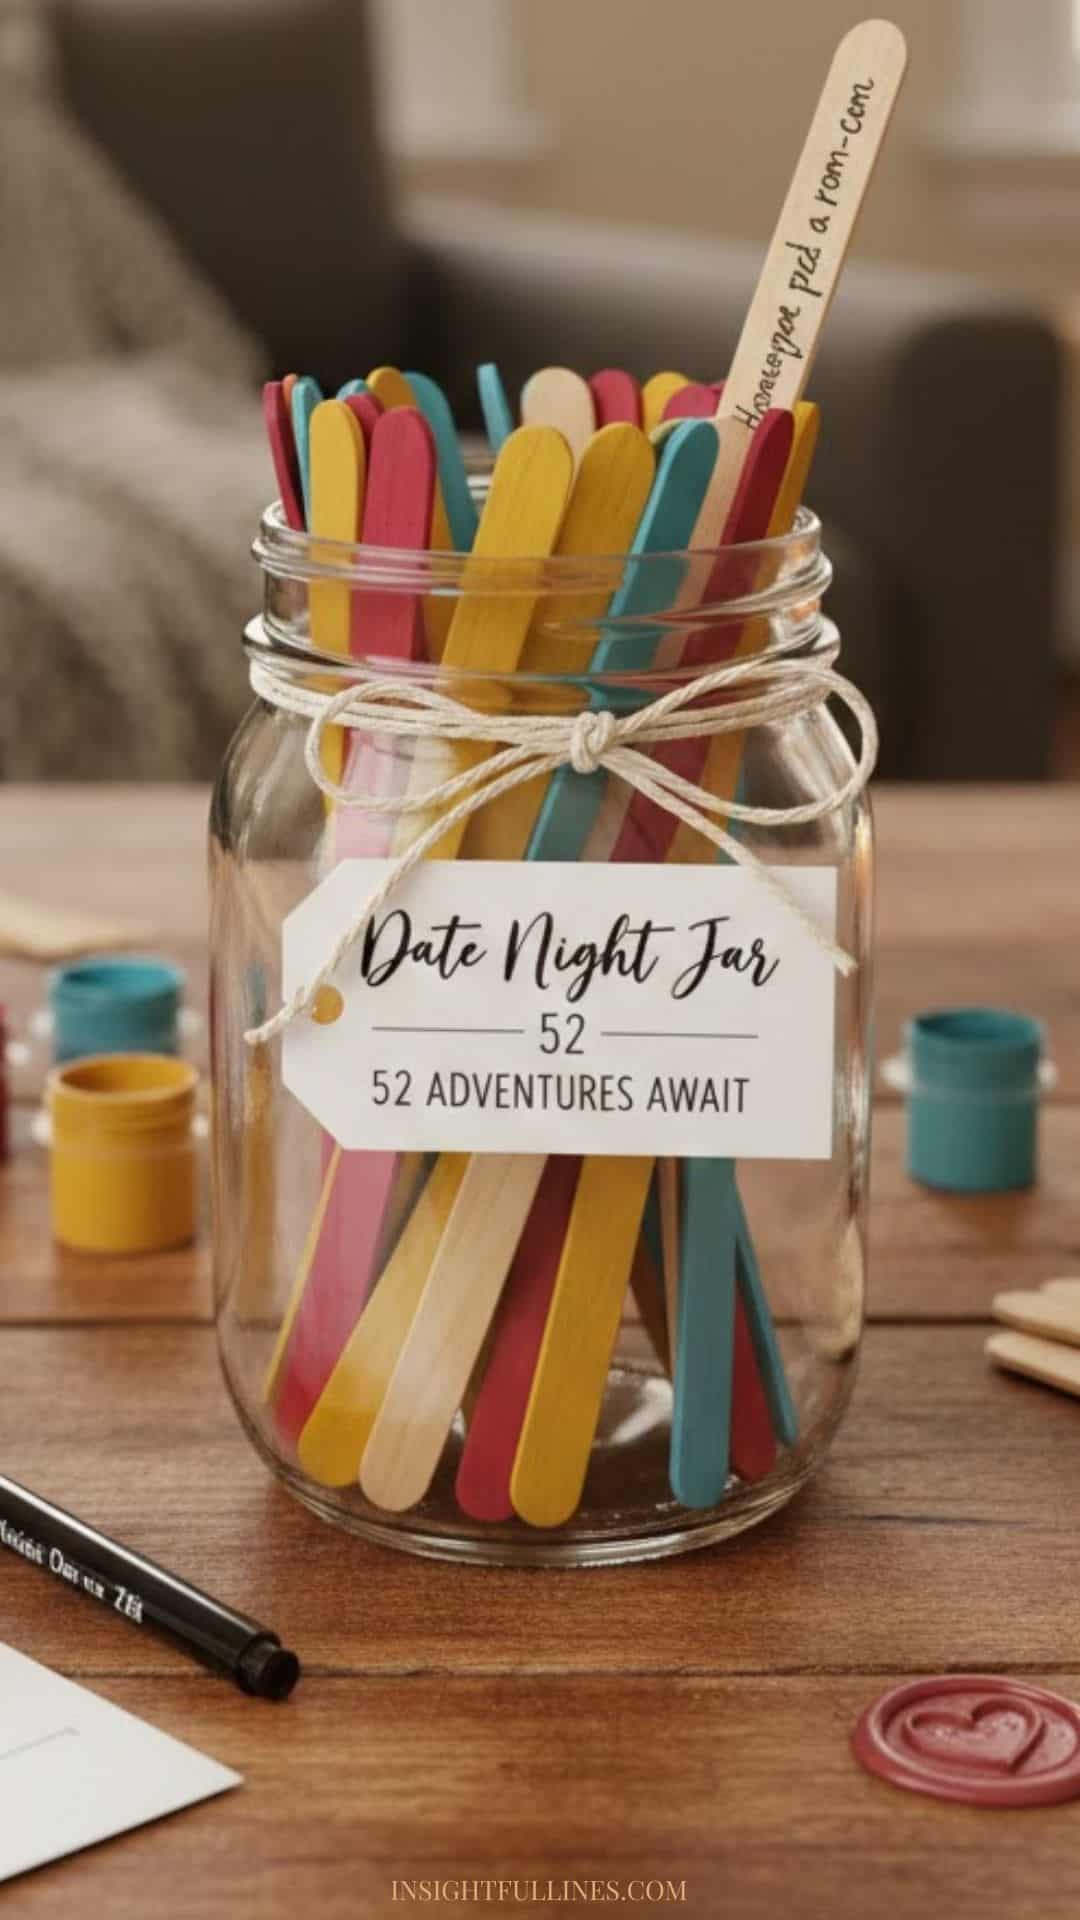
Stop the “I don’t know, what do you want to do?” cycle.
“We’ve all been there: the sun is setting, and the dreaded question hangs in the air: ‘What should we do tonight?’ This Valentine’s Day, give the gift of decisiveness. The DIY Date Night Jar is a year’s worth of intentional moments packed into one beautiful vessel, ensuring that ‘quality time’ is never sidelined by ‘decision fatigue’ again.”
What You’ll Need
- A Glass Mason Jar (clean and dry)
- Large Wooden Craft Sticks (approx. 50)
- Acrylic Paint or Colored Markers
- Fine-tip Permanent Marker
- Decorative Ribbon or Twine
- Cardstock for the Label
The Step-by-Step Guide
1. Color-Code Your Categories
Consistency is key. Decide on 3-4 categories so the couple can choose based on their budget or energy level. For example:
- Red: Expensive/Fancy Outings
- Yellow: Low-cost/Local Adventures
- Blue: At-home Dates (Netflix, Board games)
2. Prep the Sticks
Paint the ends of your wooden sticks according to your categories. Let them dry completely before writing on them to avoid the ink bleeding into the wood.
3. Brainstorm and Write
Write one idea on each stick.
- Red Tip: “Dinner at that steakhouse we saw on TikTok.”
- Blue Tip: “Homemade pizza night and a 90s rom-com.”
4. Decorate the Vessel
Tie your ribbon around the neck of the jar. Create a small tag that explains the “rules” of the jar (e.g., “No vetos allowed once a stick is pulled!”).
Pro-Tips for Selling These
If you are making these to sell, don’t just sell the jar. Sell the experience.
- The Upsell: Include a “Golden Ticket” stick that is a blank space for the recipient to write their “Ultimate Wish” date.
- Packaging: Wrap the jar in honeycomb paper or tissue paper to ensure it arrives safely and looks like a curated gift.
10. Concrete Succulent Planters
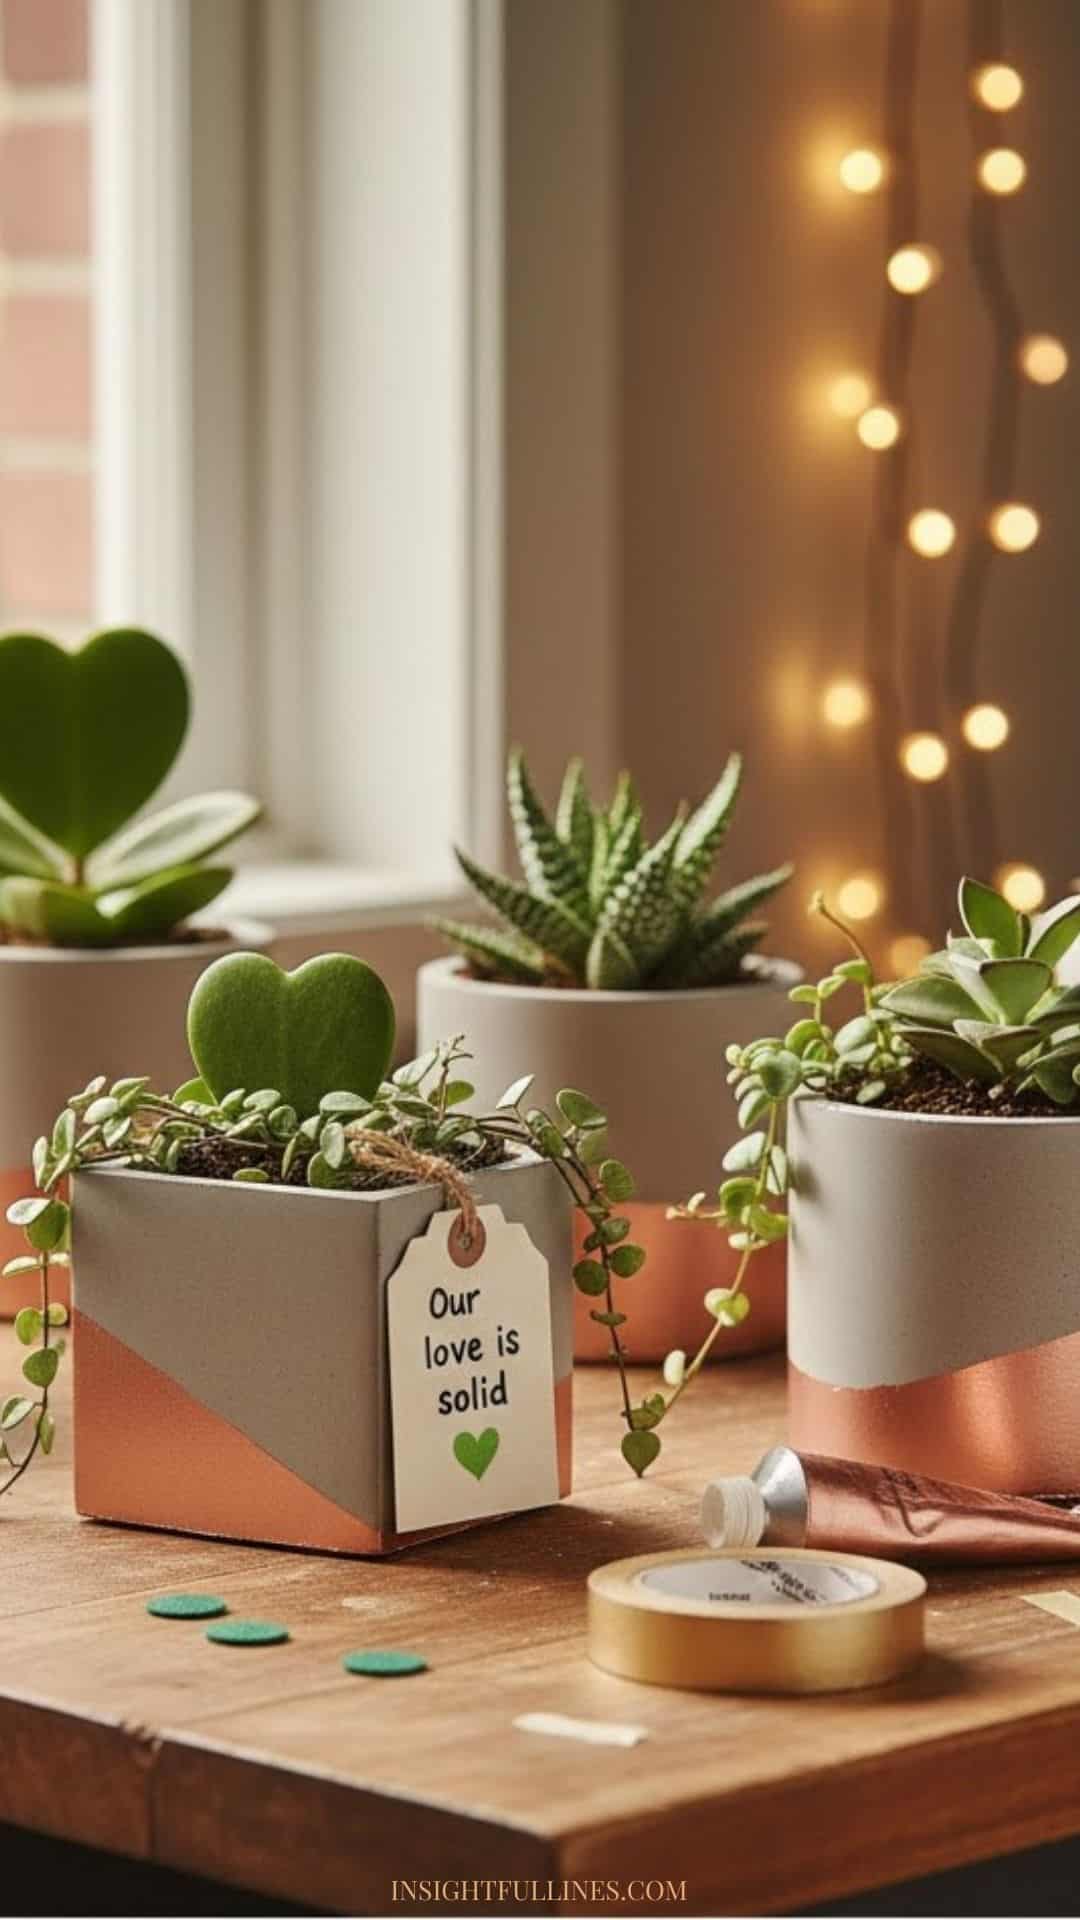
A love that is built to last. “Flowers are classic, but they fade in a week. For a love that is solid and ever-growing, look to the modern combination of hand-cast concrete and resilient greenery. These industrial-chic planters are the perfect desktop reminder that the best things in life take time to cure and space to grow.”
Valentine’s Day Crafts: More Than Just Gifts
At the end of the day, Valentine’s Day isn’t about the price tag or the grand gesture it’s about the intention. You’ve spent the last ten days mastering the pour of a wood-wick candle or carefully stitching initials into a sweatshirt, you’ve done something remarkable: you’ve turned a quiet thought of love into a physical reality.
For the makers selling these items, remember that your customers aren’t just buying “stuff.” They are buying a way to say the things they can’t always find the words for. They are buying your late nights, your attention to detail, and your artistic soul.
And for the DIYers making these for their own favorite people, know that every “imperfection” in your handmade gift is actually a fingerprint of your love. Those are the details that will be cherished long after the chocolate is gone and the roses have wilted.
Happy making, and happy Valentine’s Day!