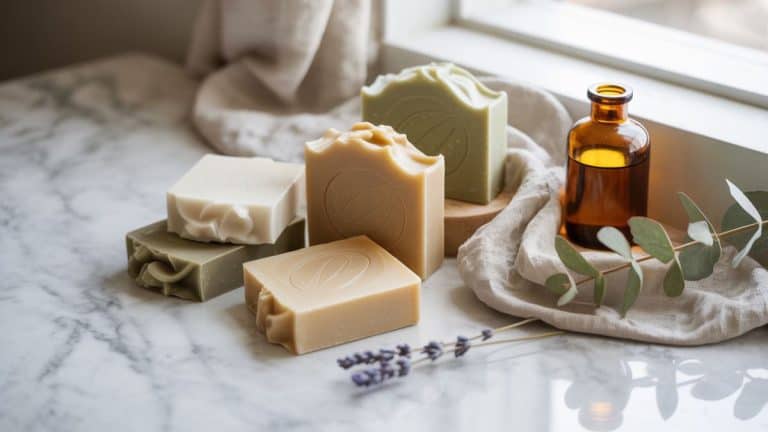
15 Easy Melt and Pour Soap Recipes for Beginners: No Lye Required
Crafting for yourself, gifting, or dreaming of a small handmade business, melt and pour soap is a beautiful place to start. Simple tools, quick results, and endless creative freedom that’s a win in our book.
This website contains affiliate links. As an Amazon Associate, I earn from qualifying purchases. Please read our disclaimer.
Project Overview: Easy Melt and Pour Soap Recipes
Melt and pour soap recipes create clean, sculptural bars that feel modern and intentional rather than overly “crafty.” With smooth finishes, soft colors, and subtle textures, these soaps look just as good styled on a bathroom tray as they do wrapped up for gifting.
They’re customizable, quick to make, and ideal for batching which makes them especially appealing for beginners and sellers alike.
Materials & Tools
Materials
- Melt and pour soap base (affiliate) (clear, white, goat milk, or shea butter (affiliate))
- Soap-safe fragrance oils or essential oils
- Liquid soap colorants or mica powders
- Optional add-ins (oatmeal, dried botanicals, coffee grounds)
- Rubbing alcohol (in a spray bottle, for bubbles)
Tools
- Microwave-safe measuring cup or double boiler (affiliate)
- Silicone soap molds (affiliate)
- Spoon or silicone spatula
- Small bowls for mixing color
- Knife or soap cutter (for trimming)
Step-by-Step Tutorial: Melt and Pour Soap Basics
Step 1: Prepare Your Workspace
Before you melt anything, take a moment to set yourself up for success.
Clear your counter and lay out:
- Soap base
- Mold
- Colorants and fragrance
- Stirring utensil
- Rubbing alcohol spray
Why this matters: Melt and pour soap cools quickly. Having everything within reach keeps the process calm and enjoyable rather than rushed.
Beginner reassurance: This is not a messy craft. A tidy setup makes it feel surprisingly relaxing.
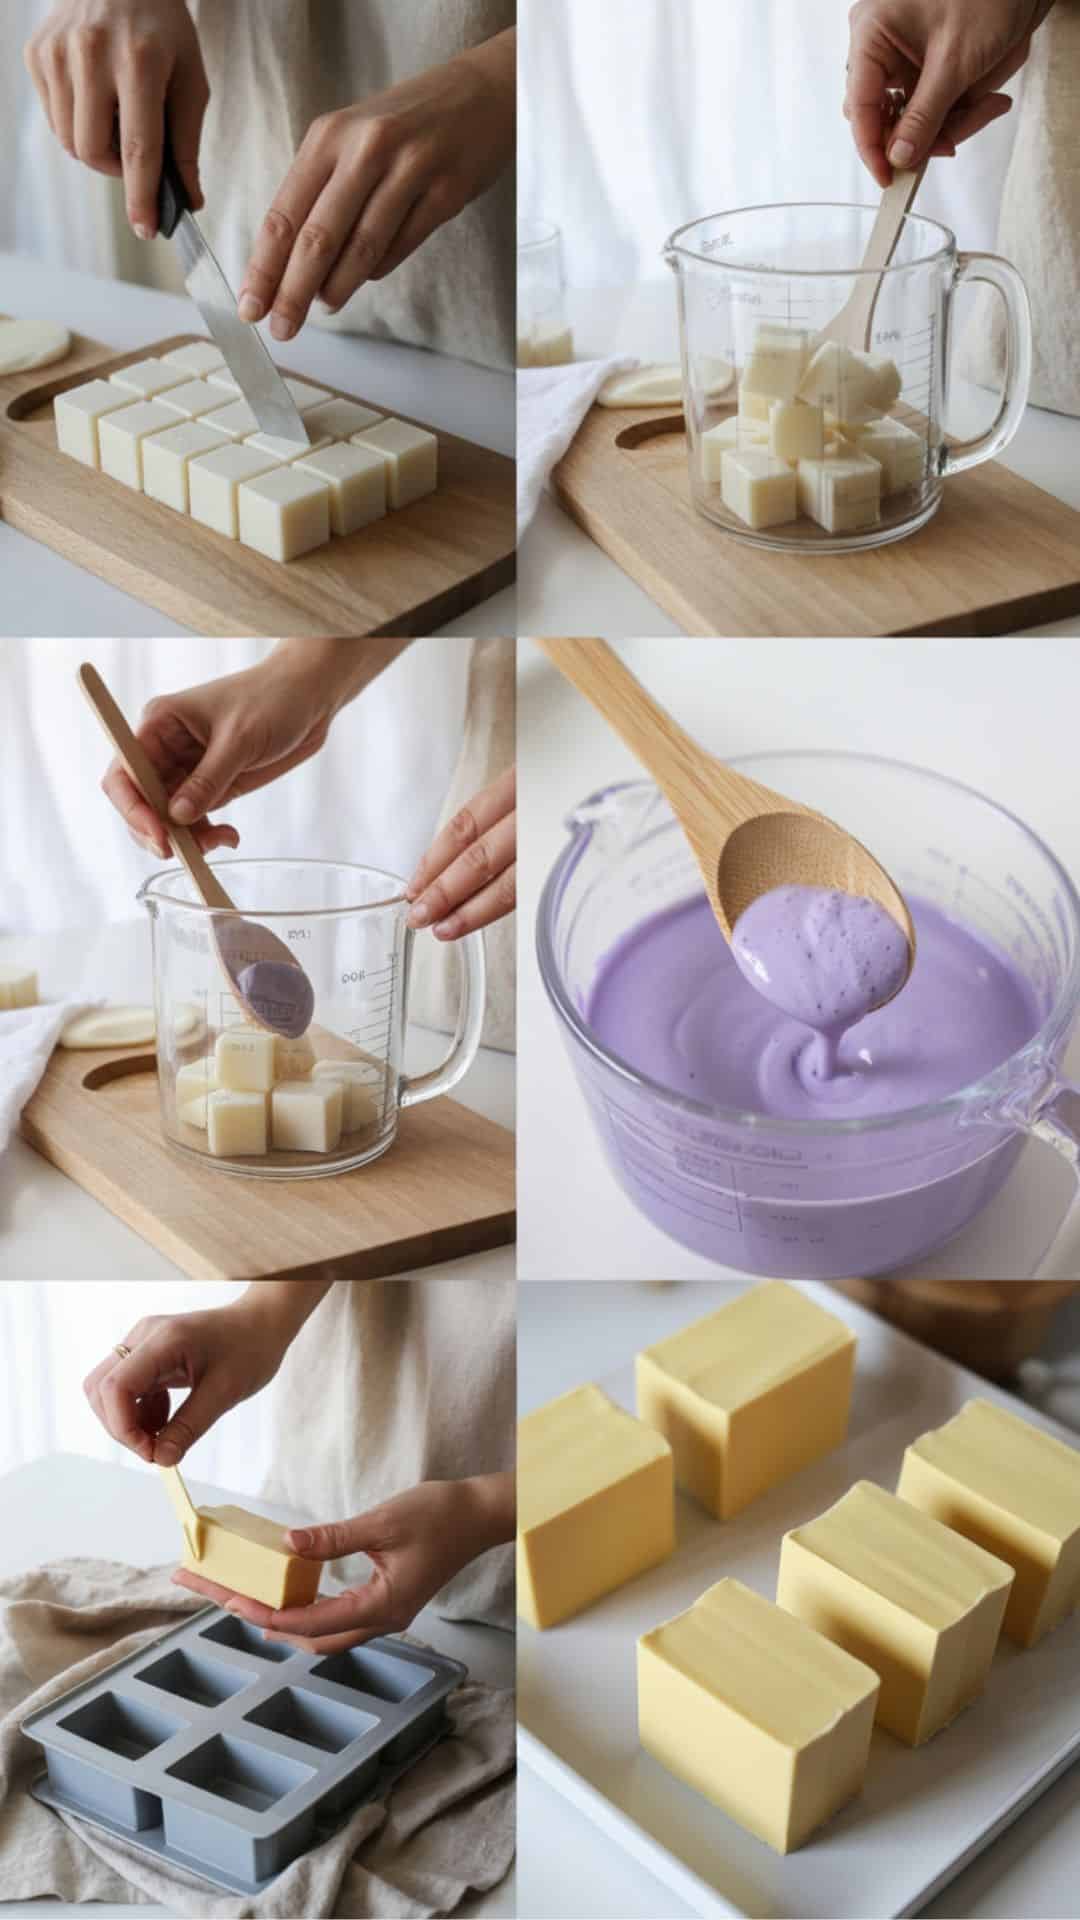
Step 2: Cut the Soap Base into Small Cubes
Cut your melt and pour soap base into evenly sized cubes, roughly 1-inch pieces.
Smaller pieces:
- Melt more evenly
- Reduce scorching
- Give you better texture and clarity
Technique note: A basic kitchen knife works perfectly no special tools needed.
Optional variation: If you’re batching, pre-cut multiple pounds of base and store them in an airtight container.
Step 3: Melt the Soap Gently
Place the soap cubes into a microwave-safe measuring cup or heatproof bowl.
Microwave in 30-second intervals, stirring between each round.
What you’re aiming for:
Fully melted, smooth liquid not boiling.
Important tip:
Overheating can cause:
- Cloudy soap
- Excessive sweating later
- A rubbery texture
If you see steam, stop heating and stir.
Step 4: Add Fragrance Slowly
Once melted, let the soap cool for about 30–60 seconds, then add fragrance oil or essential oil.
Stir gently but thoroughly.
Technique note:
- Typical usage: 0.5–1 oz fragrance per pound of soap base
- Always check fragrance usage guidelines
Beginner tip: Start with less scent than you think you need. Lightly scented soaps sell better and feel more refined.
Step 5: Add Color (Optional but Fun)
Add liquid colorant or a pinch of mica powder.
Stir slowly to avoid bubbles.
Less is more:
Soft, muted colors photograph better and feel more modern.
Optional variations:
- Divide soap into bowls for multi-color designs
- Leave uncolored for a clean, minimalist bar
- Swirl two tones gently for a marbled look
Step 6: Pour into Molds
Carefully pour the soap into your mold from a low height to reduce bubbles.
Once poured:
- Lightly spray the surface with rubbing alcohol
- This removes bubbles and creates a smooth top
Beginner reassurance:
Uneven tops happen and they’re still beautiful. Slight imperfections read as handmade, not flawed.
Step 7: Let the Soap Cool Completely
Allow the soap to sit undisturbed at room temperature.
Typical cooling time:
- 1–2 hours for standard molds
- Larger or deeper molds may take longer
Avoid:
- Refrigerating (can cause condensation)
- Moving molds too early
Step 8: Unmold with Care
Once fully firm and cool, gently peel the mold away from the soap.
If the soap resists:
- Let it sit another 15–20 minutes
- Try gently flexing the mold edges
Pro tip: Silicone molds release best when you pull the mold away from the soap not the soap out of the mold.
Step 9: Trim and Inspect (Optional)
If needed, trim rough edges with a knife or soap planer.
This step:
- Elevates the final look
- Makes soaps feel more polished and professional
Beginner reassurance: Trimming is optional. Many makers skip it entirely.
Step 10: Rest Before Packaging
Let soaps rest unwrapped for 12–24 hours before packaging.
This helps:
- Reduce sweating
- Firm up the surface
- Improve overall finish
After resting, wrap tightly in plastic wrap or store in airtight containers until gifting or selling.
Finished Piece Styling
Style finished soaps stacked on a marble tray, wrapped in parchment with twine, or paired with a small wooden soap dish. These bars feel gift-ready with minimal effort and photograph beautifully for markets and online shops.
Pro Tip
Let soaps cure uncovered for 24 hours before packaging to reduce sweating especially in humid climates.
Melt and pour soap is meant to feel easy and enjoyable. If your first batch isn’t perfect, you’re doing it right. Every bar teaches you something and even the “mistakes” are still usable soap.
Easy Melt and Pour Soap Recipes for Beginners
1. Lavender Calm Melt and Pour Soap
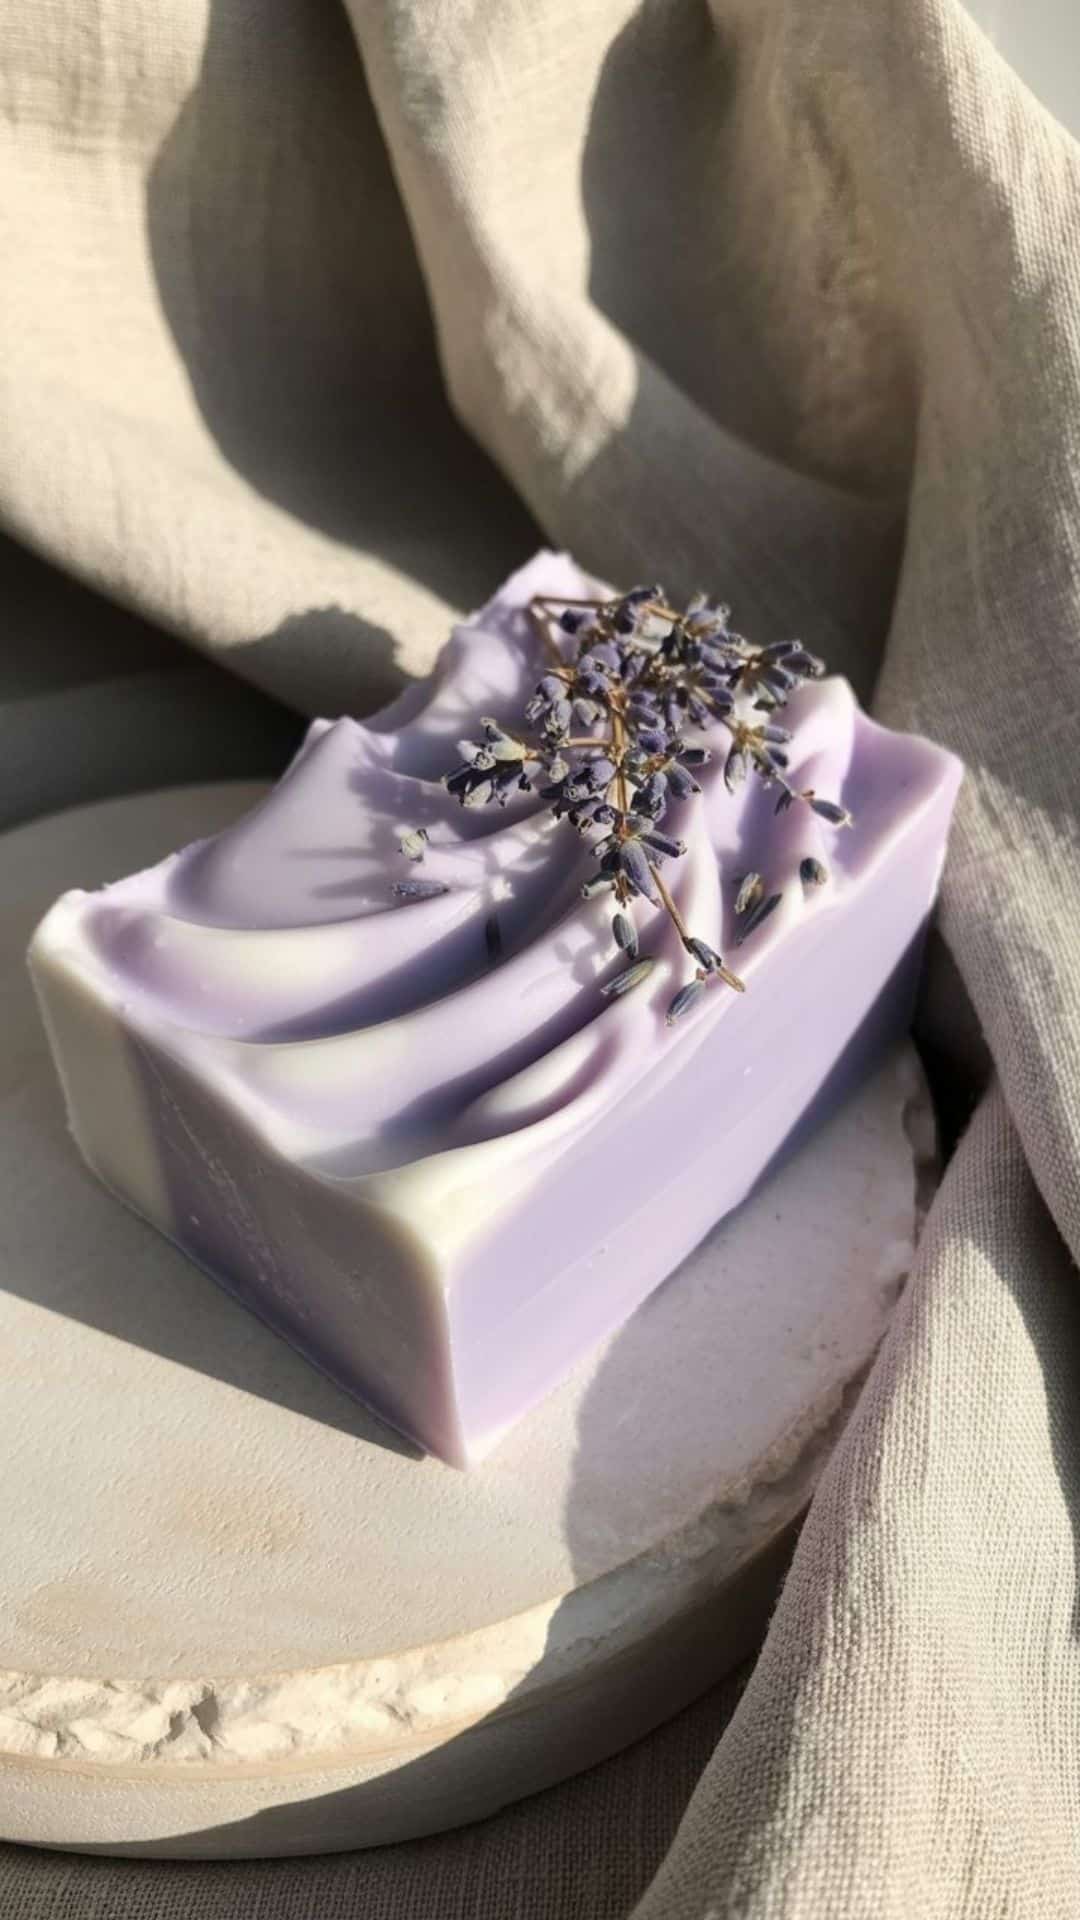
Why You’ll Love It! This soap is soothing, timeless, and universally loved. Lavender is one of the safest, most giftable scents perfect for beginners and sellers alike.
Ingredients
- White melt and pour soap base (1 lb / 450 g)
- Lavender fragrance or essential oil (0.5–1 oz)
- Optional: purple mica or liquid soap colorant
Simple Method: Melt the soap base gently, stir in lavender fragrance, add a very light tint, and pour into molds. Spray with alcohol to remove bubbles.
Styling Tip: Pair with linen, eucalyptus stems, or a wooden soap dish for a spa-like look.
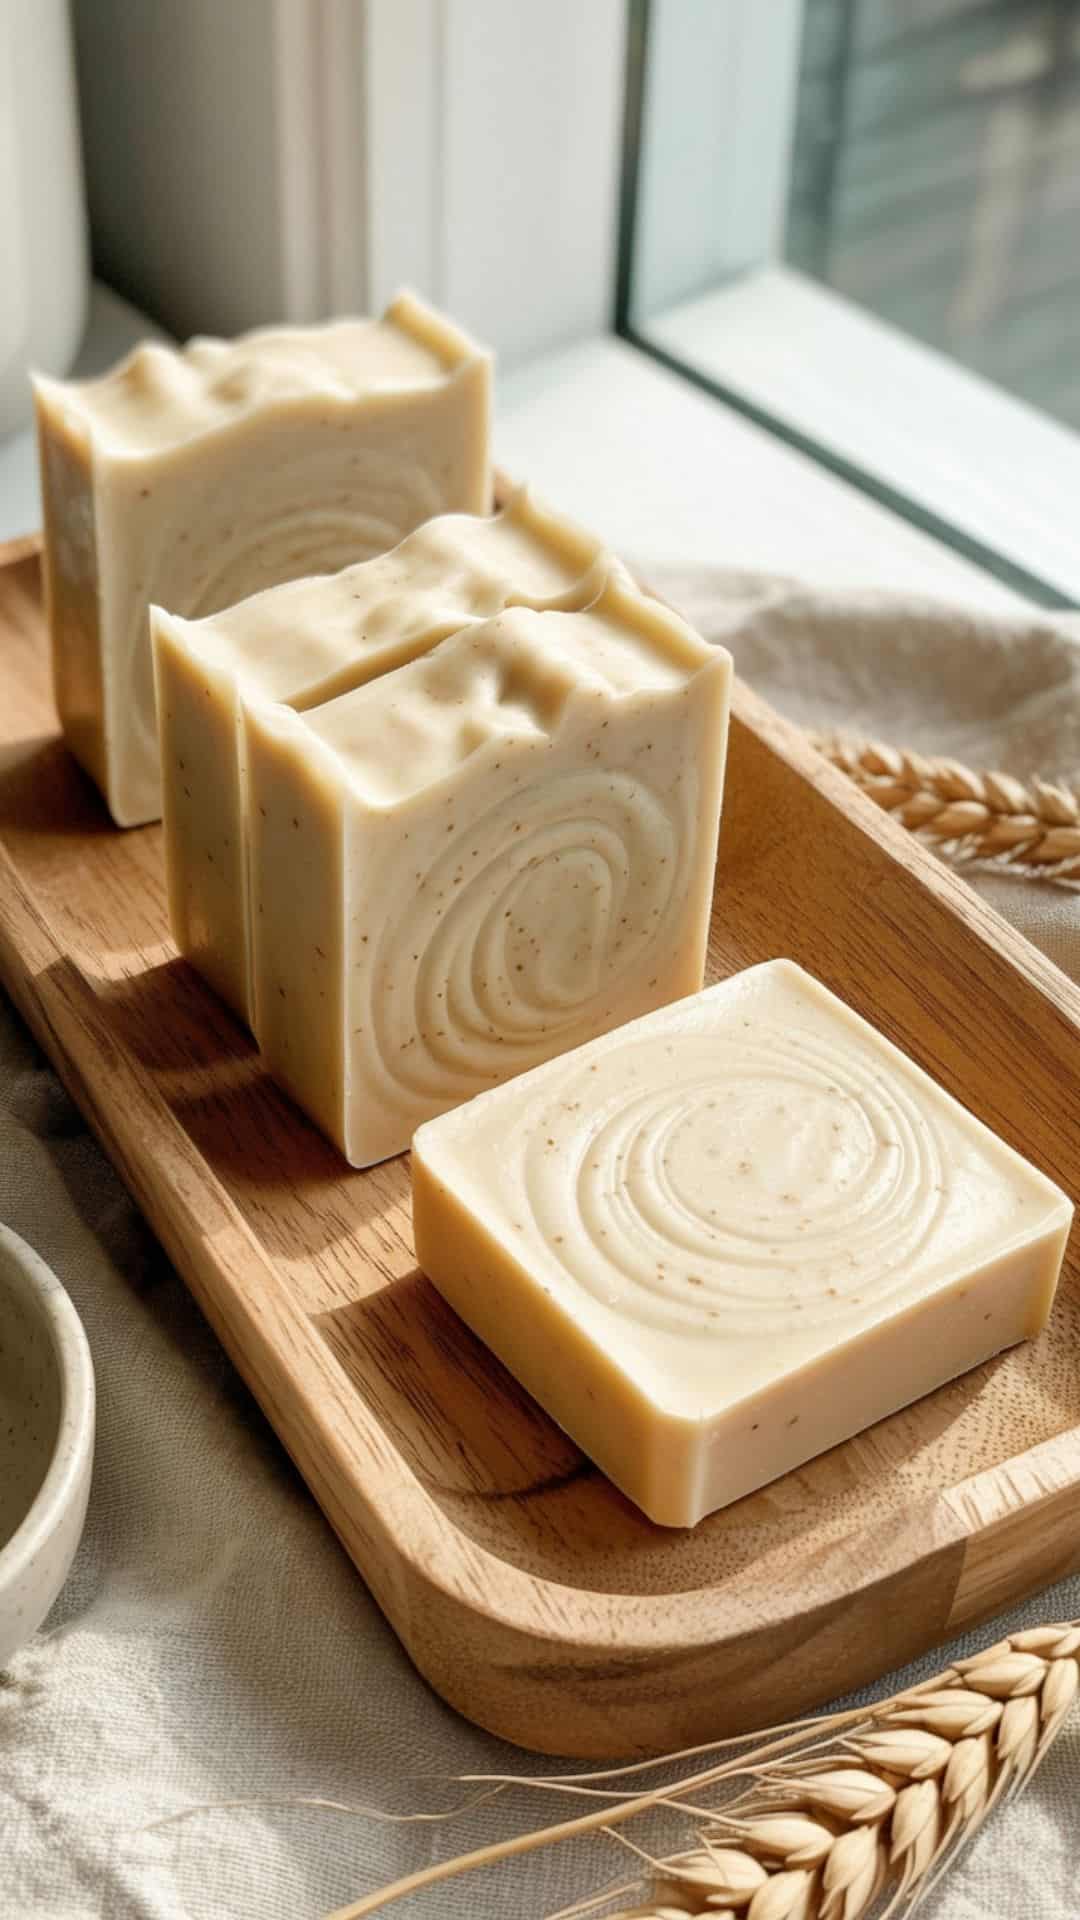
2. Oatmeal Honey Melt and Pour Soap
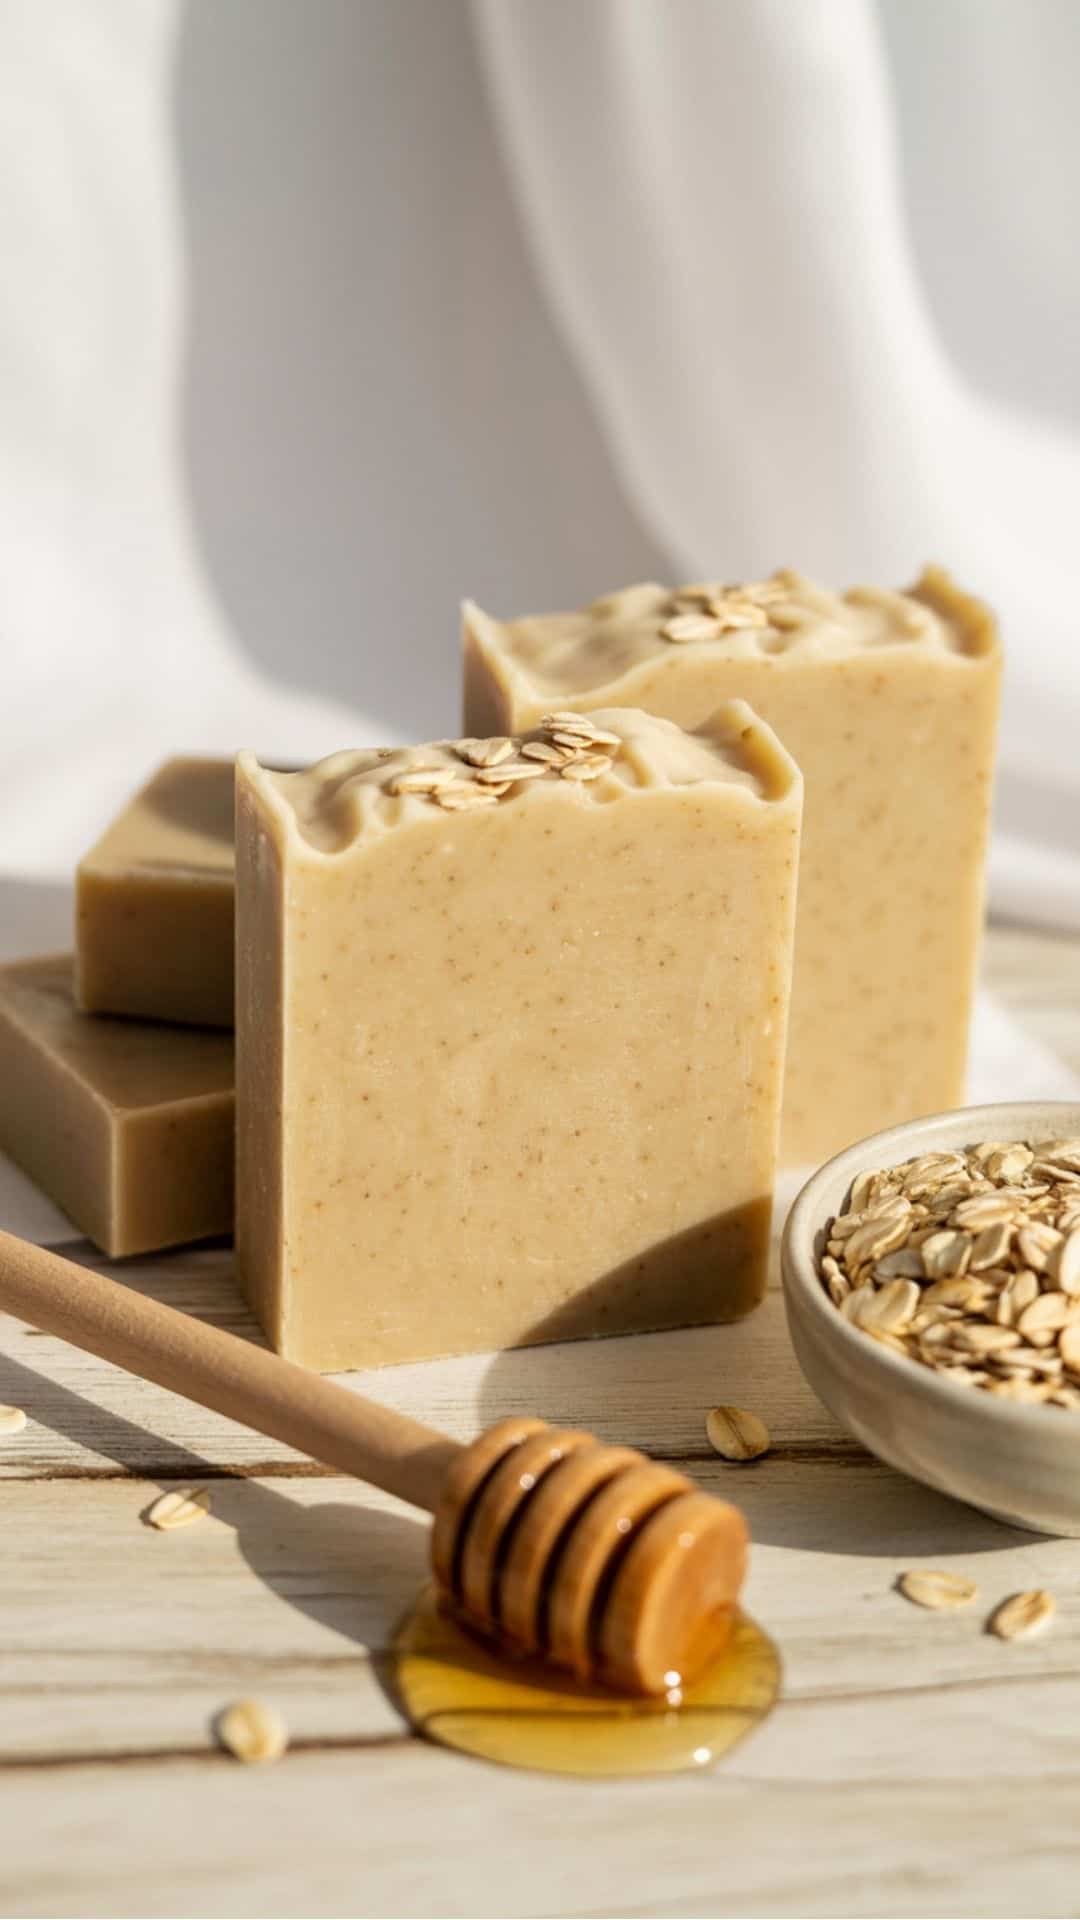
Why You’ll Love It! Soft, cozy, and comforting this soap feels nourishing and classic.
Ingredients
- Goat milk melt and pour soap base (1 lb)
- Honey fragrance oil
- Finely ground oats (1–2 tsp)
Simple Method: Stir oats into melted base just before pouring to keep them suspended evenly.
Styling Tip: Wrap in parchment paper with kraft labels for a farmhouse feel.
3. Lemon Fresh Melt and Pour Soap
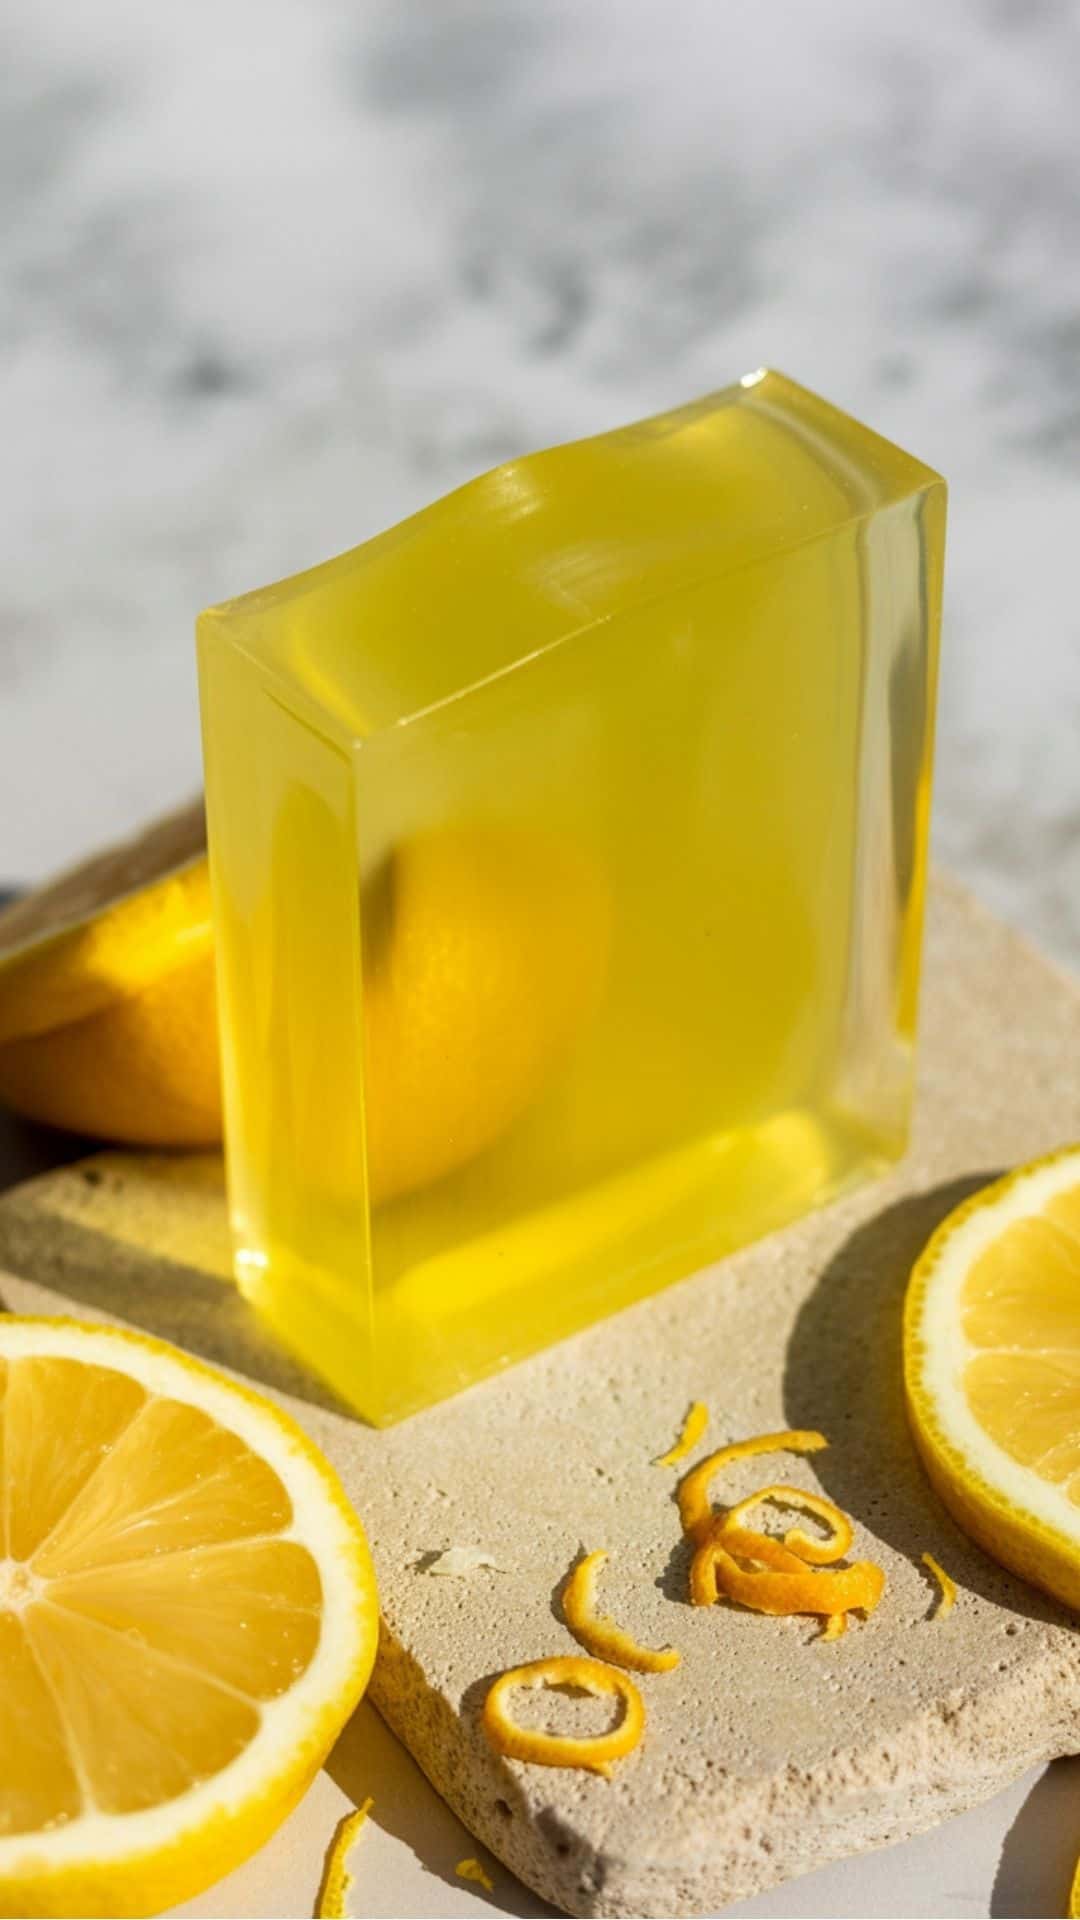
Why You’ll Love It! Bright, clean, and energizing this is a bestseller scent.
Ingredients
- Clear melt and pour soap base (1 lb)
- Lemon fragrance oil
- Yellow liquid colorant
Simple Method: Keep color light for a fresh, translucent look.
Styling Tip: Photograph near sunlight or citrus props for Pinterest appeal.
4. Rose Blush Melt and Pour Soap
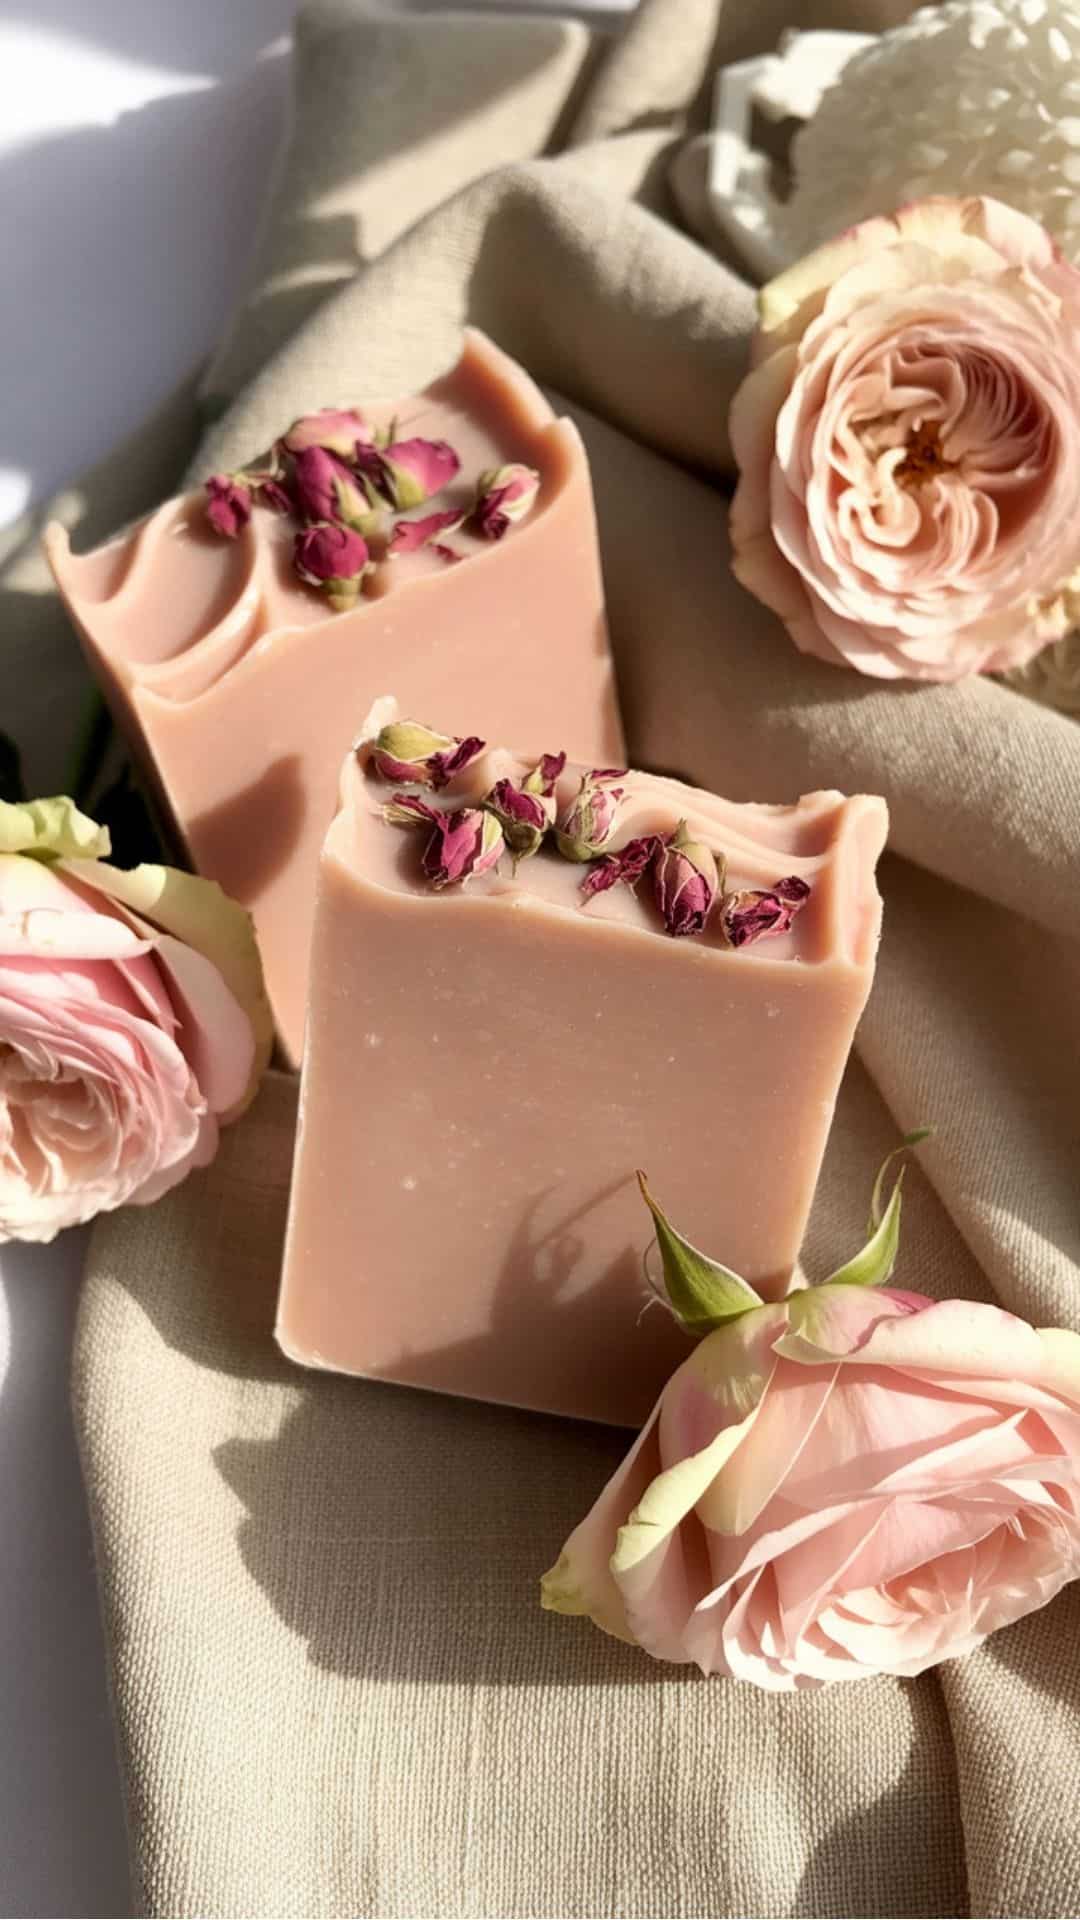
Why You’ll Love It! Romantic without being overpowering perfect for gifts.
Ingredients
- White soap base
- Rose fragrance oil
- Soft pink mica
Simple Method: Stir gently to avoid air bubbles and pour slowly for smooth tops.
Styling Tip: Pair with dried rose petals (affiliate) or soft textiles.
5. Coffee Scrub Melt and Pour Soap
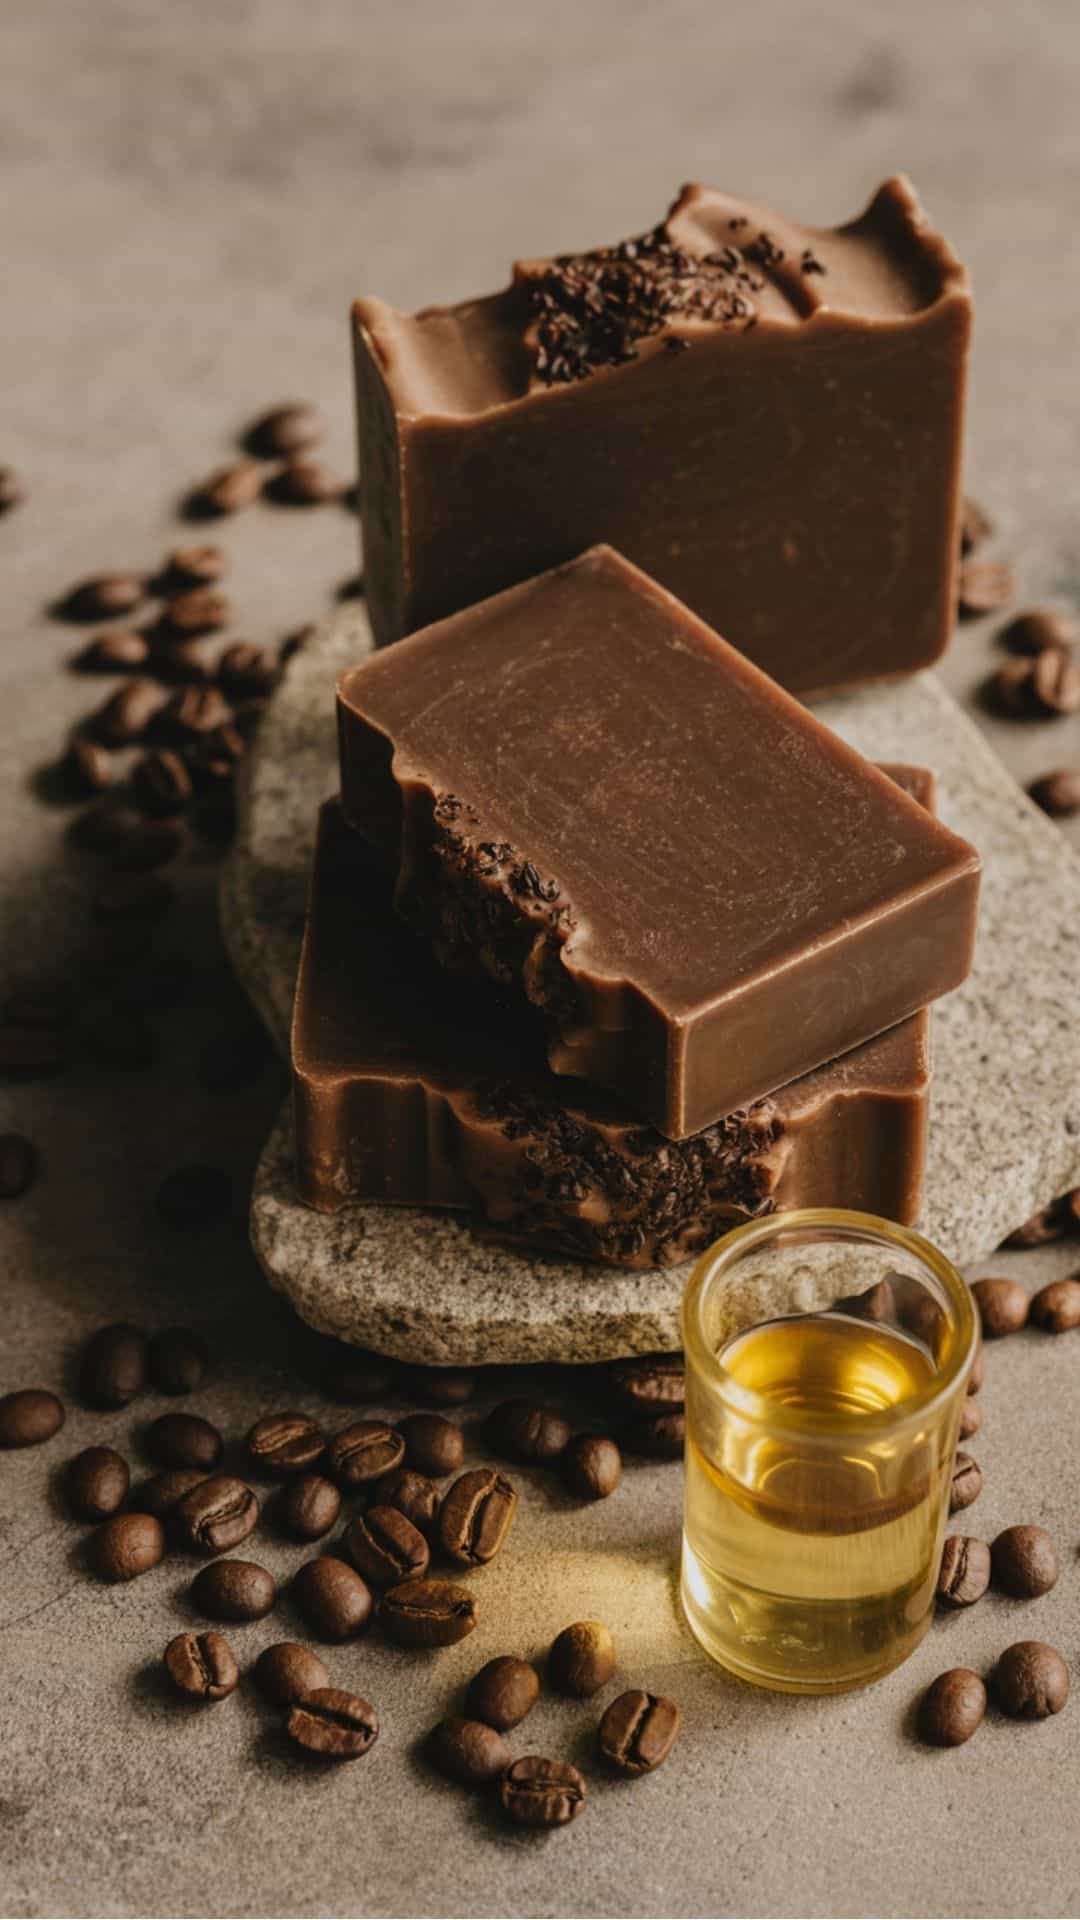
Why You’ll Love It! Earthy, bold, and exfoliating great for kitchens or workshops.
Ingredients
- Shea butter soap base
- Coffee fragrance oil
- Used coffee grounds (1 tbsp)
Simple Method: Add grounds last to control texture.
Styling Tip: Looks great photographed on stone or concrete surfaces.
6. Aloe Cucumber Melt and Pour Soap
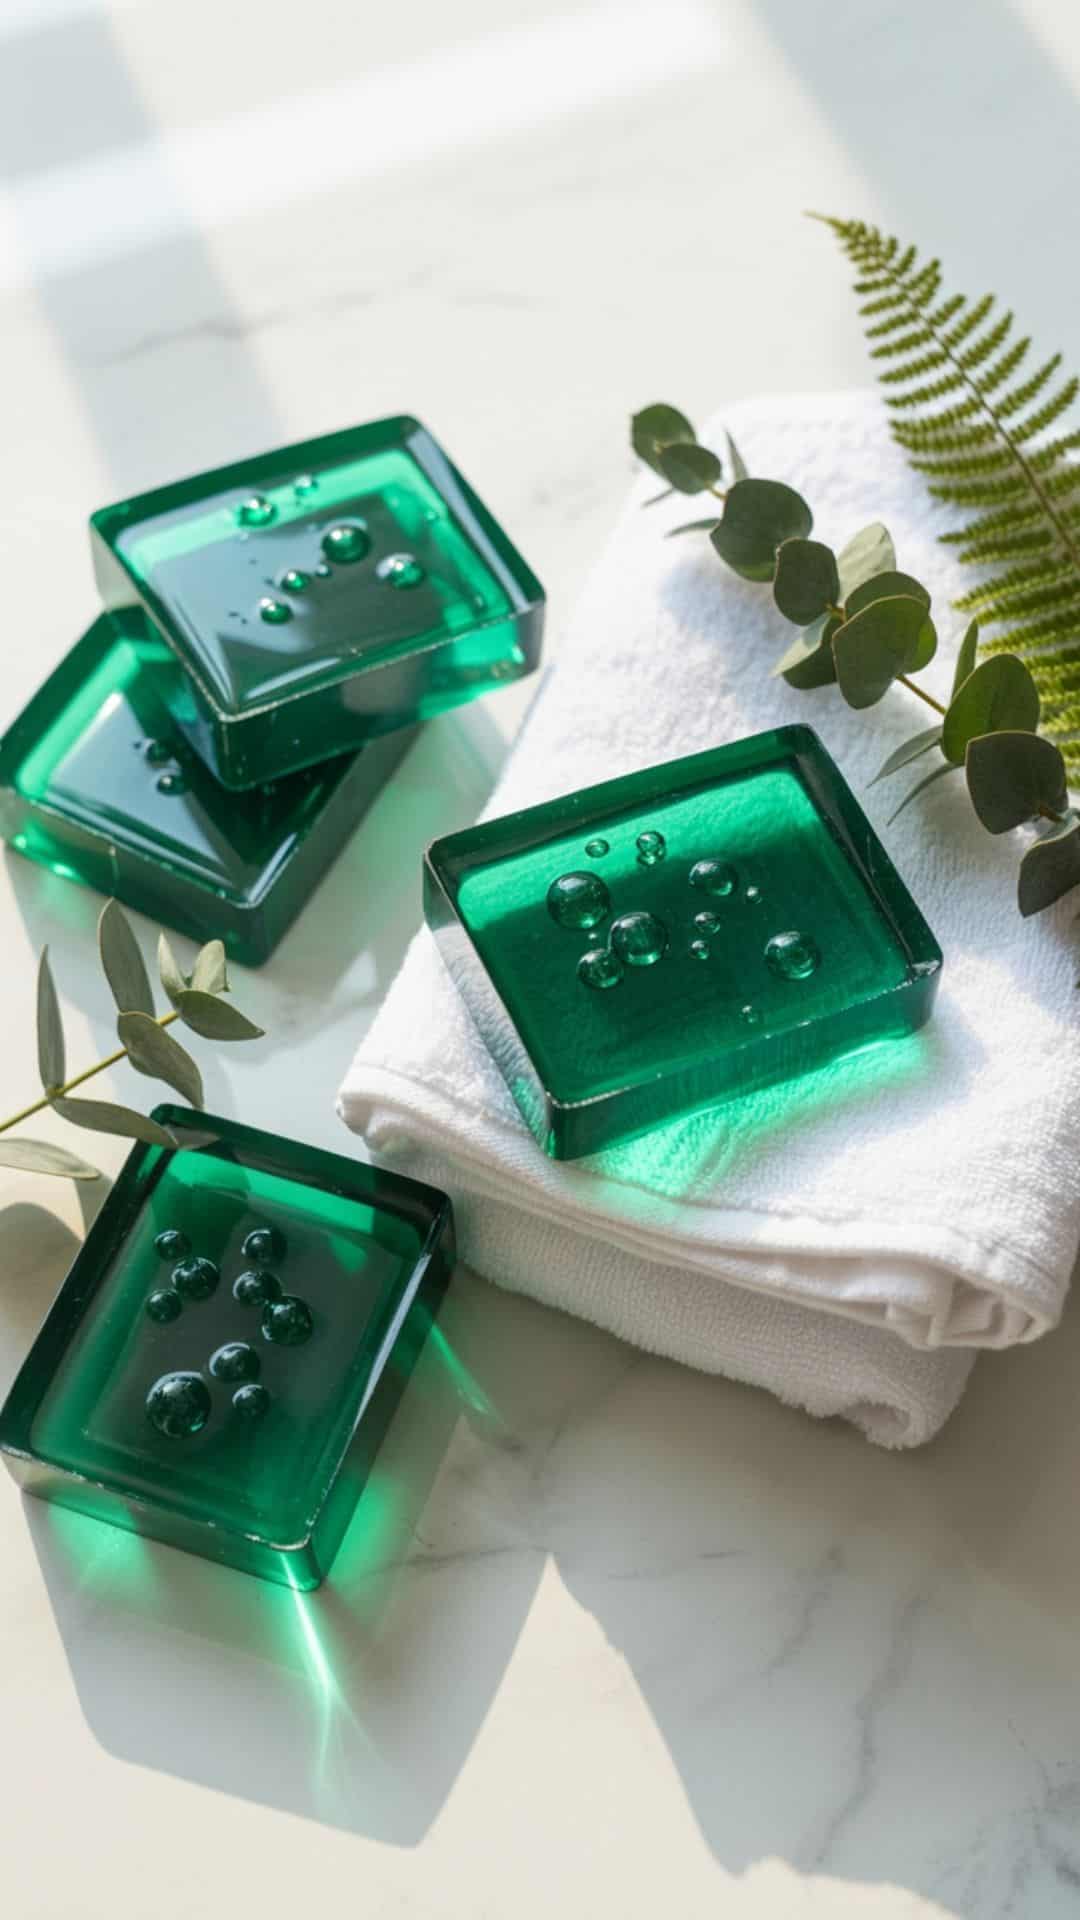
Why You’ll Love It! Fresh and spa-like with a clean finish.
Ingredients
- Clear soap base
- Aloe cucumber fragrance
- Pale green colorant
Simple Method: Use minimal color to keep it airy and modern.
Styling Tip: Style with white towels and greenery.
7. Charcoal Detox Melt and Pour Soap

Why You’ll Love It! Bold, modern, and highly marketable.
Ingredients
- Clear or white soap base
- Activated charcoal (½ tsp)
- Tea tree fragrance oil
Simple Method: Mix charcoal thoroughly to avoid speckles.
Styling Tip: Black-and-white packaging elevates this instantly.
8. Vanilla Oat Cream Melt and Pour Soap
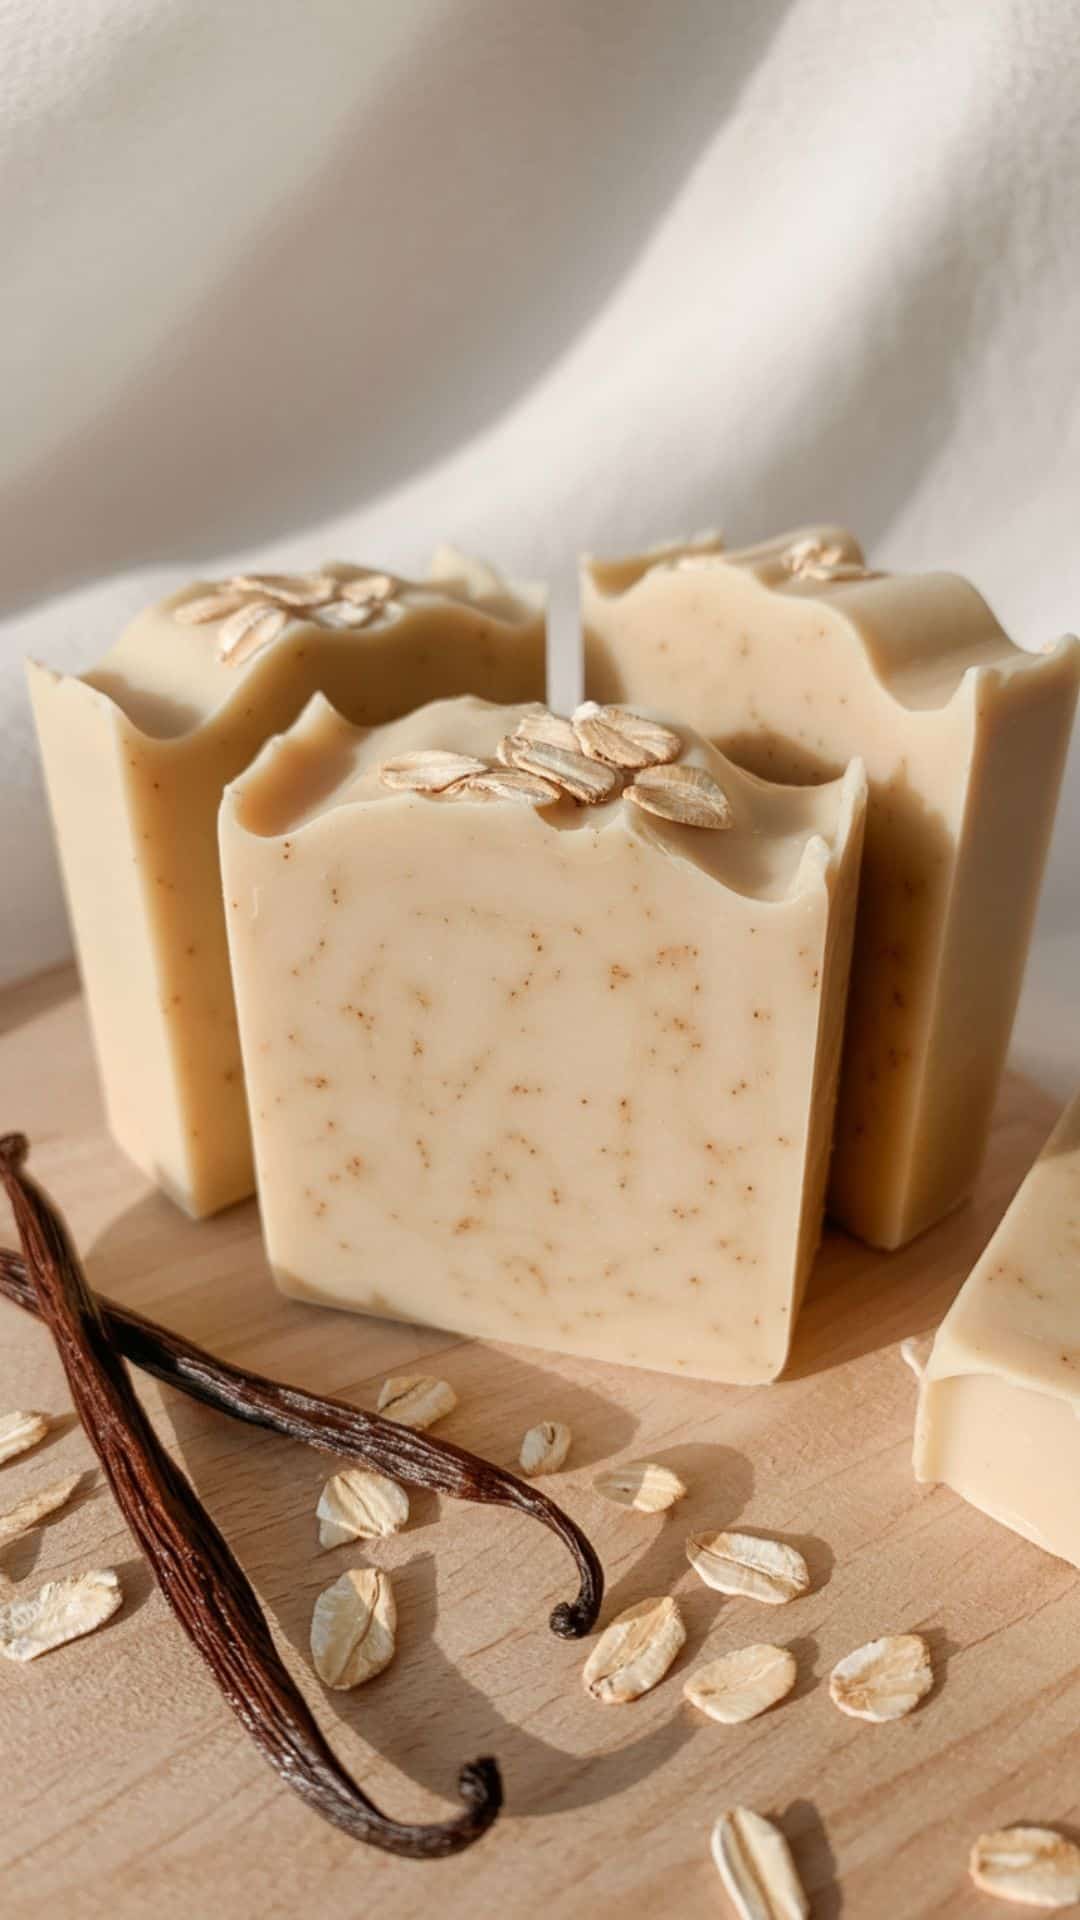
Why You’ll Love It! Warm, cozy, and universally appealing.
Ingredients
- Shea butter soap base
- Vanilla fragrance oil
- Optional oat milk powder
Simple Method: Avoid overheating to preserve creamy color.
Styling Tip: Perfect for neutral, minimalist branding.
9. Mint Eucalyptus Melt and Pour Soap
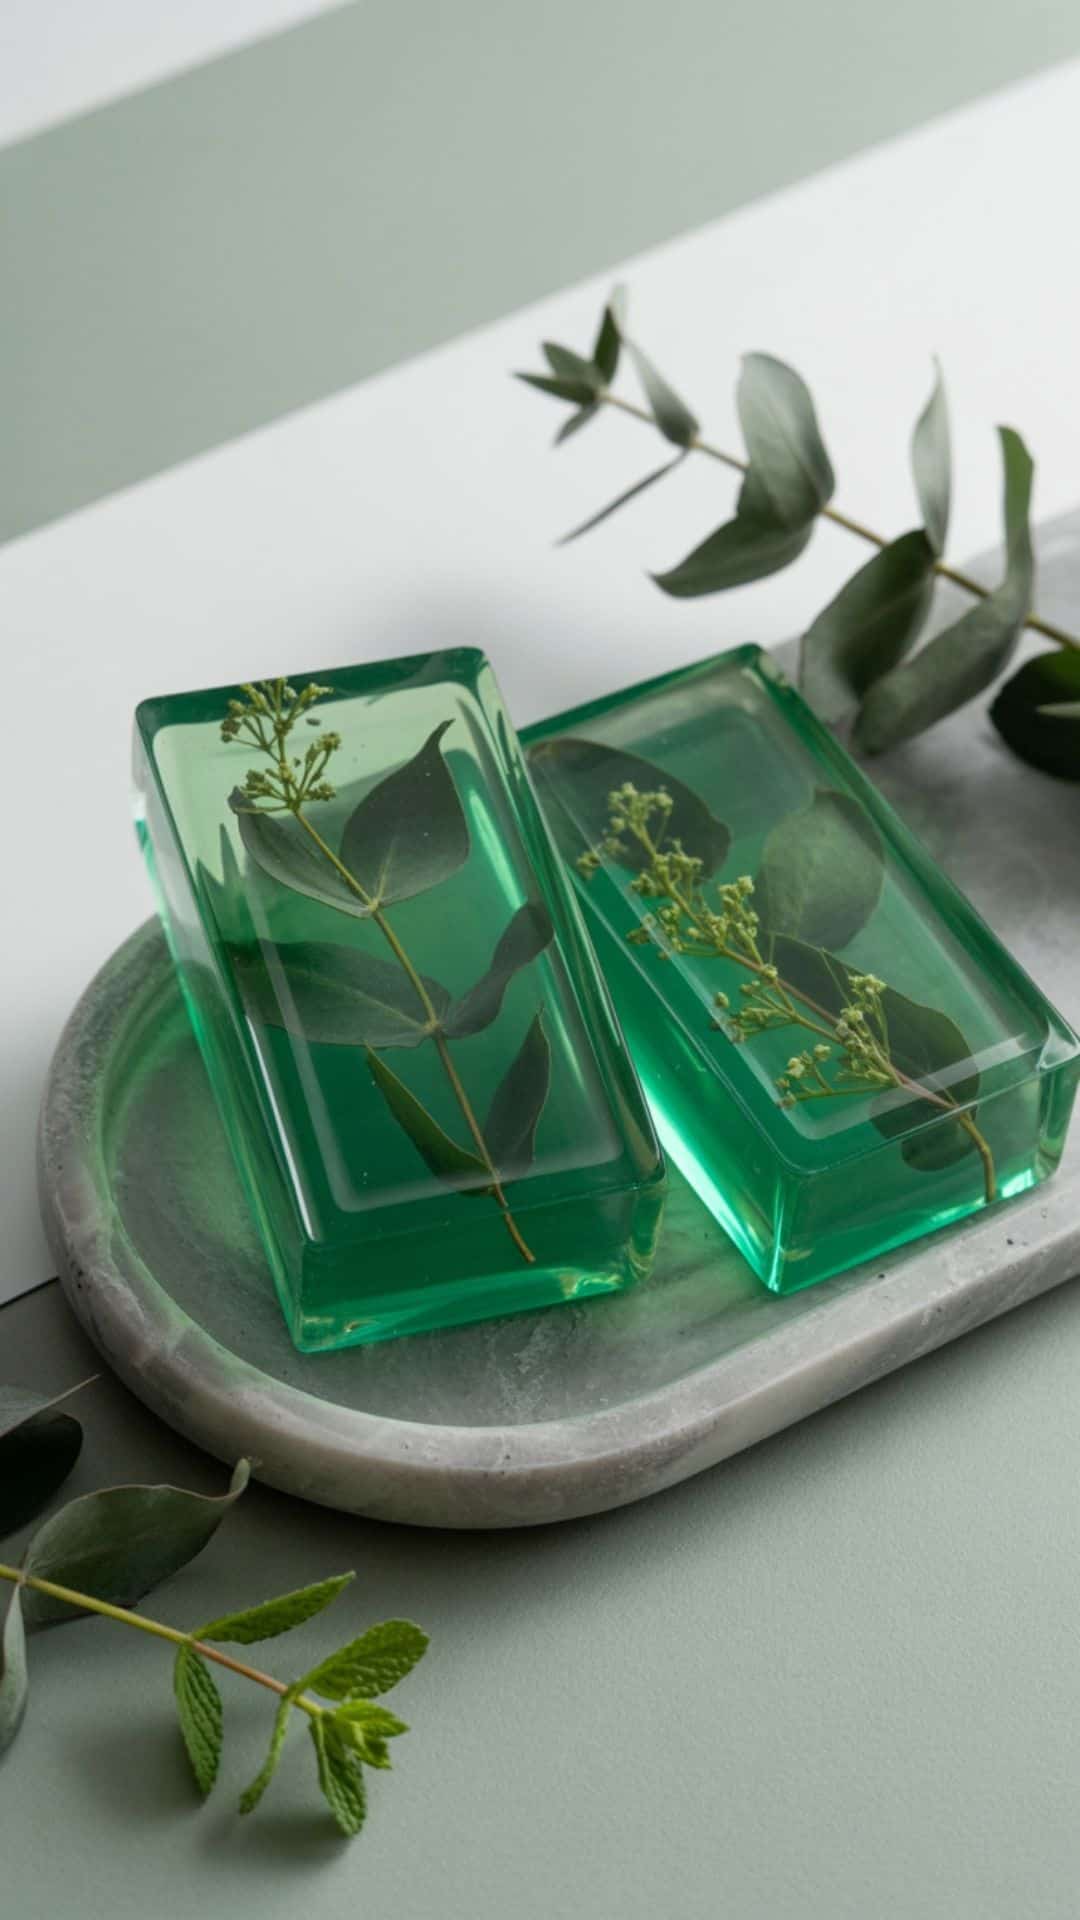
Why You’ll Love It! Refreshing and spa-inspired.
Ingredients
- Clear soap base
- Mint eucalyptus fragrance
- Green mica
Simple Method: Pour in thin layers for extra clarity.
Styling Tip: Style with marble trays or concrete dishes.
10. Orange Citrus Melt and Pour Soap
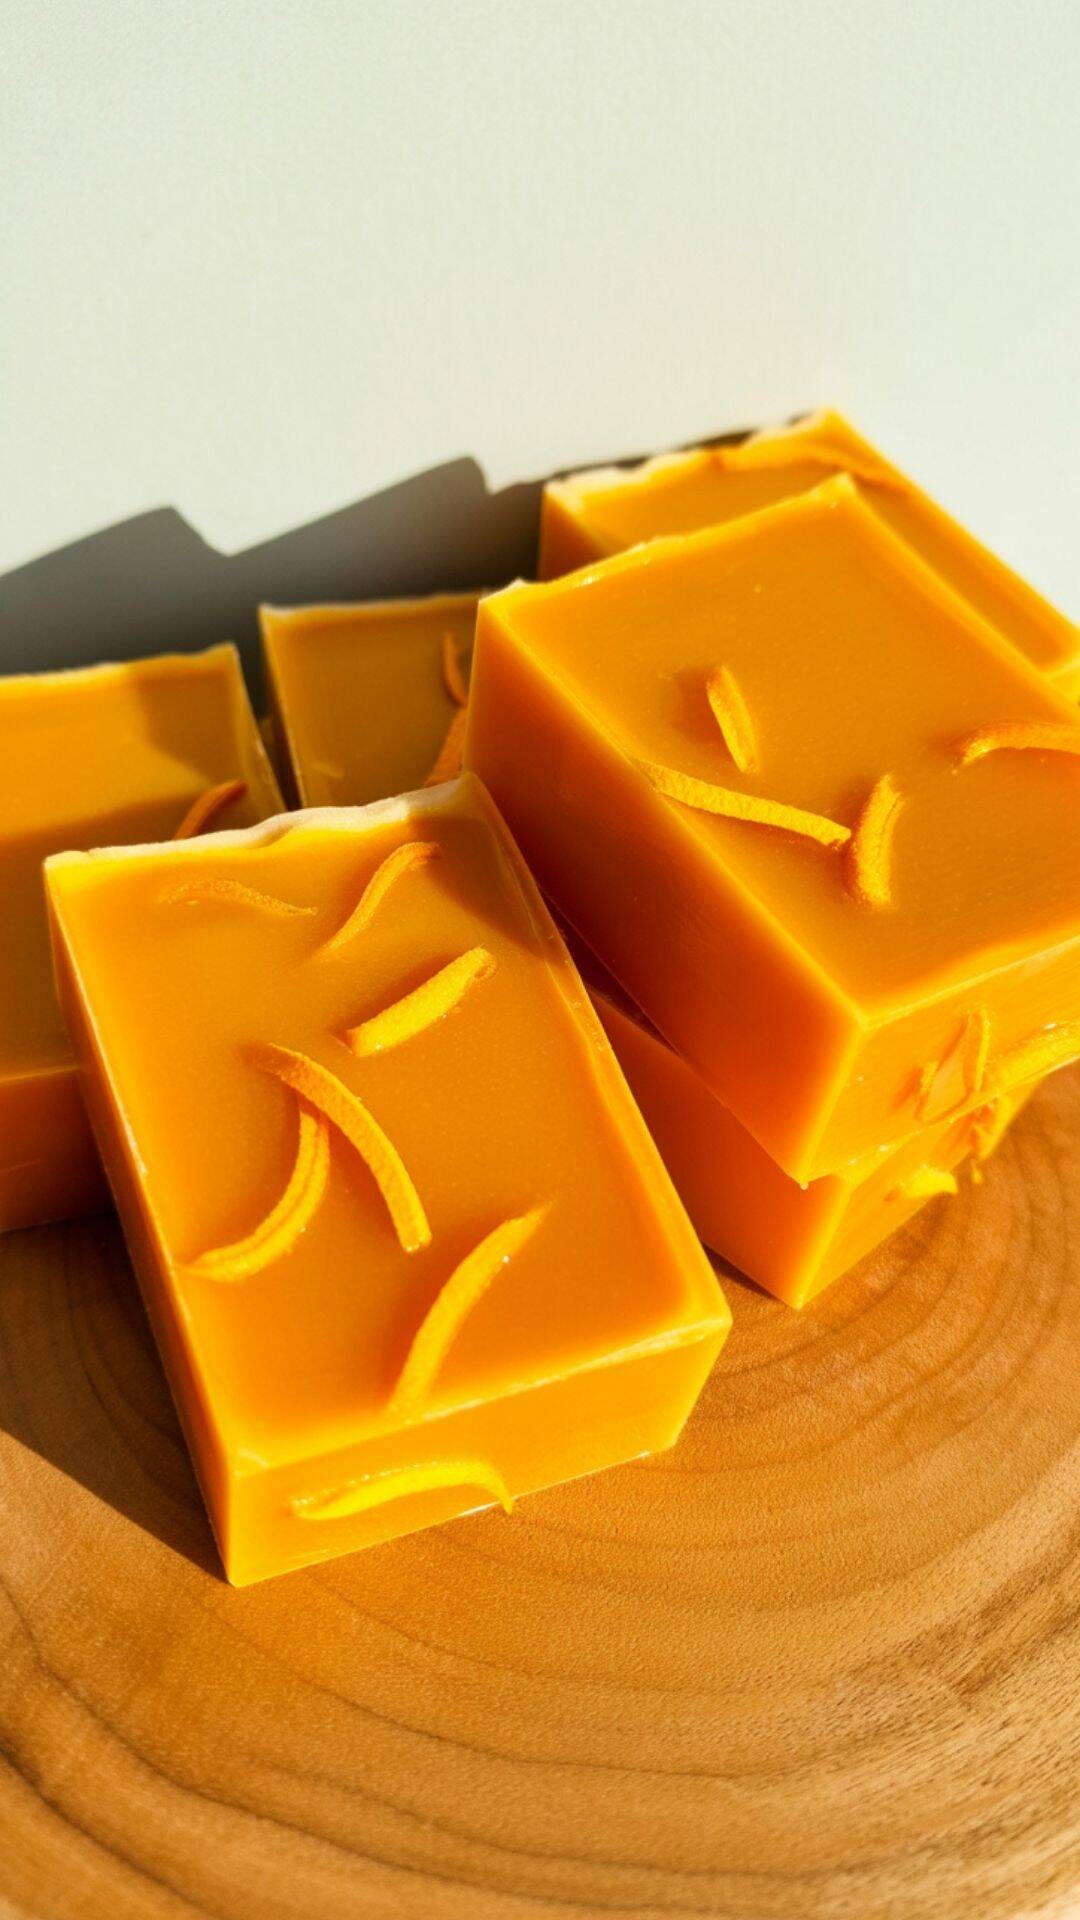
Why You’ll Love It! Cheerful and energizing perfect year-round.
Ingredients
- Clear soap base
- Sweet orange fragrance
- Orange colorant
Simple Method: Keep scent light for mass appeal.
Styling Tip: Looks amazing with warm wood tones.
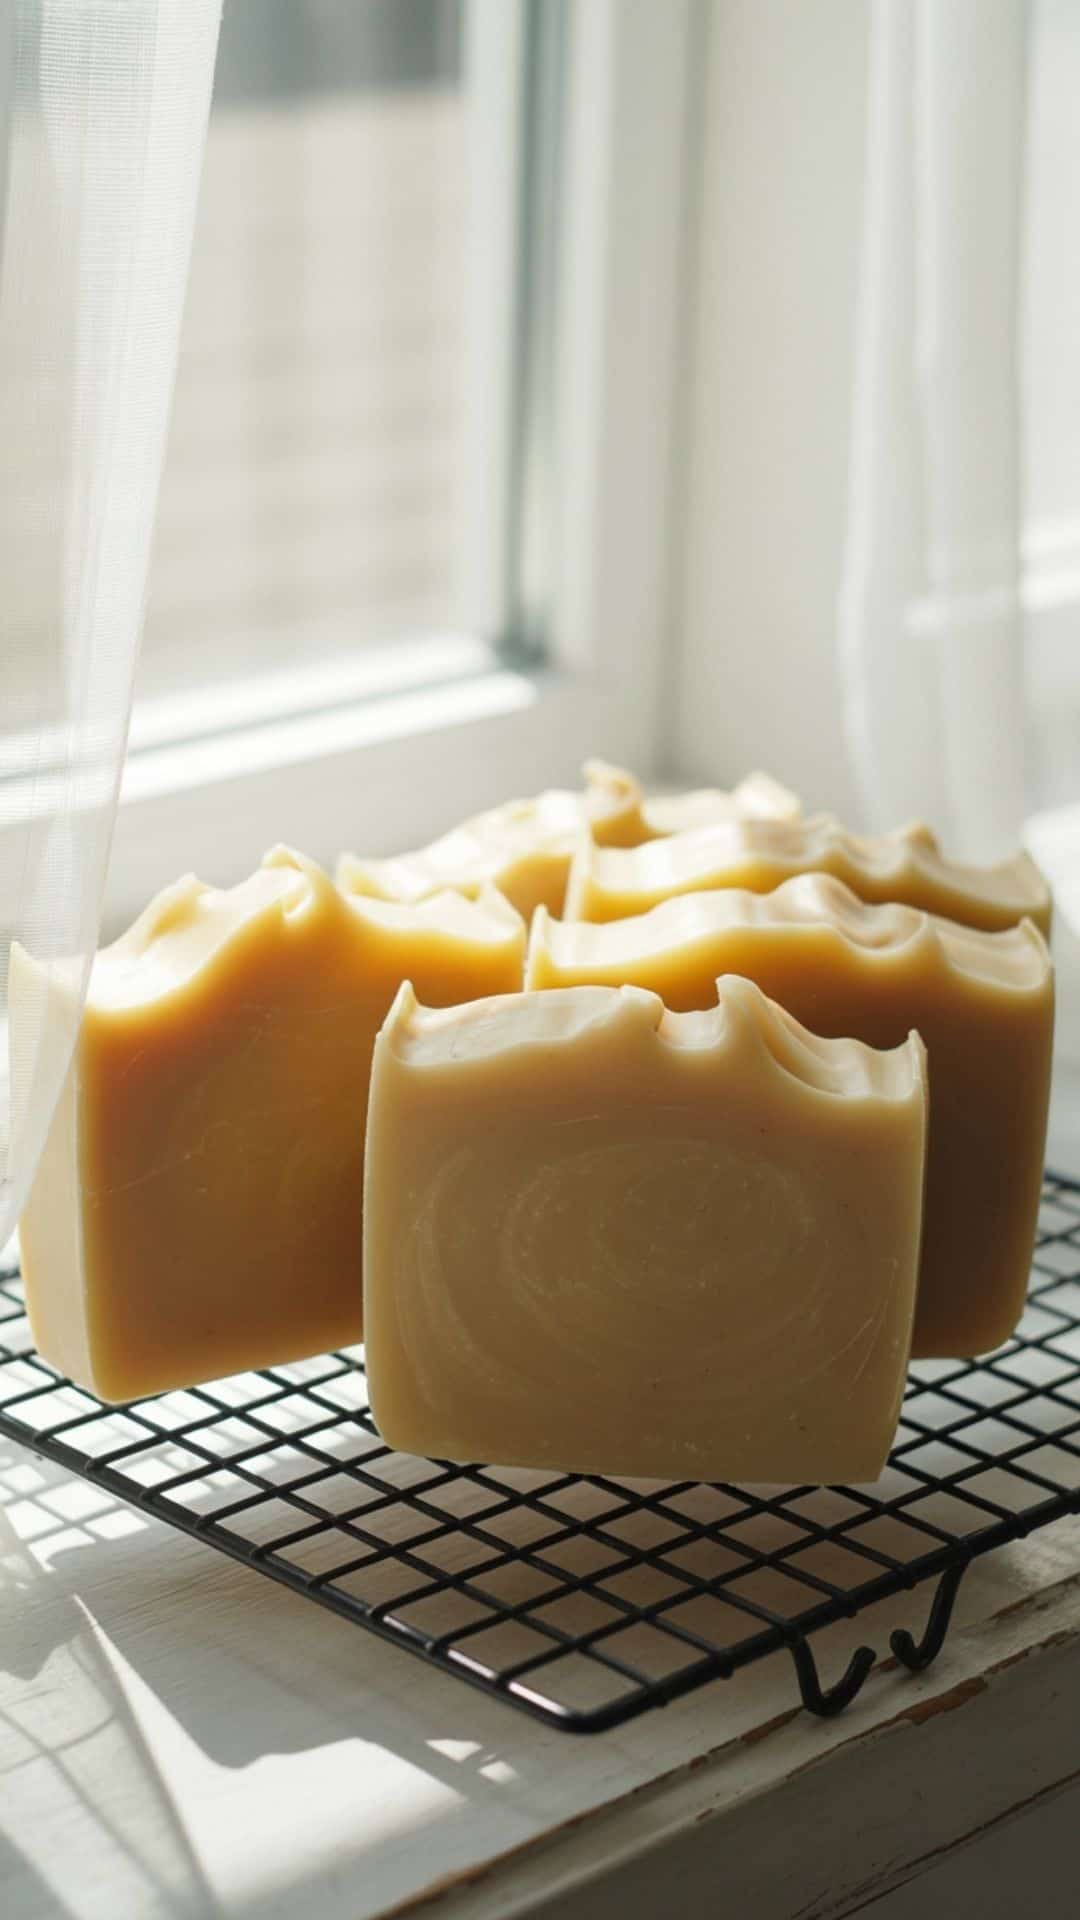
11. Milk & Honey Melt and Pour Soap
Why You’ll Love It! Timeless, gentle, and gift-ready.
Ingredients
- Goat milk soap base
- Milk & honey fragrance
Simple Method: Let cool slowly to prevent cracking.
Styling Tip: Stack in sets for market displays.
12. Chamomile Calm Melt and Pour Soap
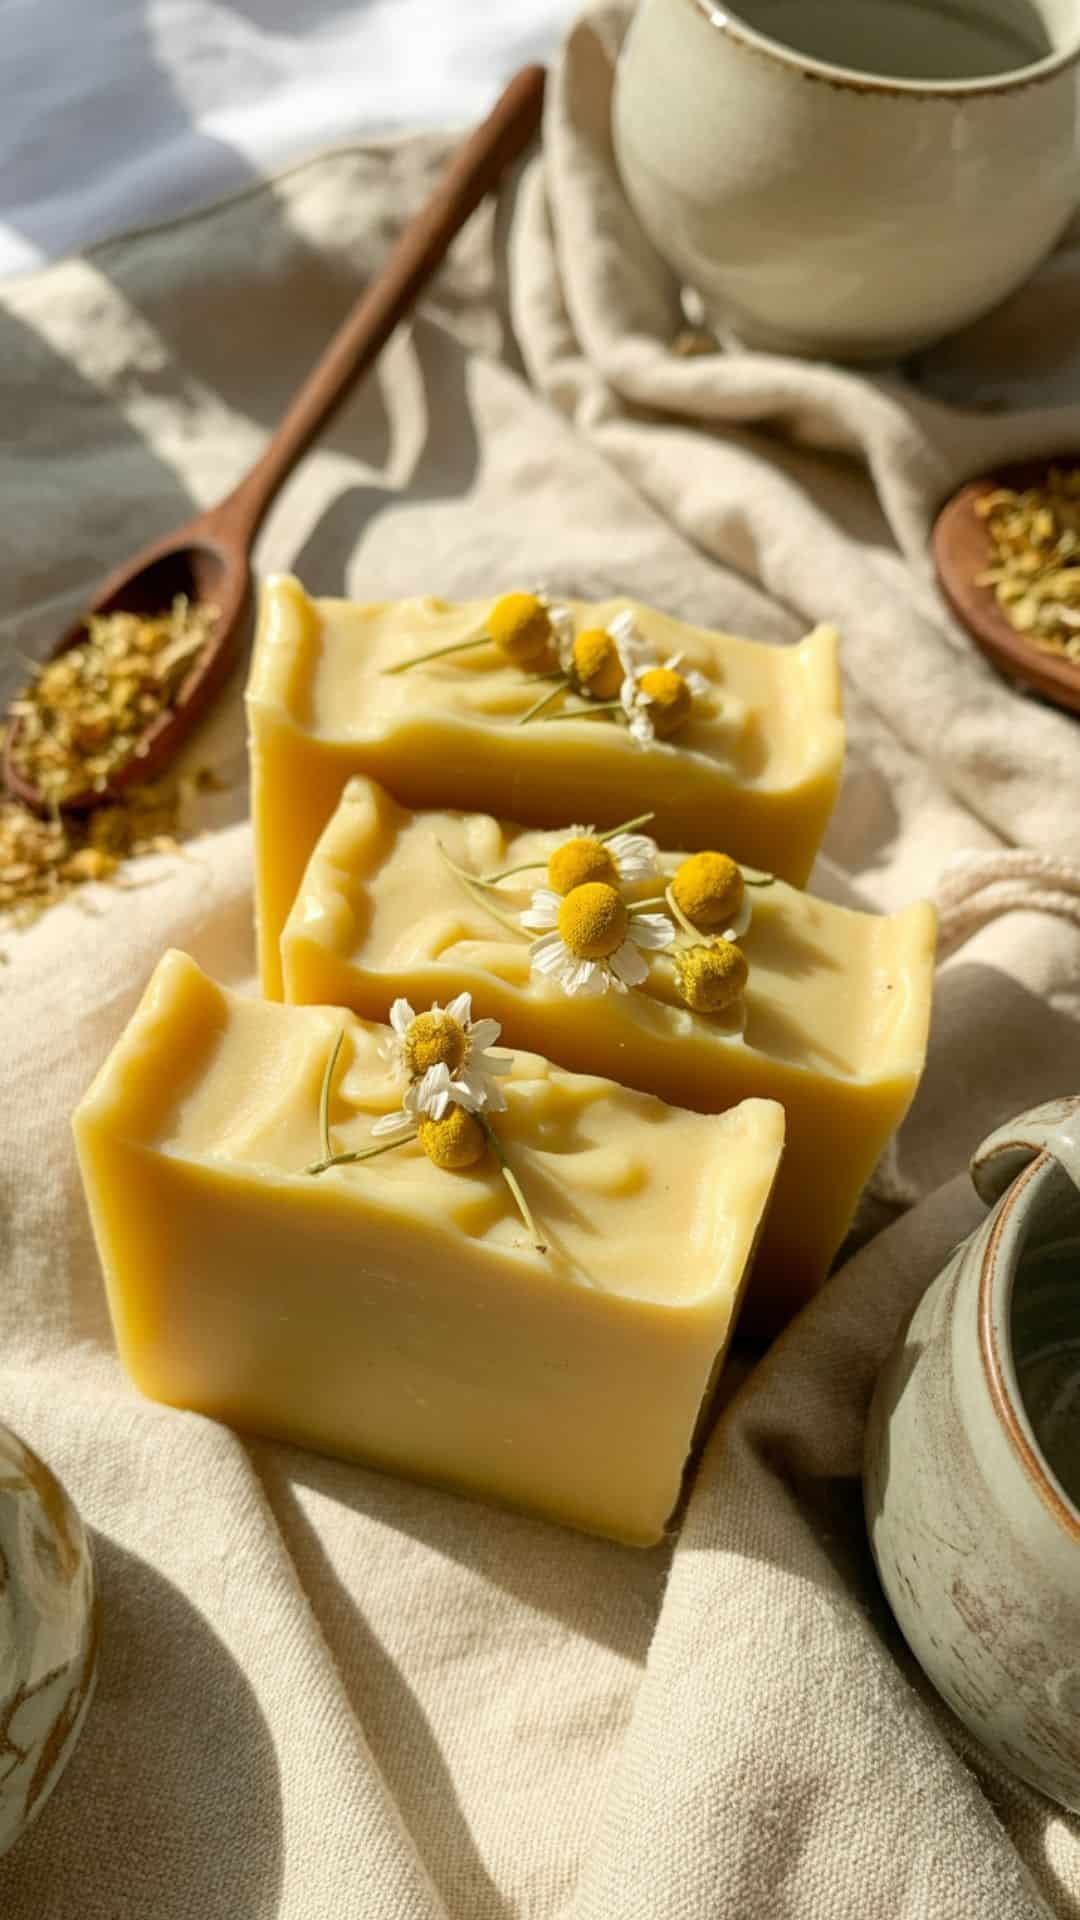
Why You’ll Love It: Soft, soothing, and perfect for bedtime routines.
Ingredients
- White soap base
- Chamomile fragrance
- Pale yellow tint
Simple Method: Stir gently for a silky finish.
Styling Tip: Pair with soft linens and ceramics.
13. Sea Salt Spa Melt and Pour Soap

Why You’ll Love It! Feels luxurious and spa-worthy.
Ingredients
- Clear soap base
- Ocean or spa fragrance
- Fine sea salt (1 tsp)
Simple Method: Stir briefly to prevent salt sinking.
Styling Tip: Blue-gray palettes photograph beautifully.
14. Cocoa Butter Nude Melt and Pour Soap
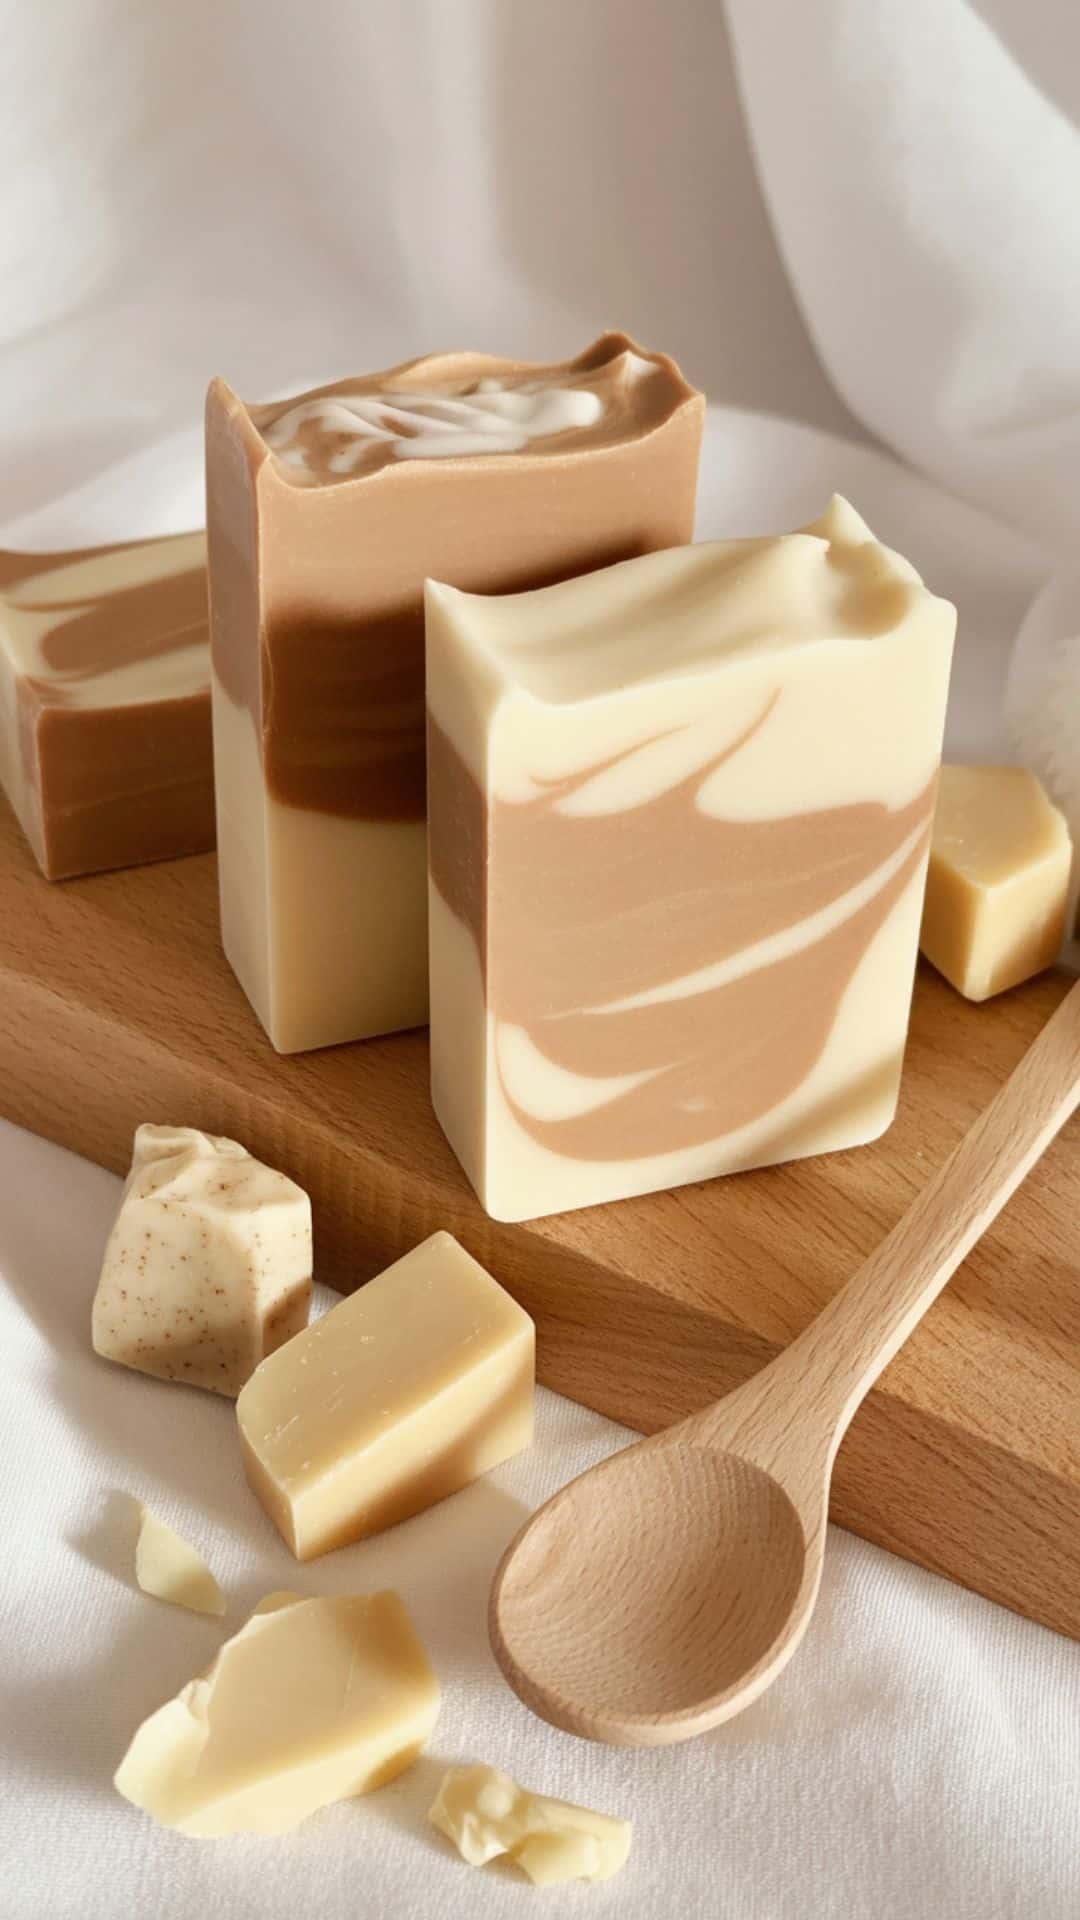
Why You’ll Love It! Minimal, warm, and modern.
Ingredients
- Cocoa butter soap base
- Light vanilla fragrance
Simple Method: Pour slowly for ultra-smooth tops.
Styling Tip: Perfect for luxury-inspired branding.
15. Confetti Scrap Melt and Pour Soap
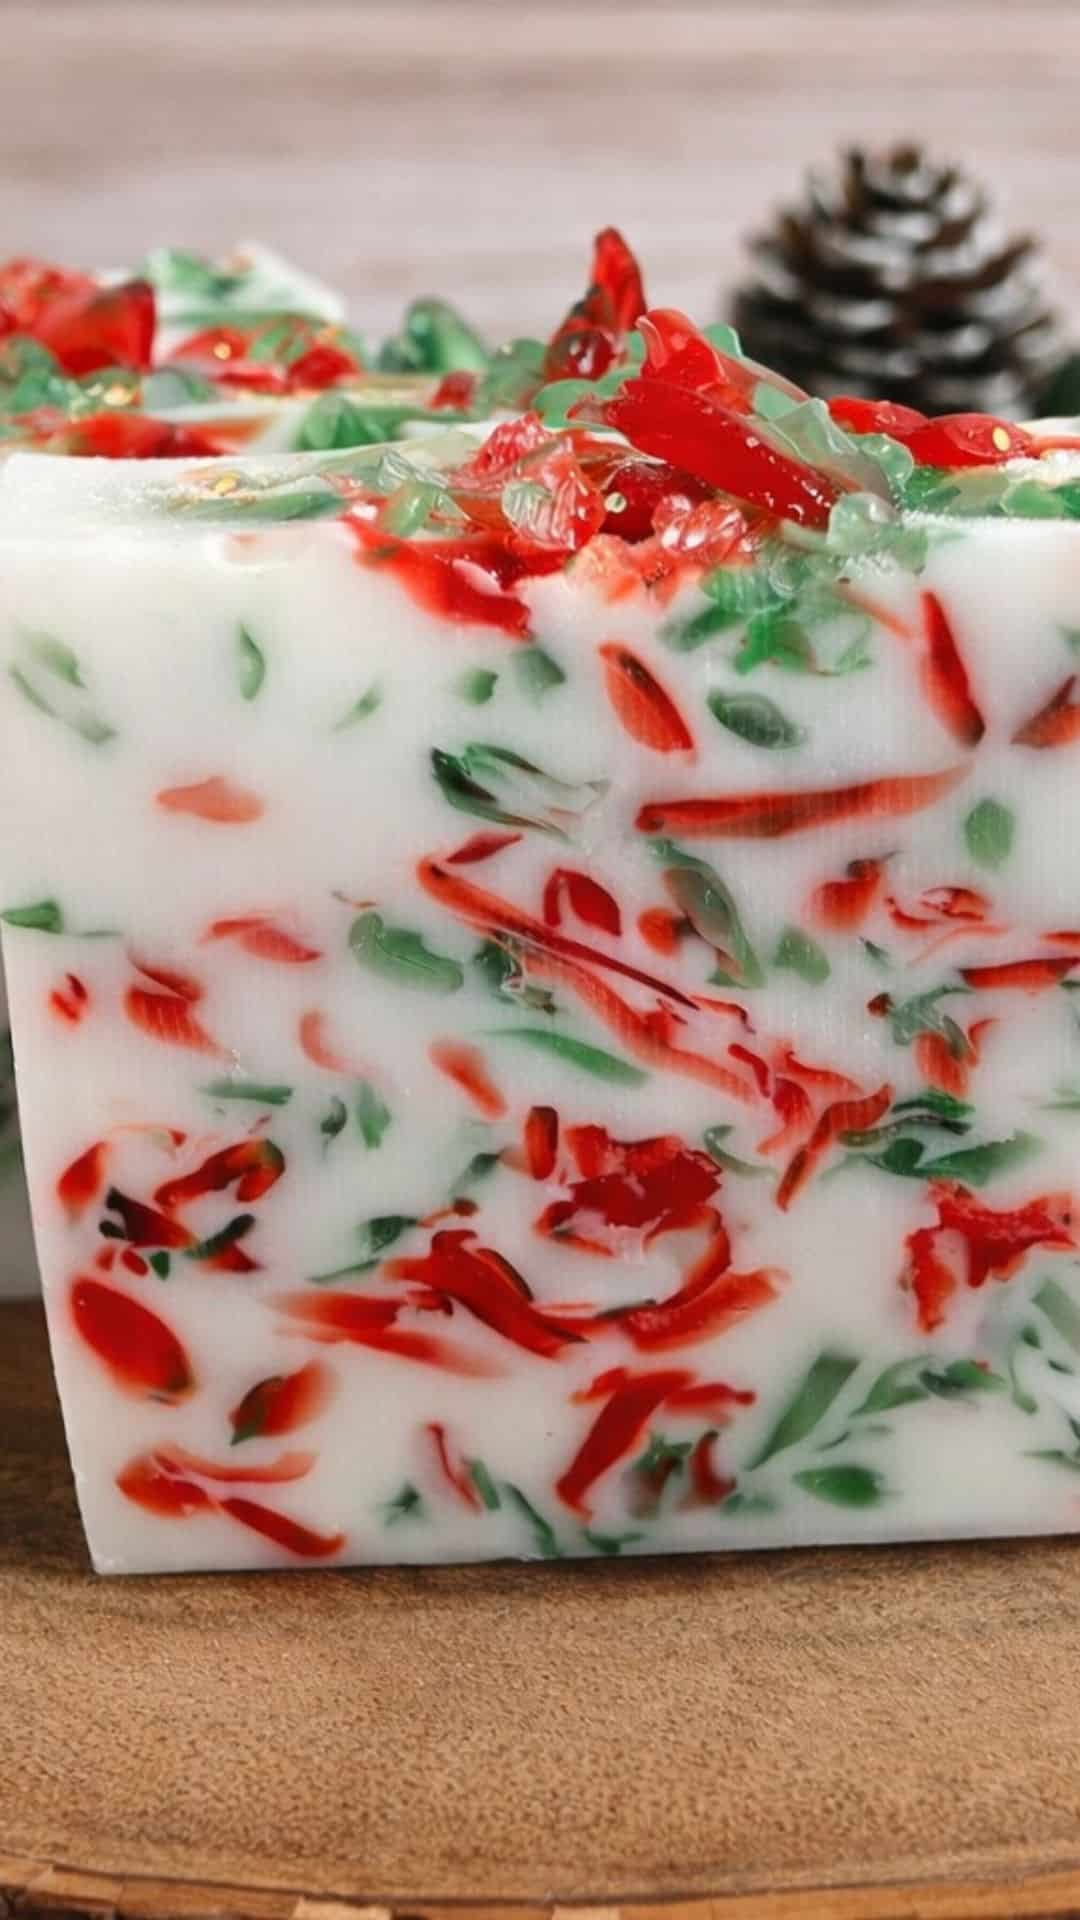
Why You’ll Love It! Zero waste, playful, and great for beginners.
Ingredients
- Clear soap base
- Soap scraps (cubed)
Simple Method: Press scraps gently into the base before pouring.
Styling Tip: Great as kid-friendly or eco-conscious gifts.
16. Goat’s Milk Soap Recipe
Goat’s milk melt and pour soap is one of the easiest and most rewarding ways to make handmade soap at home. With its creamy texture and gentle feel, it’s perfect for beginners who want beautiful results without complicated steps. In this list, you’ll find simple goat’s milk melt and pour soap ideas that are easy to make, lovely to use, and perfect for gifting or small-batch crafting. Get all the details for making easy goat’s milk soap!
Why These Soap Recipes Sell So Well
- High gift appeal for all ages
- Practical yet luxurious
- Easy to batch and restock
- Customizable colors and scents
- Strong perceived value with simple materials
Suggested Price Point
Standard Size / Core Version
$6–9 per bar
This reflects simple designs, standard molds, and basic fragrances where most makers land comfortably.
Premium / Elevated Versions
$10–14 per bar
Includes layered colors, embeds, premium fragrances, or textured tops.
Set Pricing (Highly Recommended)
- Set of 3: $18–24
- Set of 5: $28–35
Sets feel intentional and increase average order value.
Pricing Confidence Tip
Customers aren’t just buying soap they’re buying handmade artistry, calming design, and small-batch quality. Don’t underprice beautiful work.
Batching Tip
Melt large batches of base at once and divide into smaller containers for multiple colors or scents less cleanup, faster workflow.
Packaging Idea
Wrap bars in parchment or glassine paper with a kraft label and twine. For markets, display them in shallow wooden trays for a clean, modern look.
Fun Variations to Offer
- Seasonal scents (pumpkin, pine, citrus)
- Minimal black-and-white color palettes
- Oversized “statement” bars
- Botanical tops for visual texture
If you’re interested in working with activated charcoal, be sure to check out my How to Make Charcoal Melt and Pour Soap (Beginner’s Guide).
Wrapping Up
Melt and pour soap recipes are proof that beautiful handmade crafts don’t have to be complicated. With just a few supplies and a little creativity, you can make soaps that feel polished, modern, and genuinely special.
If you’re new to crafting, start simple, trust the process, and enjoy the calm that comes with making something by hand. You’ve got this!