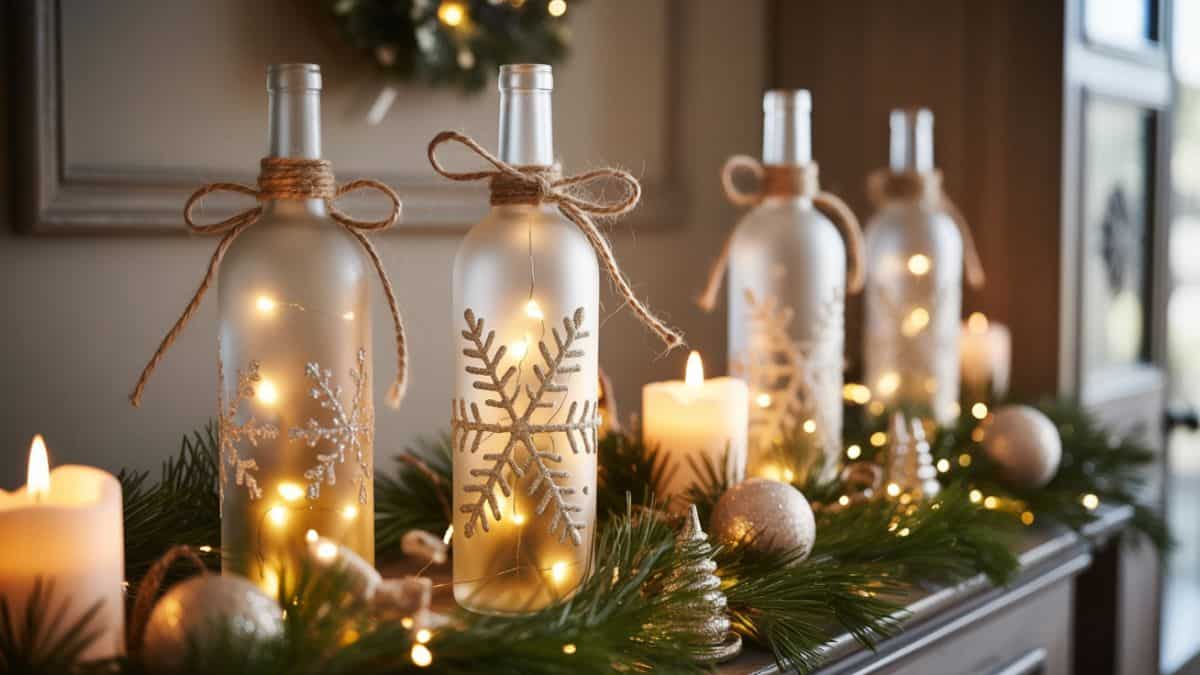
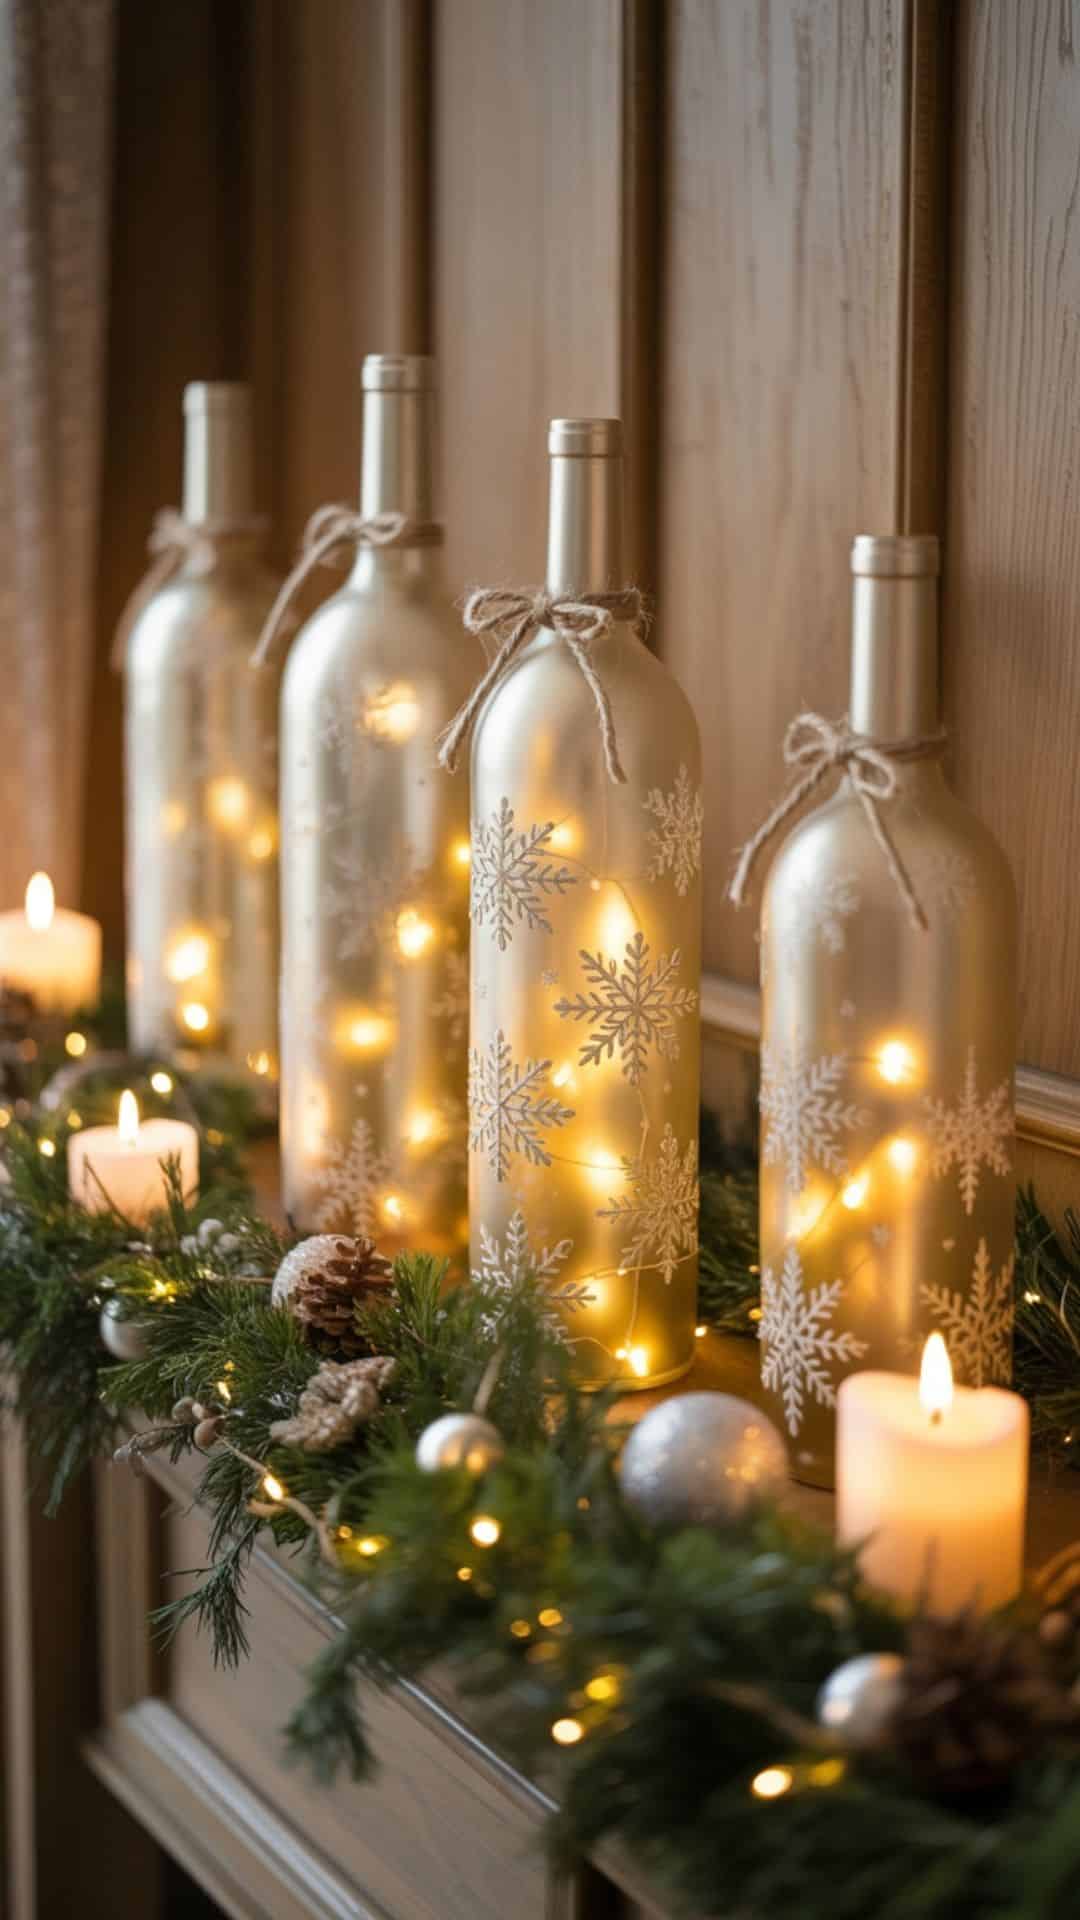
DIY Wine Bottle Lights: Fairy Light Decor for Christmas
If you love transforming simple everyday items into beautiful Christmas décor, wine bottle light creations are one of the easiest and most magical holiday projects you can make. They glow softly, feel boutique-quality, and instantly add warmth to mantels, shelves, and festive tablescapes.
Crafting them for your own home or stocking up for a holiday market, these glowing bottles photograph beautifully and make irresistible gifts.
This website contains affiliate links. As an Amazon Associate, I earn from qualifying purchases. Please read our disclaimer.
How Long Do DIY Wine Bottle Lights Take to Make
Wine bottle lights are wonderfully quick once your bottles are prepped. Most bottles take 10–15 minutes from start to finish. If you prep 6–10 bottles at once by removing labels and spray-painting them together, the decorating and assembly become a fast, easy flow.
Materials & Tools
Before you start assembling your wine bottle light décor, gather all your materials so the process stays smooth and enjoyable. This project uses simple, affordable supplies that create a surprisingly high-end look. Prepping everything ahead of time also helps you move quickly, especially if you’re batching bottles for a holiday market or planning to make multiple sets as gifts.
Materials
- Empty wine bottles
- Goo remover (for sticky label residue)
- Frosted glass spray paint or white spray paint
- Battery-operated fairy lights (bottle string lights preferred)
- Twine or ribbon
- Optional: stencils such as snowflakes, stars, or Christmas trees
Tools
- Scissors
- Craft knife (optional for tough labels)
- Drop cloth or cardboard for spraying
- Gloves
Step-by-Step Instructions
Step 1: Prep the Bottles
Remove all labels and adhesive using warm water and goo remover. Wash the bottles thoroughly, let them dry completely, and check for remaining sticky patches. A smooth, clean surface ensures an even finish once painted.
Technique note: Any residue will cause streaking in the spray paint, so take your time with prep.
Step 2: Paint the Bottles
Place the bottles on a protected surface and spray them with frosted glass paint for a soft, diffused glow. Allow them to dry completely before handling.
Variation: Add stencil designs with white paint, glitter spray, or faux snow for a winter-wonderland look.
Pro tip: Light, even coats work best. Heavy coatings will block the glow of the fairy lights.
Step 3: Insert the Fairy Lights
Use bottle-top fairy lights, which include a small battery-pack lid that fits neatly into the bottle opening. Insert the string lights and gently shake or adjust until the lights distribute evenly throughout the bottle.
Technique note: Keep extra batteries with you if you’re selling at markets so customers can test brightness.
Step 4: Decorate the Neck
Wrap twine, velvet ribbon (affiliate), or wired holiday ribbon around the neck of the bottle. Add embellishments like tiny bells, pine sprigs, holly berries, or metal charms for a polished, boutique-style finish.
Variation: Choose jute twine for rustic farmhouse designs or metallic ribbon for glam Christmas versions.
Step 5: Test the Lights
Turn on the lights and check for balanced illumination. If the lights fall to the bottom, gently reposition the bottle to encourage the string to settle more evenly inside.
Pro Tip: Frosted spray offers the most beautiful diffused glow, giving the bottle a premium finish that feels elevated and boutique-worthy. Solid paints create bold matte bottles but reduce the sparkle inside.
Why These Fairy Light Bottles Sell So Well
These glowing bottles create instant Christmas ambiance warm, cozy, and magical. They look like high-end décor you’d find in a boutique, but the material cost is low, which means excellent profit margins. Shoppers love pieces that feel handcrafted, gift-ready, and photogenic, especially during the holiday season.
Suggested Price Point
Single bottle: $15–$20
Set of 2: $28–$35
Premium painted or stenciled sets: $40–$45
Batching Tip
Prep all bottles at once by removing labels, cleaning, and spray-painting in batches. Once dry, the assembly steps lights in, ribbon on, embellishments added take only minutes per bottle.
Packaging Idea
Wrap each bottle in bubble wrap and place it inside a kraft wine bottle box. This protects the product and creates a beautiful, gift-ready presentation your shoppers will appreciate.
Variations
- Gold or champagne spray for glam Christmas décor
- Vinyl holiday quotes like “Believe,” “Joy,” or “Peace”
- Themed color sets such as frosted white, green, gold, or mixed metallics
How to Display Them at Markets
Wine bottle light décor sells best when displayed in a warm, inviting setup that shows how magical they look once illuminated.
- Arrange bottles on wooden crates (affiliate), tiered stands, or risers to create height and visual interest.
- Keep several bottles turned on so the soft glow draws customers in from across the aisle.
- A small sign that says “Try Me” or “Lights On” encourages interaction and gets shoppers closer to your booth.
- If you’re selling sets, tie pairs or trios together with ribbon so buyers can instantly see gift-ready options.
The cozy, glowing display helps customers imagine these bottles in their own homes and makes your booth feel festive and irresistible.
More Christmas Craft Ideas
50+ Christmas Crafts to Sell: DIY Handmade Ideas That Make Money