DIY Jean Tote Bag: How to Turn Old Jeans into a Sturdy Shopping Bag
Transform your worn-out jeans into a practical, eco-friendly tote bag with this simple tutorial. Instead of tossing those old denims, give them new life as a sturdy shopping companion. This project requires minimal sewing skills and can be completed in just a few hours. The result? A unique, durable bag that showcases your creativity while reducing textile waste.
This website contains affiliate links. As an Amazon Associate, I earn from qualifying purchases. Please read our disclaimer.
Materials You’ll Need

- One pair of old jeans (adult size works best)
- Scissors or fabric shears
- Sewing machine (affiliate) (or needle and thread for hand sewing)
- Matching thread (denim/blue recommended)
- Pins
- Measuring tape or ruler
- Seam ripper
- Iron (optional but helpful)
- Decorative elements (optional): patches, buttons, embroidery floss
Step 1: Select and Prepare Your Jeans
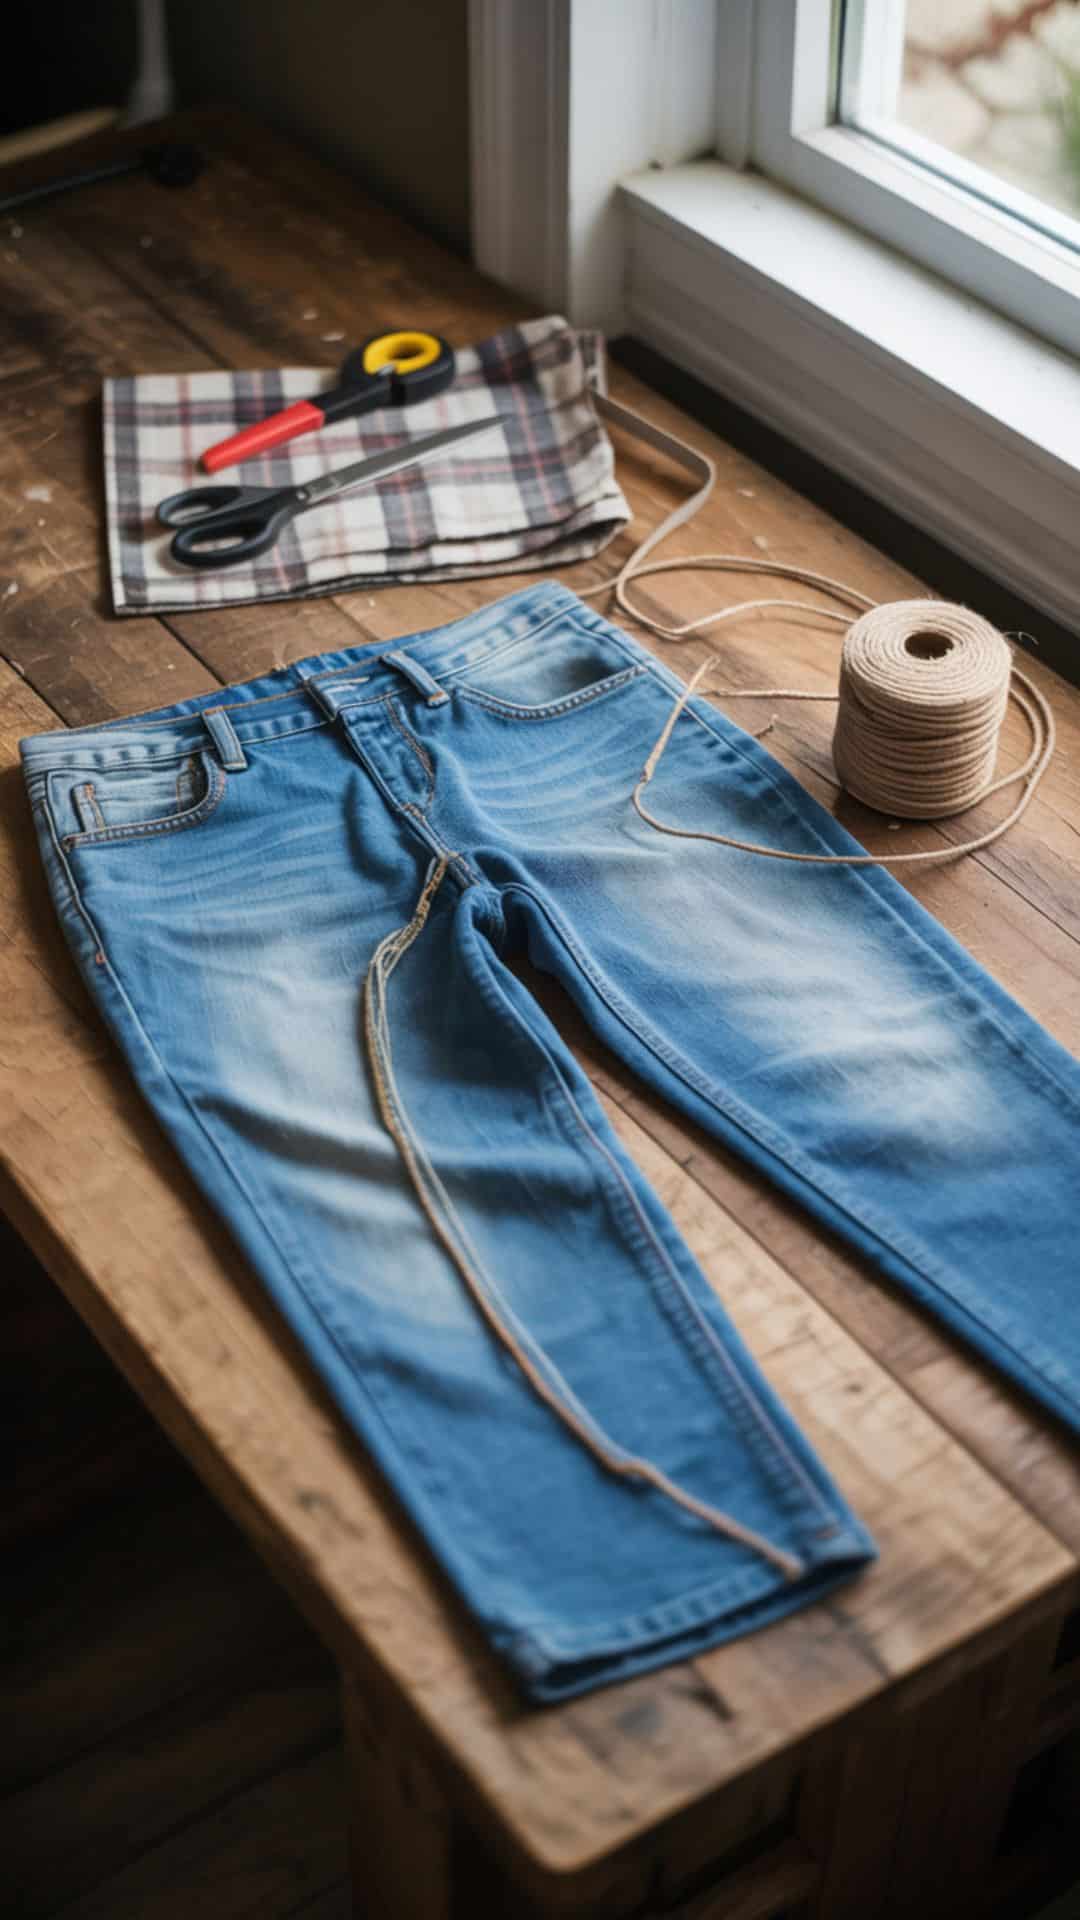
Choose a sturdy pair of jeans that isn’t too worn out. While rips and tears can add character, you’ll want the denim to be strong enough to hold items. Wash and dry your jeans before starting to ensure they’re clean and won’t shrink after you’ve created your bag.
Pro Tip: Jeans with interesting details like unique pocket designs, embroidery, or patches make for more distinctive tote bags. Consider using these features as decorative elements on your finished bag.
Step 2: Cut Off the Pant Legs

Lay your jeans flat on a work surface. Measure from the waistband down to your desired bag length (typically 14-16 inches) and mark a straight line across both legs. Make sure both sides are even by measuring carefully.
Using sharp scissors, cut straight across both legs following your marked line. Set aside the cut-off legs – you can use this fabric later for handles or decorative elements.
For a more polished look, use a ruler or measuring tape to ensure your cut is perfectly straight. An uneven bottom edge will be noticeable on your finished tote bag.
Step 3: Tear Out the Inner Seam

How to Use a Seam Ripper Effectively
Now you’ll need to open up the inner seam at the crotch area to create a flat front and back for your bag. Using your seam ripper, carefully tear out the inner seam that runs from the front to the back of the jeans.
- Insert the pointed end of the seam ripper under a stitch
- Push the blade against the thread until it cuts
- Move to the next stitch and repeat
- Once several stitches are cut, gently pull the fabric to separate
- Continue until the entire inner seam is opened
This step creates the flat front and back panels of your tote bag. Take your time to ensure you don’t damage the surrounding fabric.
Step 4: Trim the Crotch Fabric

After opening the inner seam, you’ll notice curved fabric at the crotch area. To create a flat front and back for your tote bag, you’ll need to trim away these curves.
Lay the jeans flat and smooth out any wrinkles. Draw a straight line across the bottom where you want your bag to end. Using sharp scissors, carefully trim away the curved fabric to create straight edges that will form the bottom of your bag.
Be careful not to cut too much fabric. It’s better to trim conservatively and adjust later if needed. Cutting too much can reduce the size and capacity of your finished bag.
Step 5: Sew the Bottom of the Bag
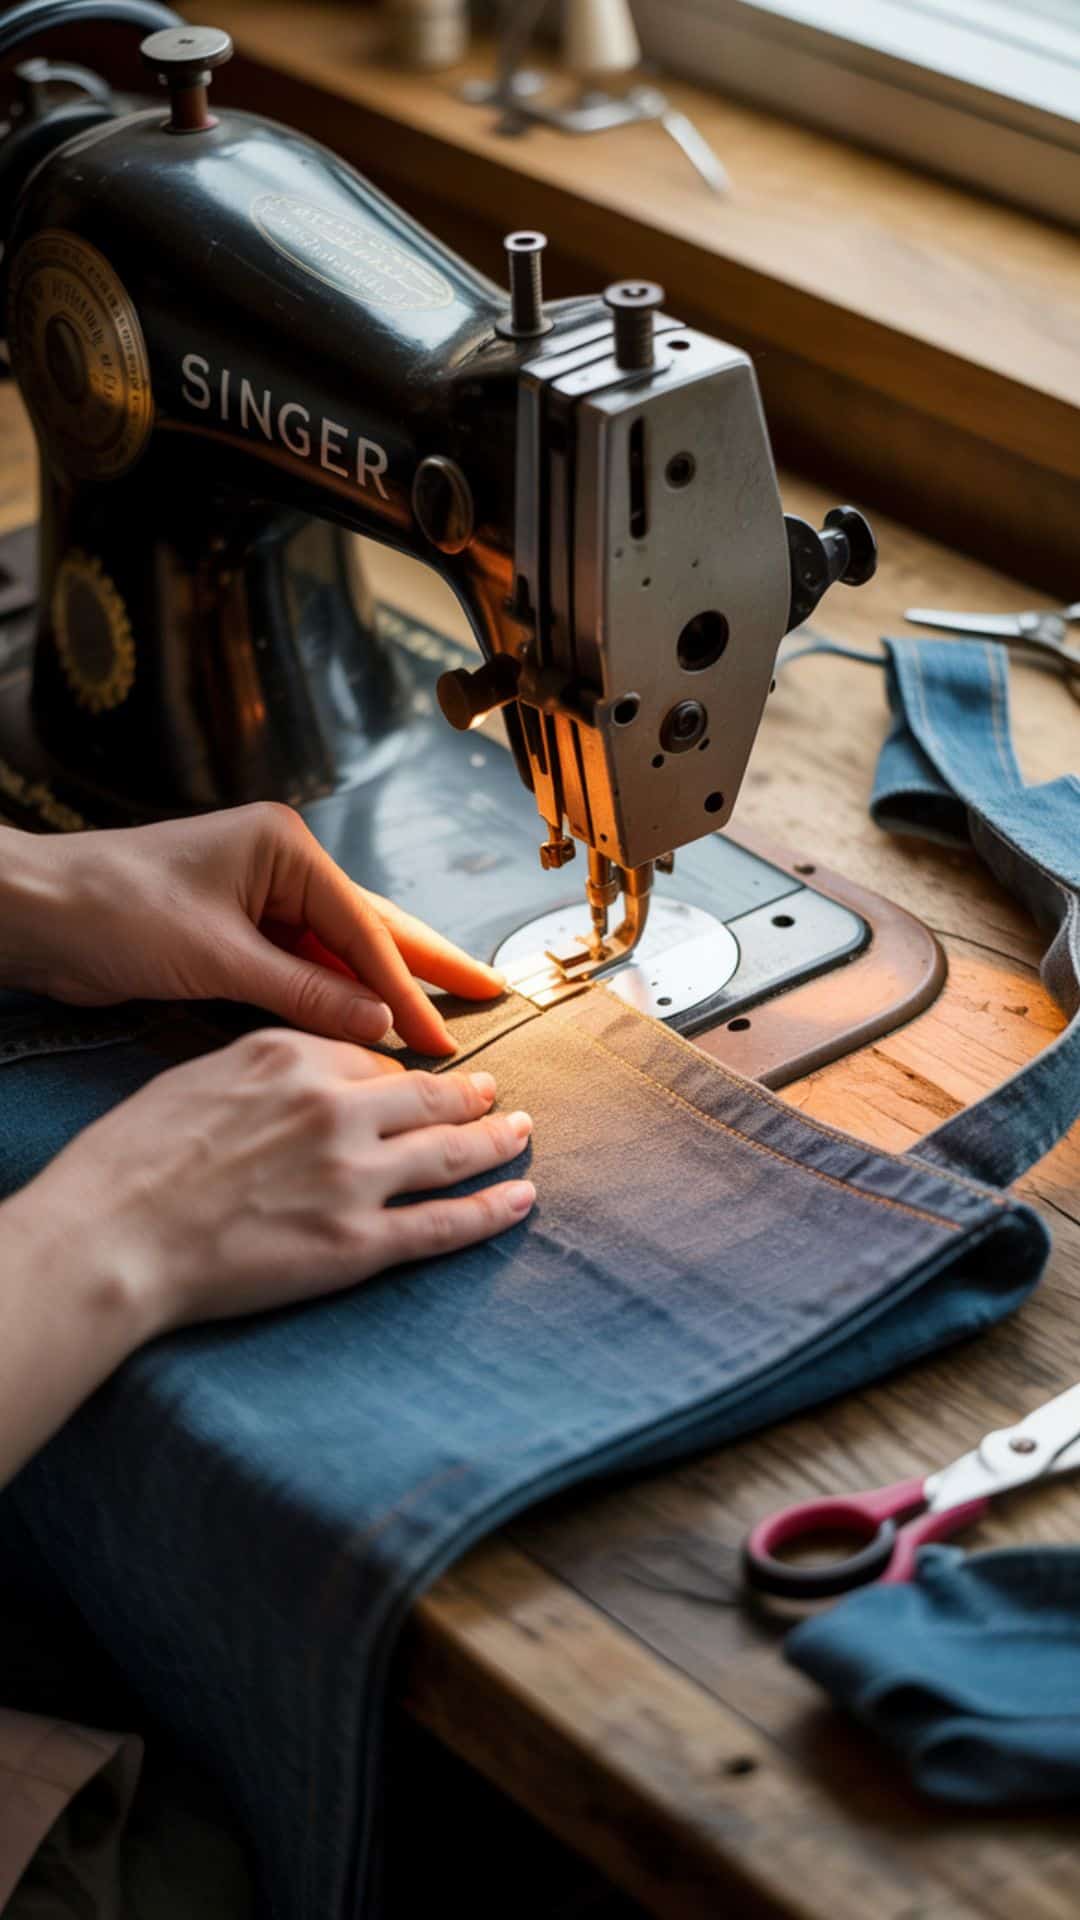
With the right sides of the fabric facing together, pin the front and back pieces along what will become the bottom of your bag. This is where you’ve trimmed the crotch area to create a straight line.
Creating a Durable Bottom Seam
Using your sewing machine (or needle and thread), sew a straight seam along the pinned edge. For extra durability, sew a second line of stitching about 1/4 inch away from your first line. This reinforcement is crucial since the bottom of the bag will bear the most weight.
“Double-stitching the bottom seam is essential for a sturdy tote that can handle groceries or books. Don’t skip this reinforcement step!”
– Experienced Upcycler
Optional: Creating a Flat Bottom
For a bag that stands up better when placed on a surface, you can create a flat bottom:
- With the bag inside out, pinch the bottom corners to form triangles
- Measure and mark about 2 inches from the point of each corner
- Sew straight across each corner at your marked line
- Trim excess fabric, leaving about 1/2 inch seam allowance
Step 6: Make and Attach the Handles
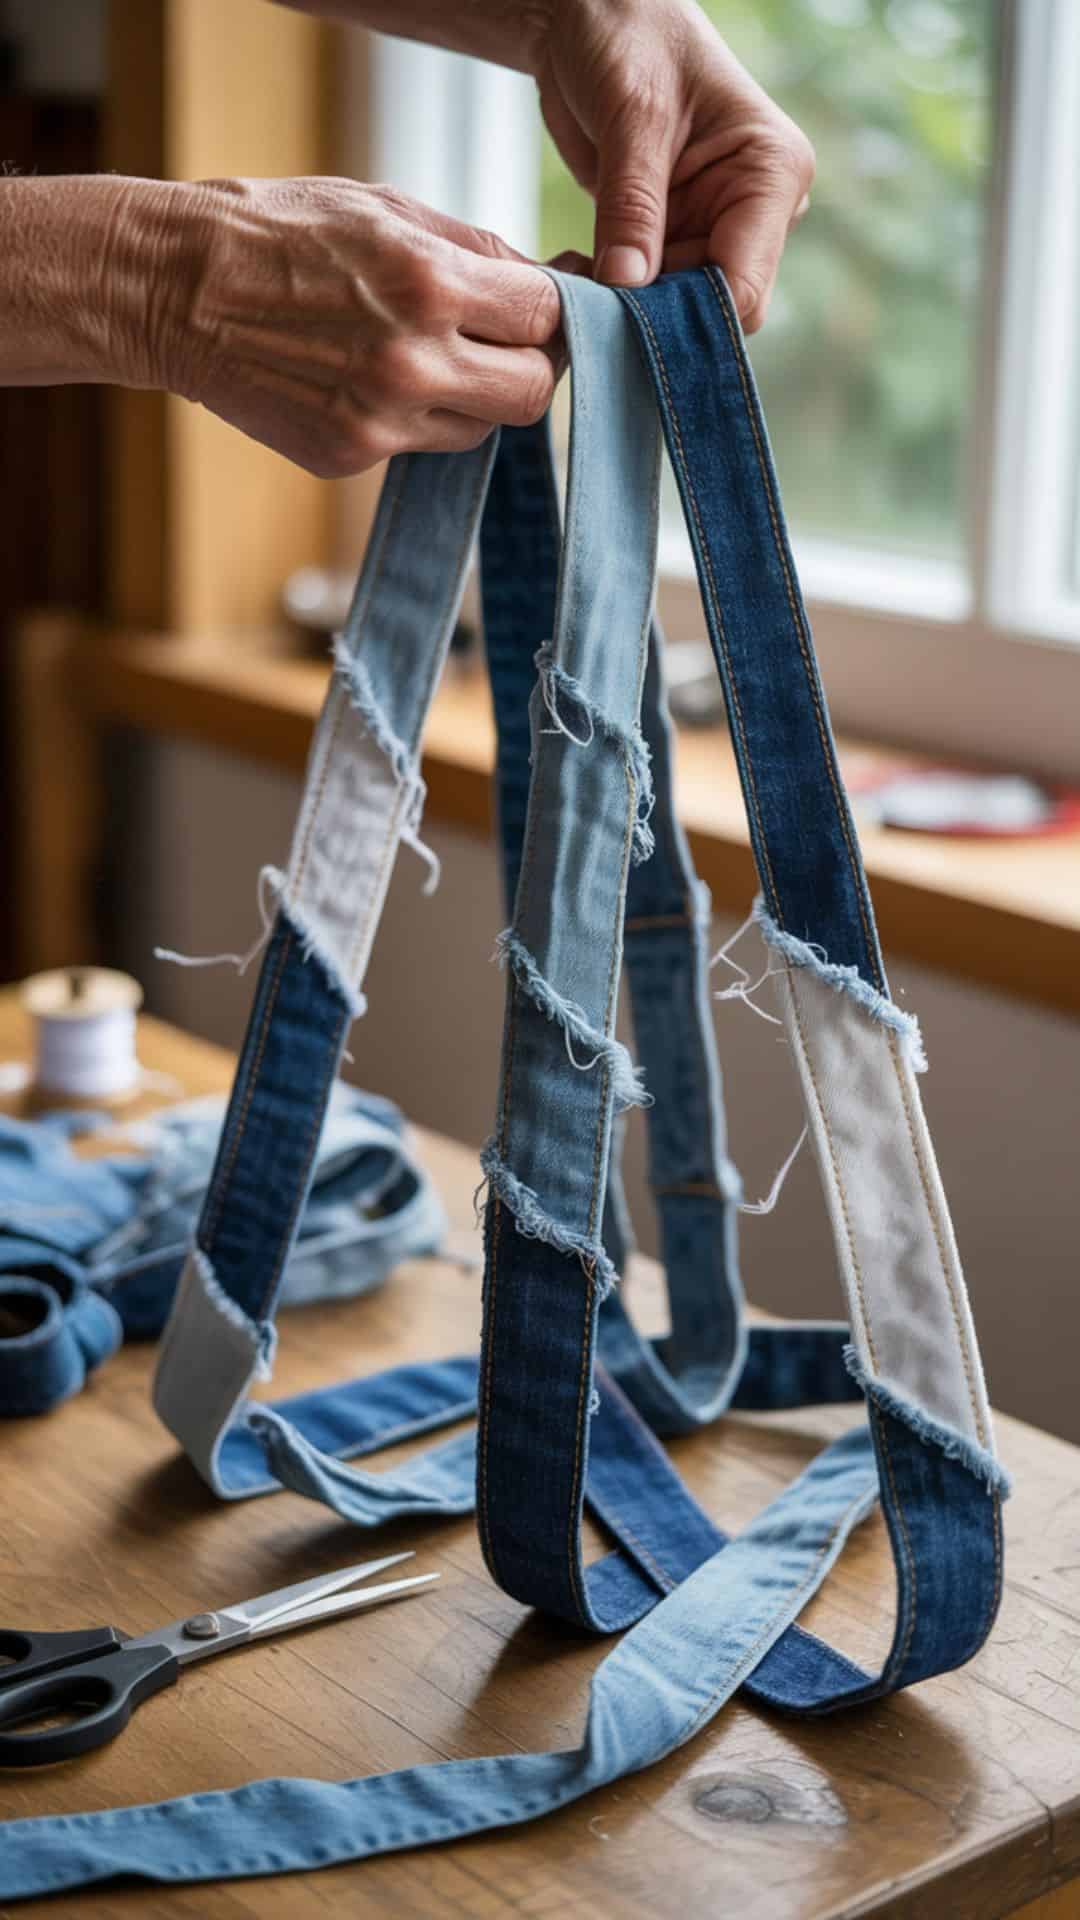
You can create handles from the leftover pant legs or use contrasting fabric for a unique look. For standard tote handles, you’ll need two strips of fabric.
Creating Sturdy Handles
- Cut two equal strips of fabric, approximately 4 inches wide by 22 inches long
- Fold each strip in half lengthwise with right sides together
- Sew along the long open edge and one short end
- Turn the tube right side out (a safety pin can help with this)
- Press flat with an iron if available
- Topstitch around all edges for a finished look and added strength
Attaching Handles to Your Bag
Position your handles on the inside of the bag’s waistband, spacing them evenly. For a standard tote, place each handle end about 3-4 inches from the side seams. Pin in place.
Sew the handles securely using a box stitch with an X in the middle for maximum strength. This reinforcement is crucial as the handles will bear the weight of your bag’s contents.
Customization Ideas
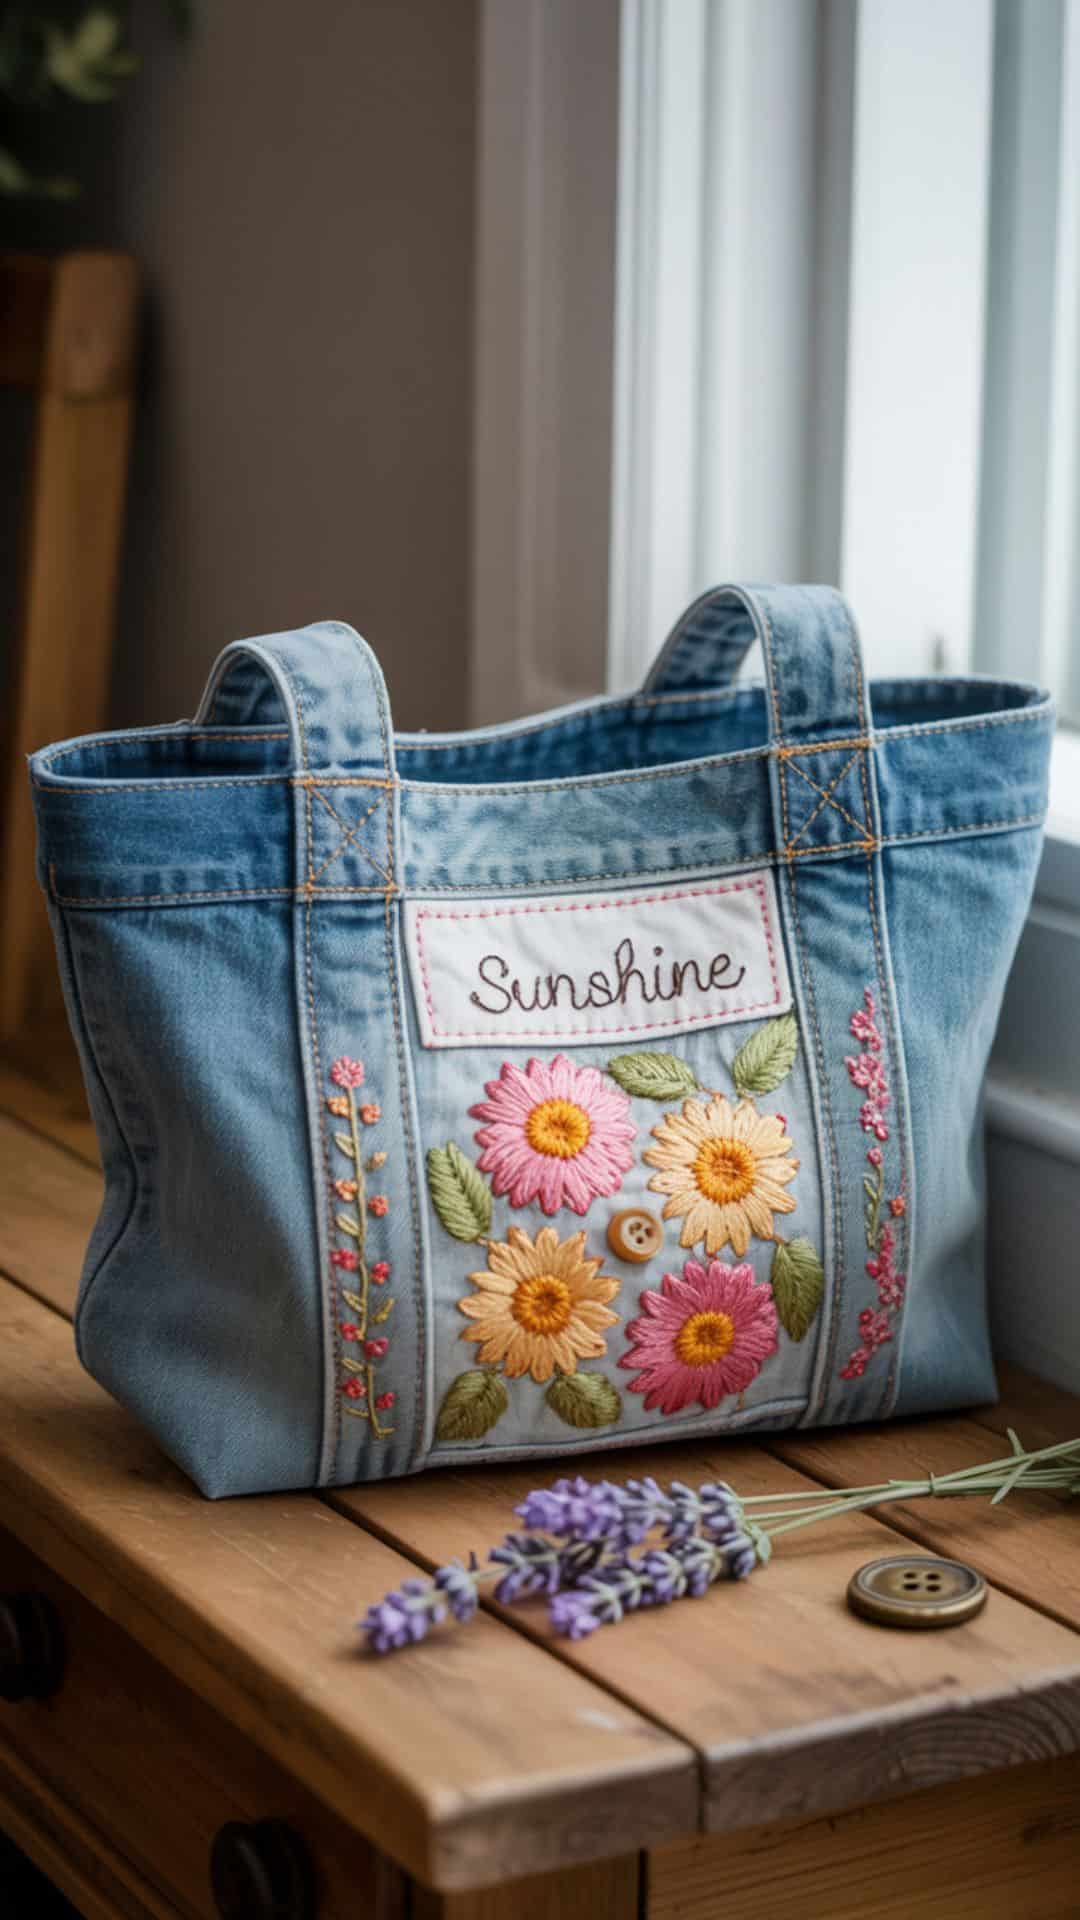
Make your jean tote bag unique by adding personal touches. Here are some ideas to customize your creation:
Decorative Elements
- Add iron-on patches or appliqués
- Embroider designs or your initials
- Attach decorative buttons or studs
- Sew on colorful fabric scraps
- Use fabric paint for custom designs
Functional Additions
- Add an inside pocket from the jean’s back pocket
- Sew a zipper closure at the top
- Create compartments with additional fabric
- Add a key clip or carabiner
- Reinforce the bottom with cardboard or plastic
Creative Idea: Use the original jean pockets as external pockets on your tote bag. They’re perfect for holding your phone, keys, or transit card for easy access!
Caring for Your DIY Jean Tote Bag
Your upcycled jean tote bag is designed to be durable, but proper care will extend its life even further. Here’s how to keep it looking great:
- Spot cleaning: For small stains, use a damp cloth with mild soap to gently scrub the affected area
- Machine washing: When necessary, wash your bag inside out on a gentle cycle with cold water
- Air drying: Hang to dry rather than using a dryer to prevent shrinkage
- Reinforcement: Check stitching periodically and reinforce any areas that show wear
- Storage: Store flat or hanging when not in use to maintain shape
Denim typically becomes softer and develops character with use and washing. Your bag may develop a natural worn look over time, adding to its unique appeal.
Share Your Creation!
Now that you’ve created your unique jean tote bag, it’s time to show it off! We’d love to see your creative upcycling project and how you’ve personalized it.
“Every time you upcycle an old item, you’re giving it a second chance while reducing waste. Your creativity helps our planet!”
Frequently Asked Questions
Can I make a jean tote bag without a sewing machine?
Yes! While a sewing machine makes the process faster, you can hand-sew your jean tote bag using a strong needle and denim thread. Use a backstitch for strength, especially on the bottom seam and handle attachments.
How can I make my DIY jean tote bag waterproof?
While denim isn’t naturally waterproof, you can add water resistance by applying a fabric waterproofing spray designed for outdoor fabrics. Alternatively, you can line your bag with waterproof fabric like ripstop nylon or oilcloth.
What’s the best way to clean my jean tote bag?
For regular cleaning, spot clean with a damp cloth and mild soap. If your bag needs a deeper clean, wash it inside out on a gentle cycle with cold water and air dry. Avoid bleach and harsh detergents that can damage the denim.
Crafts you can make in under 30 minutes to sell for profit!
Wrapping Up: Your Sustainable Fashion Statement
By creating your own DIY jean tote bag, you’ve taken a meaningful step toward sustainable living. You’ve transformed what might have been textile waste into a practical, personalized accessory that reflects your creativity and environmental consciousness.
This project is just one example of how upcycling can give new life to old items. Your handmade tote not only serves a practical purpose but also starts conversations about reducing waste and rethinking our relationship with clothing and accessories.
We hope you’ve enjoyed this creative journey and that your new jean tote bag serves you well for years to come!