Crafts to Make Fast and Sell Beginners and Seasoned Crafters
If you’ve ever thought about turning your creativity into a side hustle, crafts to make fast and sell are one of the best ways to start. These projects are beginner-friendly, affordable to make, and in high demand at markets and online shops. The best part? Each one can be finished in 30 minutes or less.
Whether you’re stocking your craft fair booth, launching an Etsy shop, or just testing the waters of selling handmade, this list will give you plenty of ideas. Each craft comes with tips on pricing, batching, packaging, and even variations so you can stand out from the crowd.
This website contains affiliate links. As an Amazon Associate, I earn from qualifying purchases. Please read our disclaimer.
Crafts You Can Make Fast: Beginner-Friendly & Practical Ideas
If you’re short on time but still want to stock your shop or booth with handmade items, these quick projects are perfect. Each of these crafts can be completed in 30 minutes or less, yet they look polished, trendy, and ready to sell.
Soy Wax Candles in Jars or Tins
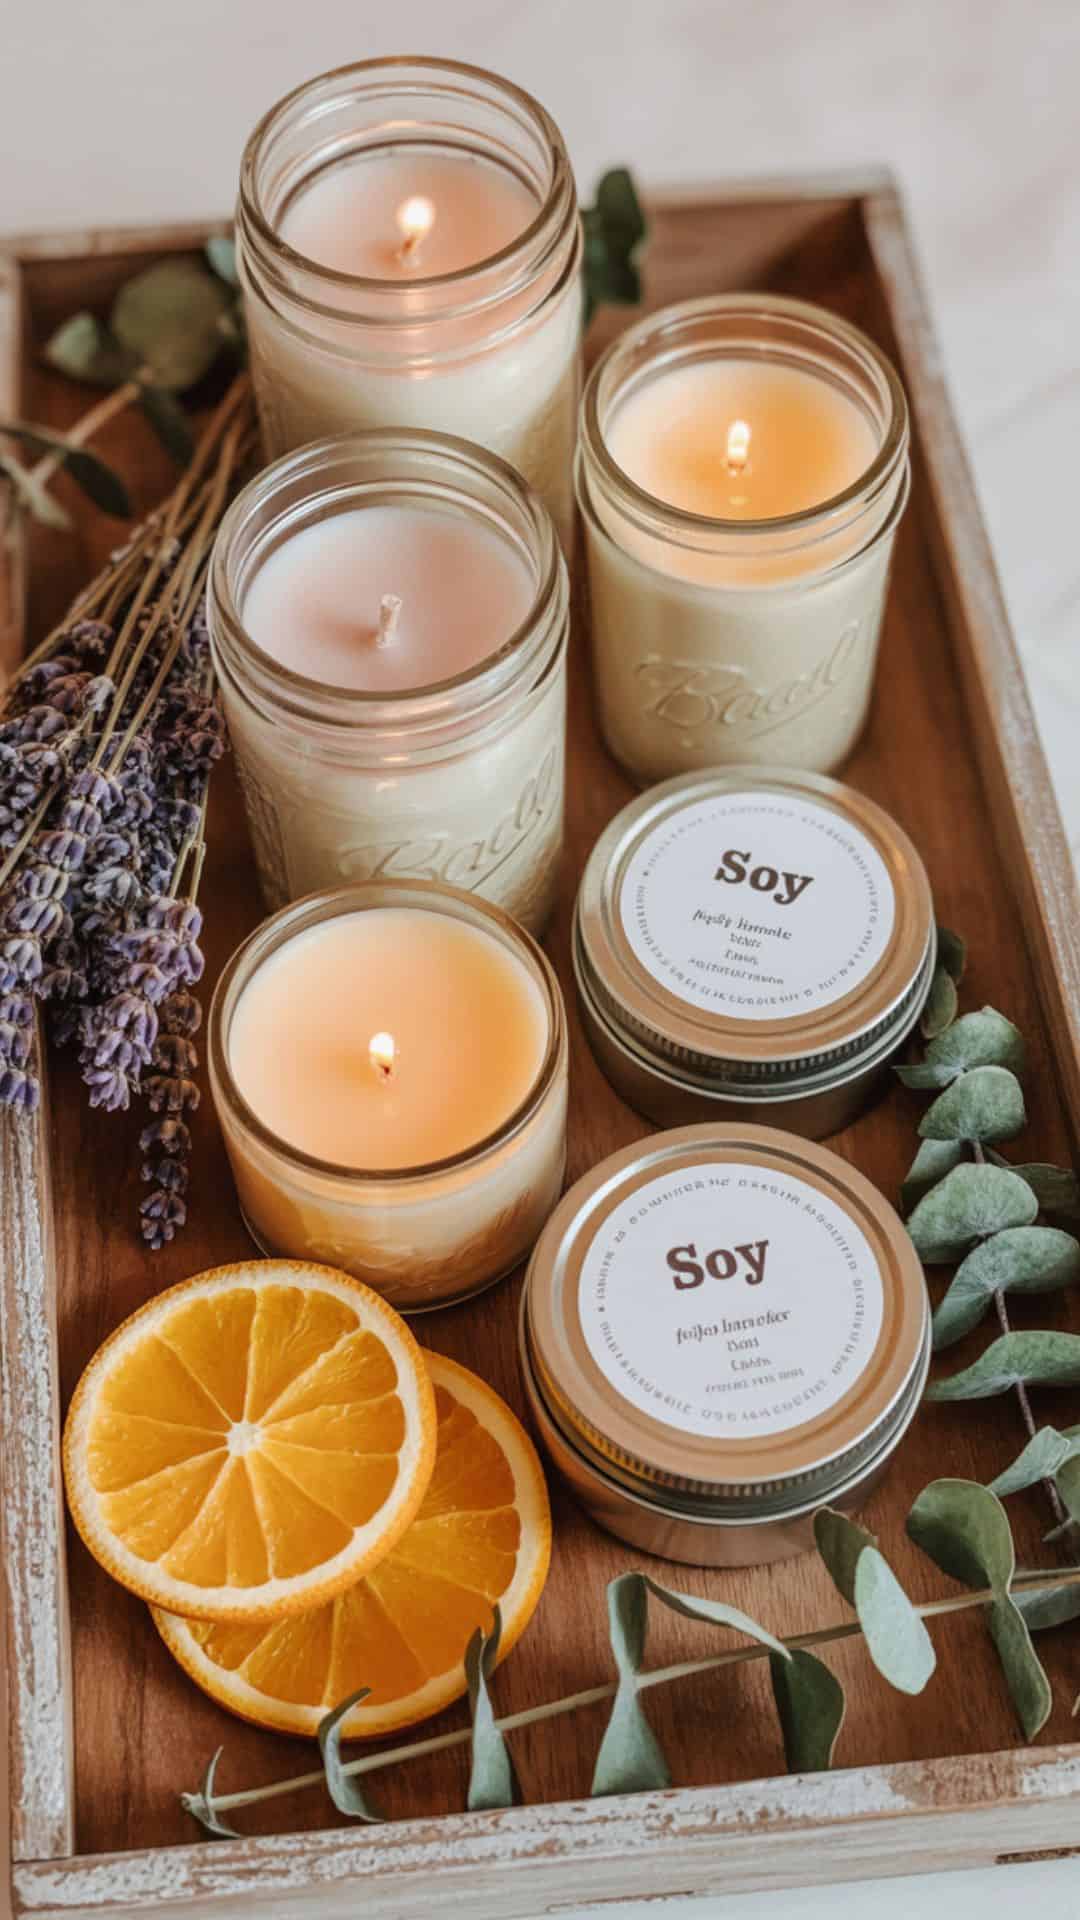
Soy wax candles are functional, giftable, and smell amazing. They’re one of the easiest crafts to make in batches, which means maximum profit in minimal time.
Materials Needed:
- 1 lb soy wax flakes
- Pack of 20 pre-tabbed candle wicks
- 6-12 Heat-resistant small jmason jars or tins
- 1 oz bottle of fragrance oil or essential oils
- Double boiler (or a heat-safe bowl over a saucepan)
- Wooden skewers, wick holders or chopstick (to hold wick in place)
Instructions:
- Melt the Wax – Heat soy wax flakes in a double boiler until fully melted.
- Set the Wick – Place a wick in the center of your jar/tin, securing it upright with a skewer across the top.
- Add Fragrance – Stir in your chosen fragrance or essential oils.
- Pour the Wax – Carefully pour the melted wax into the jar.
- Cool & Trim – Let the candle cool until solid, then trim the wick to ¼ inch.
Why Soy Candles Sell: Candles are evergreen sellers because they’re both practical and giftable. People buy them for home use, but also as quick presents, making them a year-round profit item.
Suggested Price Point:
- Small jar (4 oz): $8–$10
- Medium jar (8 oz): $15–$18
- Bundle set of 3 minis: $20–$25
Batching Tip:
Melt a larger batch of wax and prepare 6–8 jars at once you’ll have a full product line in under an hour.
Packaging Idea:
Tie kraft paper tags around the jar neck with twine, or use custom labels with scent names like “Cozy Vanilla” or “Lavender Dreams.” Sets wrapped in small gift boxes sell especially well during the holidays.
Variations:
- Add dried herbs (lavender, rosemary) for a rustic look.
- Layer two scents for a “surprise” burn.
- Try colored wax for seasonal collections.
Pro Tip: Always pour wax at a slightly cooler temperature (around 135°F) to avoid sinkholes and uneven tops.
Beaded Stretch Bracelets
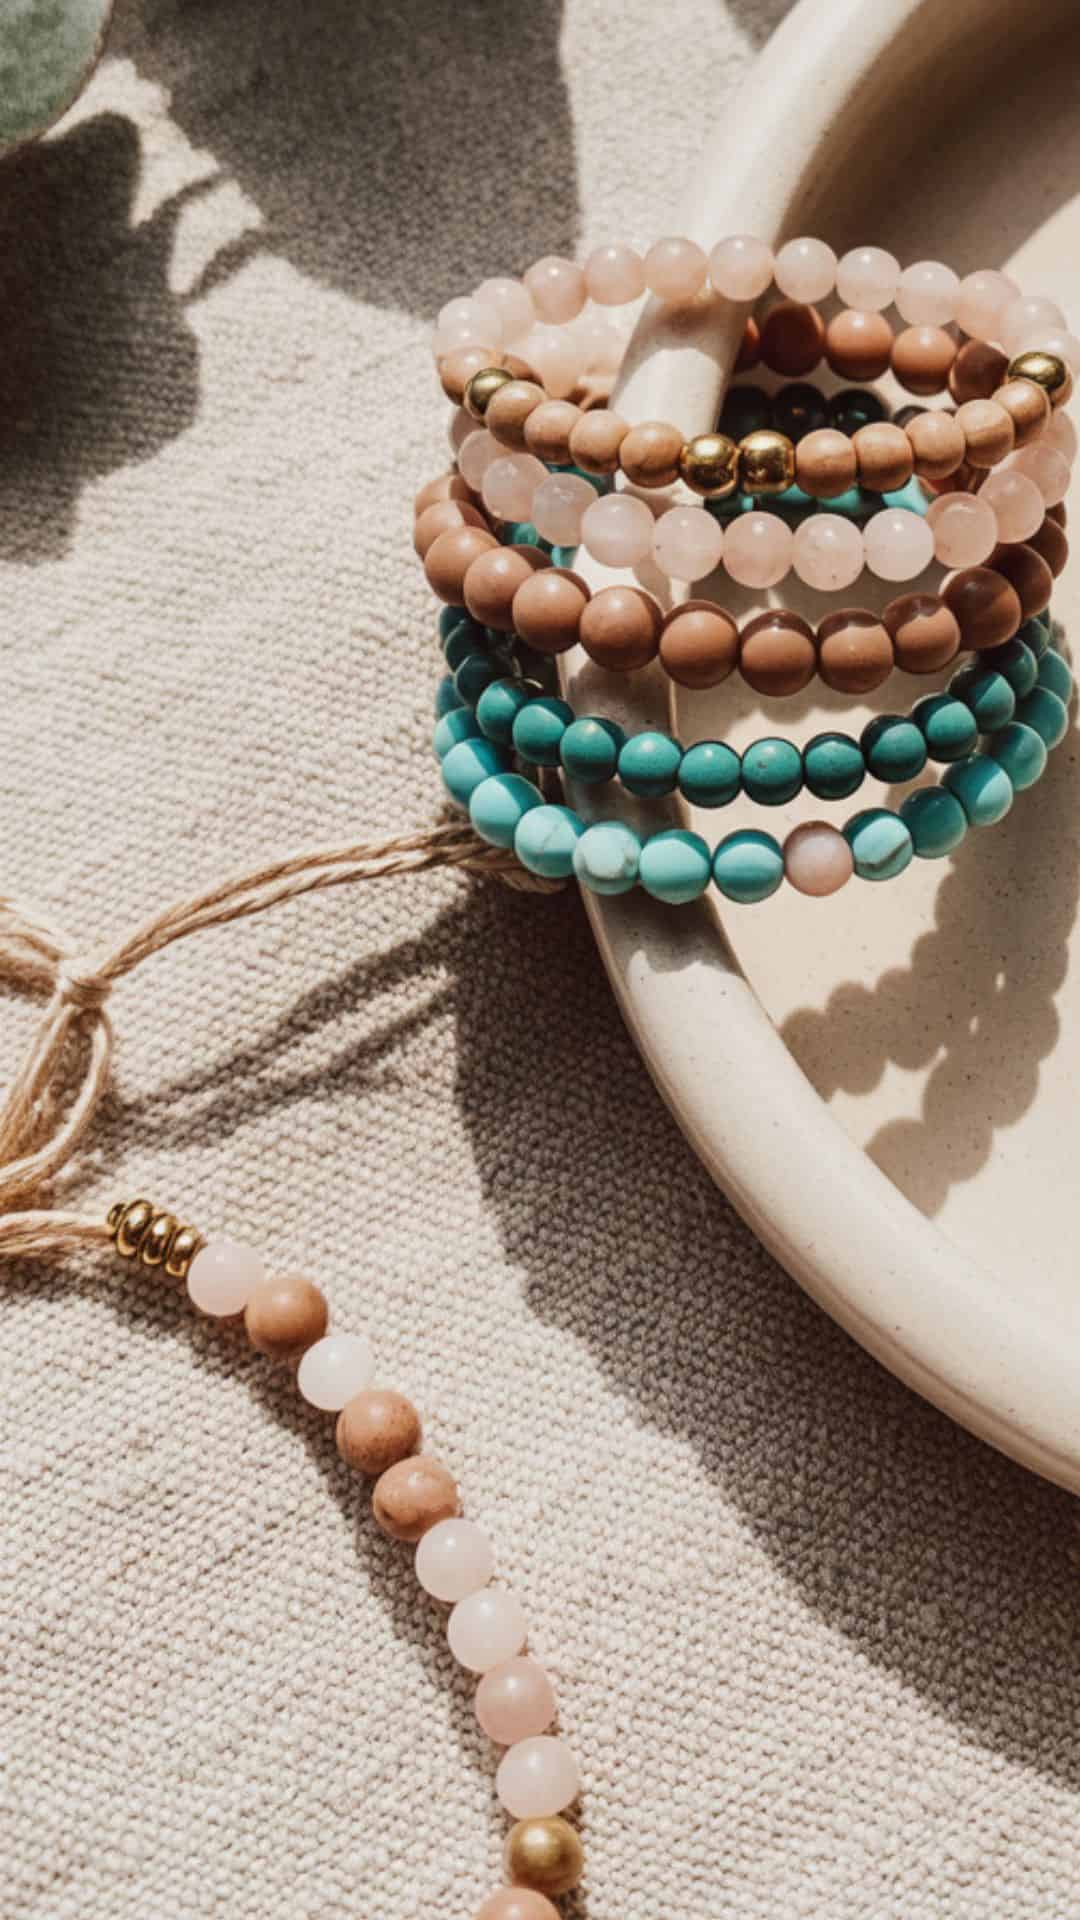
Beaded bracelets are stylish, customizable, and ridiculously easy to batch-make. They’re the perfect impulse buy at markets or online.
Materials Needed:
- 10 yards clear stretch cord
- Assorted beads (gemstone, glass, wood, or acrylic)
- Scissors
- Jewelry glue (optional, to secure knot)
- Small jewelry pliers and scissors
Instructions:
- Cut Cord – Trim a 10-inch piece of stretch cord.
- String Beads – Slide beads in your chosen pattern or mix of textures.
- Test Fit – Wrap around your wrist to check sizing.
- Knot Securely – Tie a double or triple knot; dab glue for security.
- Trim Ends – Snip excess cord and it’s ready to sell.
Why This Sells: Bracelets are affordable, trendy, and appeal to all ages. People love stacking multiple styles, which encourages repeat sales.
Suggested Price Point:
- Single bracelet: $8–$15
- Stack of 3: $20–$25
Batching Tip: Pre-sort beads into “style kits” (boho, minimal, colorful). You’ll whip through production faster and create mini collections.
Packaging Idea: Slide bracelets onto kraft jewelry cards or slip into organza pouches. Bundles tied with ribbon feel more premium.
Variations:
- Use birthstone beads for personalized pieces.
- Add letter beads to create names or affirmations.
- Try seasonal color palettes (pastels for spring, jewel tones for winter).
Pro Tip: Stretch cord can loosen over time use a surgeon’s knot for extra holds. It’s a smart little project that feels high-end but takes just minutes to create.
Learn more about making beaded bracelets in my article that teaches you how to make DIY minimalist Christmas beaded bracelets for holiday gifting or selling.
Decorated Mason Jars
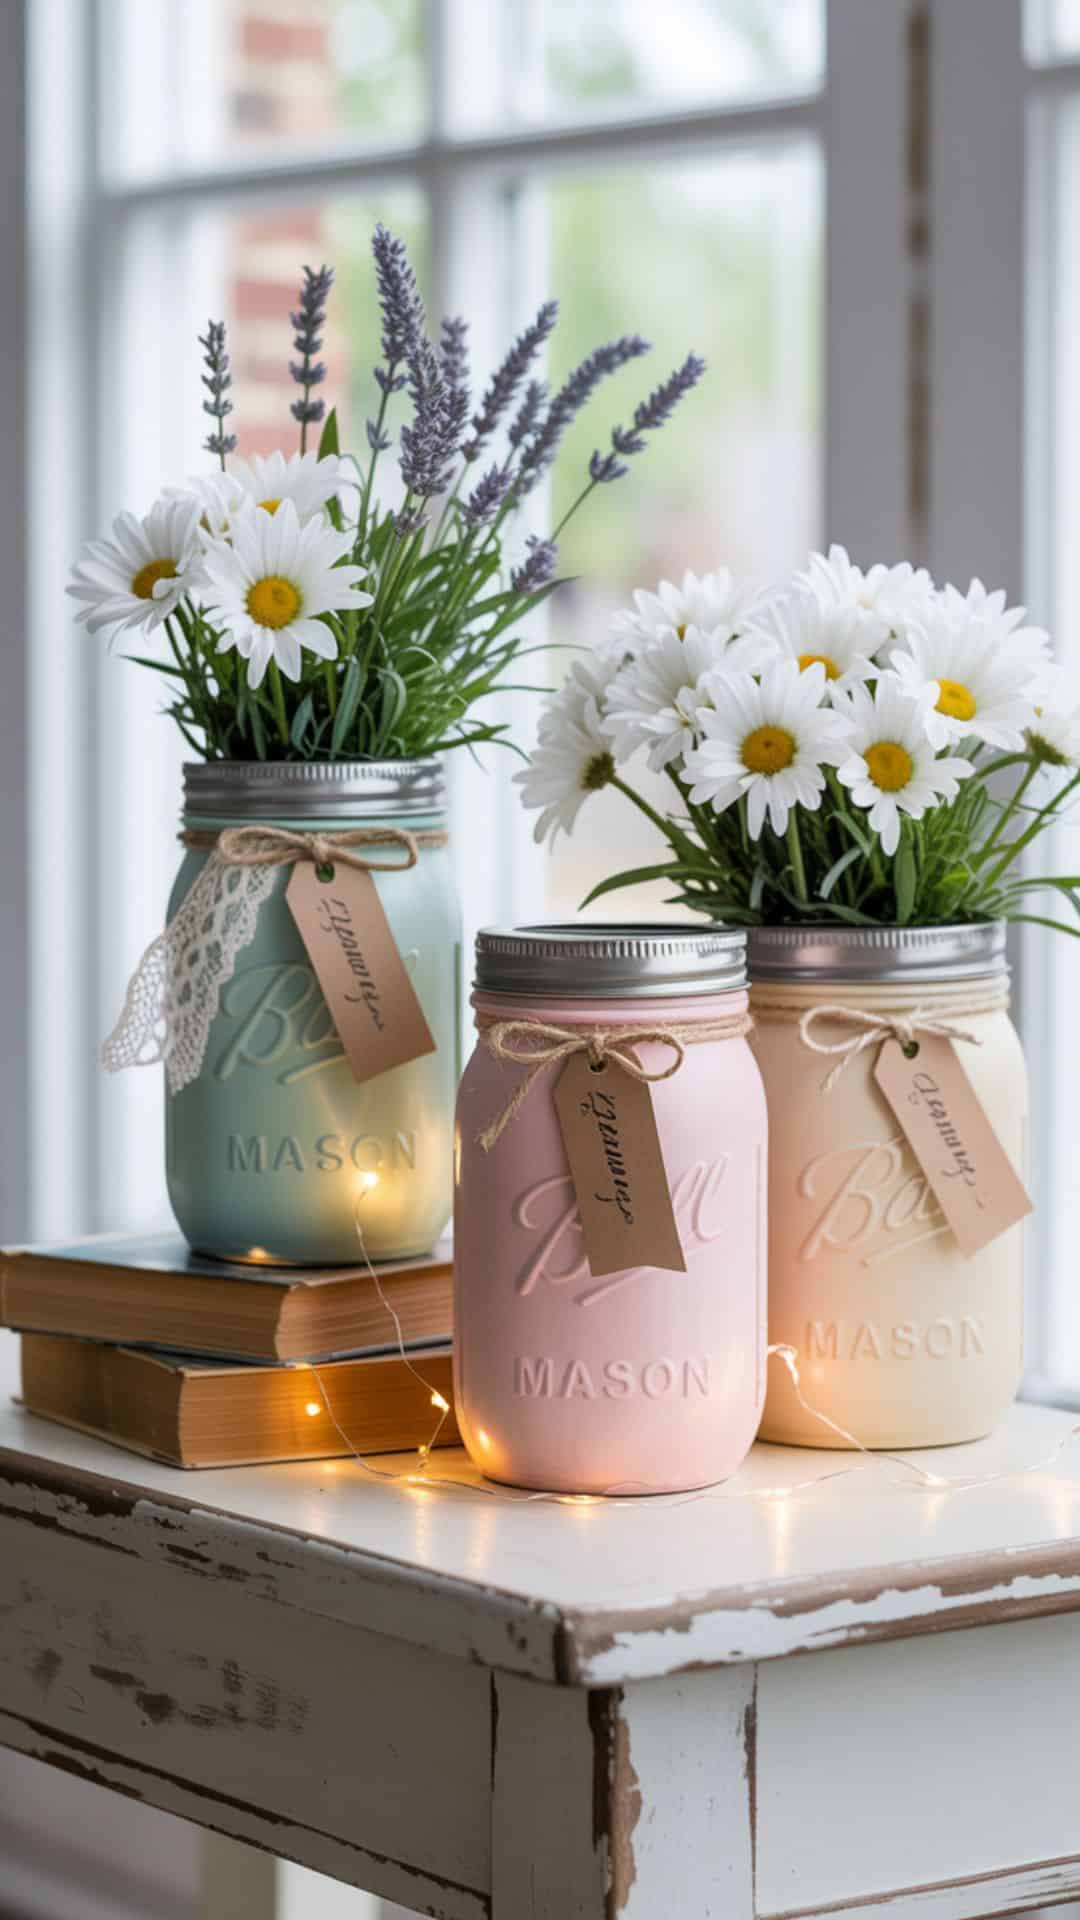
Decorated jars are endlessly versatile use them as vases, candle holders, or organizers. They’re quick to make and sell beautifully as sets.
Materials Needed:
- 6-12 mason jars (small to medium)
- Jute twine, spools of lace, or ribbon
- Hot glue gun and glue sticks
- Optional: paint, chalk paint, or glass markers.
Instructions:
- Clean Jars – Make sure jars are washed and dry.
- Wrap & Glue – Secure twine, lace, or ribbon around the neck or body of the jar.
- Optional Paint – Add a coat of chalk paint or light distressing for a farmhouse vibe.
- Embellish – Tie a bow or glue on a charm for personality.
Why This Sells: People love home décor that doubles as gifts. These jars are low-cost and customizable, making them profitable even at low price points.
Suggested Price Point:
- Single jar: $8–$10
- Set of 3: $20–$25
Batching Tip: Prep jars in batches paint or wrap all at once, then finish with details assembly-line style.
Packaging Idea: Sell sets bundled in rustic wooden crates (affiliate) or tied together with ribbon. Perfect for seasonal gift displays.
Variations:
- Paint jars in pastel shades for spring or metallics for Christmas.
- Add chalkboard labels for personalization.
- Fill jars with fairy lights or faux flowers to sell as ready-made décor.
Pro Tip: Use matte chalk paint for the trendiest farmhouse finish it sticks well to glass and doesn’t require priming.
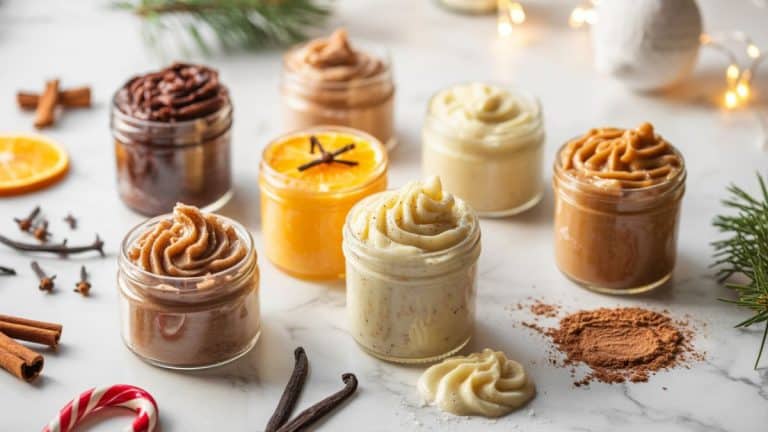
Bath Salts or Sugar Scrubs

Bath salts and scrubs are market darlings because they feel indulgent, smell divine, and make effortless gifts. You can whip up a batch in minutes and sell them in adorable jars for a boutique-ready product line.
Materials Needed:
- 2 lbs Epsom salt or granulated sugar
- 8 oz carrier oil (coconut, almond, or jojoba)
- 2-3 drops Essential oils (lavender, peppermint, vanilla)
- 12 Pack of Small jars with lids
- Optional: dried flower petals, food-safe coloring
Instructions:
- Mix Base – Combine salt or sugar with a few tablespoons of carrier oil.
- Add Scents – Stir in essential oils to fragrance.
- Customize – Fold in dried petals or a touch of coloring for style.
- Jar & Label – Spoon into jars, seal, and decorate with labels.
Why This Sells: People love affordable luxuries, and bath products hit that sweet spot. They’re inexpensive to produce yet feel premium when packaged beautifully.
Suggested Price Point:
- Small jar (4 oz): $6–$8
- Medium jar (8 oz): $12–$15
- Gift set of 3 minis: $18–$22
Batching Tip: Mix one large bowl of salts, then portion into jars. It’s just as easy to make 12 as it is to make 2.
Packaging Idea: Tie kraft paper tags around jar necks with twine or satin ribbon. A spoon tied to the jar adds a luxe, spa-day feel.
Variations:
- Lavender + chamomile salts for relaxation.
- Sugar scrub with vanilla + coconut oil.
- Holiday spice blends with cinnamon and clove.
Pro Tip: Always mix essential oils with carrier oil first before adding to salts this prevents clumping and uneven scent distribution.
Lip Balms
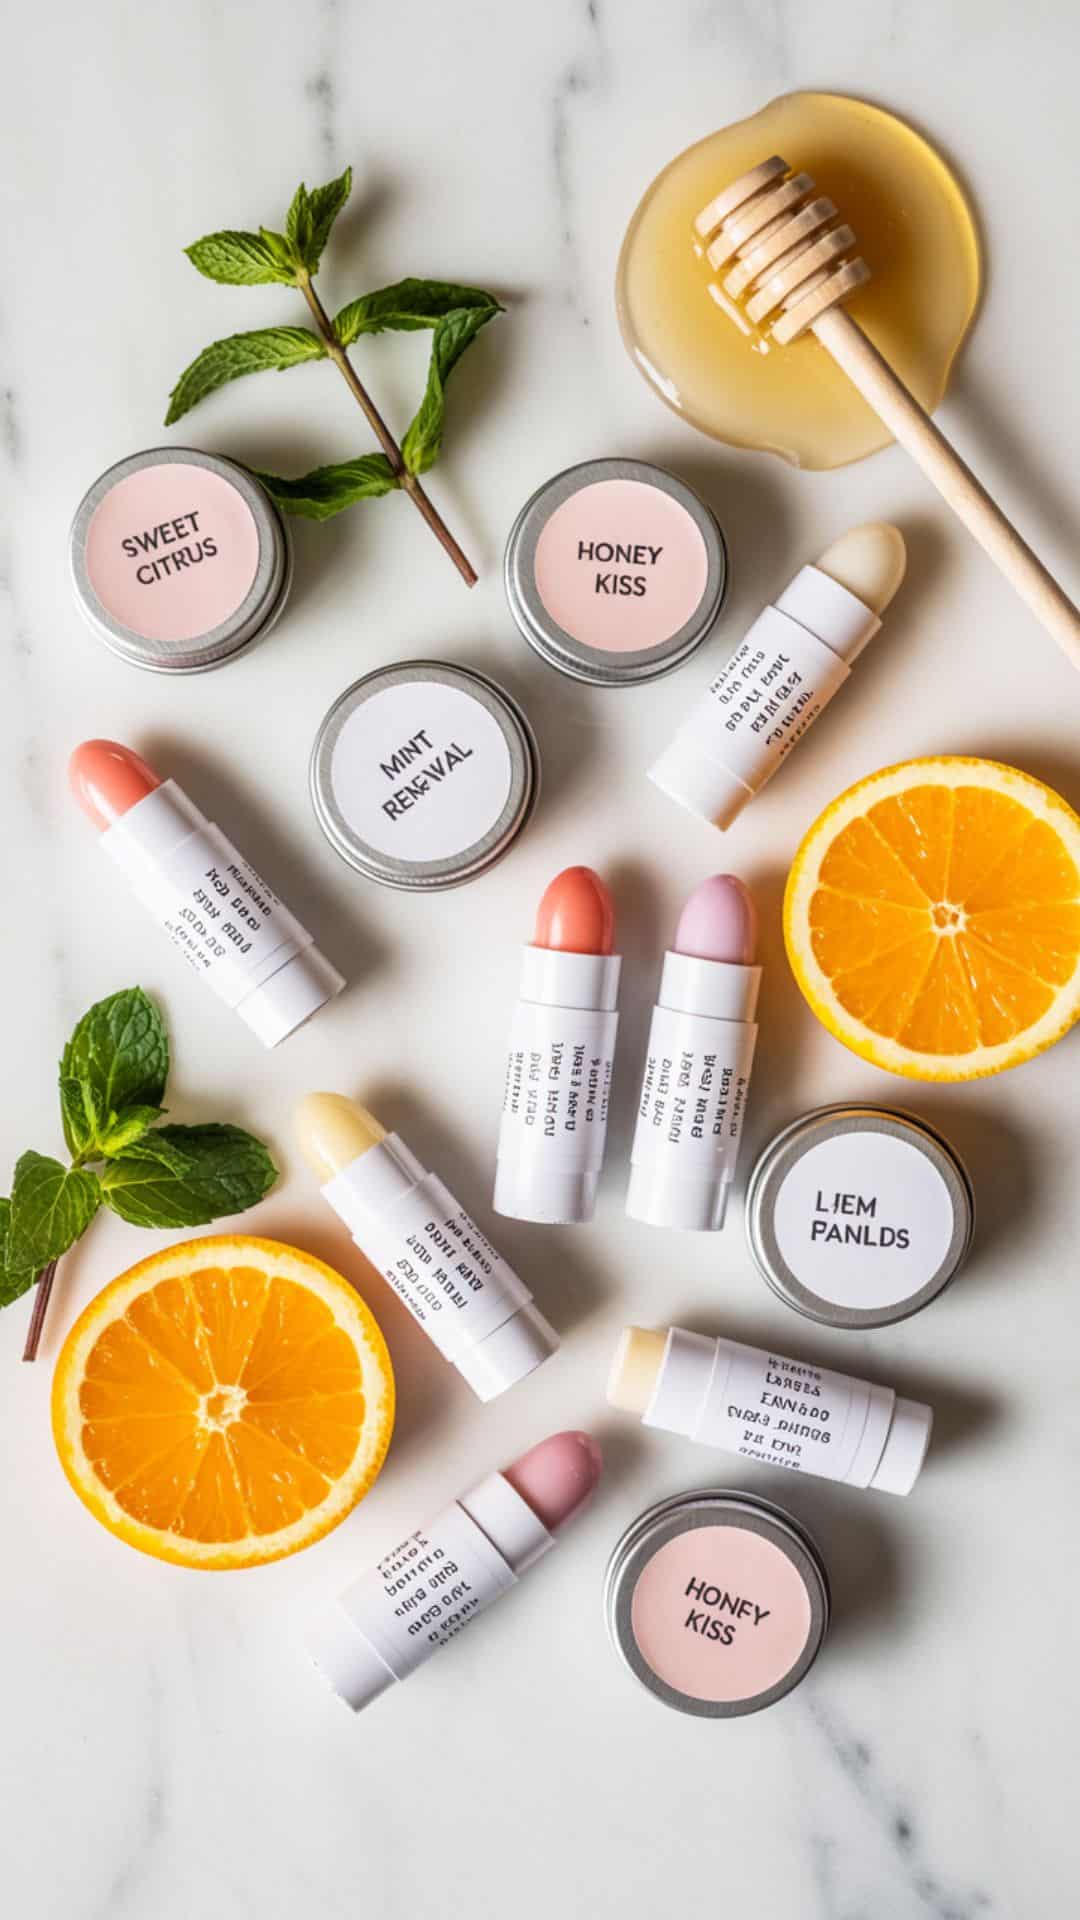
Homemade lip balms are a genius quick craft they’re natural, giftable, and can be made in dozens at once. They’re always popular at markets because they’re practical and affordable.
Materials Needed:
- 1 lb Beeswax pellets (affiliate)
- 16 oz Coconut oil or shea butter
- Essential oils (peppermint, vanilla, citrus)
- 50 Lip balm tubes or tins
- Double boiler
Instructions:
- Melt Base – Heat beeswax and oil together until melted.
- Add Flavor – Stir in essential oils.
- Pour – Transfer into tins or tubes quickly before cooling.
- Set – Allow to harden for 30 minutes.
Why This Sells: Lip balms are consumables people come back for more once they’ve tried them.
Suggested Price Point:
- Single balm: $3–$4
- Bundle of 3: $8–$10
Batching Tip: Melt a big batch and pour into 20+ tubes at once it takes no extra time.
Packaging Idea: Add cute custom labels or sell in mini organza bags for bundles.
Variations:
- Holiday flavors (peppermint, cinnamon).
- Floral blends (lavender, rose).
- Kids’ flavors (bubblegum, strawberry).
Pro Tip: Keep tubes warm before pouring the balm sets smoother and won’t tunnel.
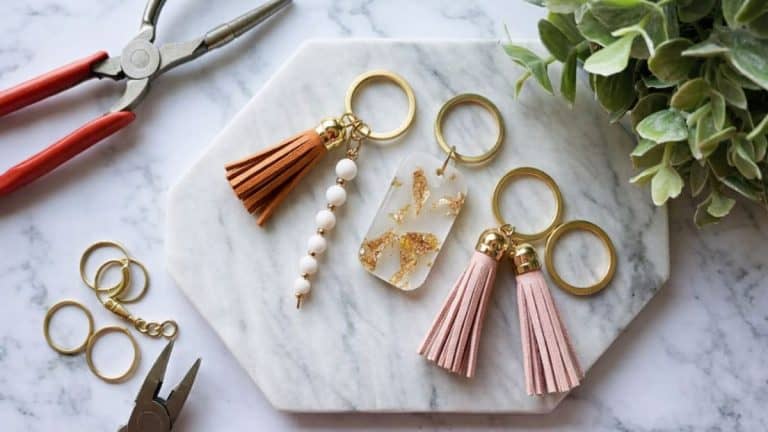
Keychains or Bag Charms

Keychains are the ultimate impulse buy fun, fast, and endlessly customizable. They’re low-cost, lightweight, and can be made in dozens of styles to match any trend.
Materials Needed:
- 50 Pack Keychain rings or lobster clasps
- Faux leather tassels or strips in assorted colors
- Beads, resin charms, or pom-poms assortment
- Jump rings & jewelry pliers
Why These Keyrings Sell: Small, affordable gifts always move fast at craft fairs. Keychains are also a great upsell alongside bigger items.
Suggested Price Point:
Single charm: $6–$10
- Luxe resin/metal styles: $12–$15
- Bundle set of 3: $18–$22
Variations:
- Zodiac or initial charms for personalization.
- Seasonal tassels (Christmas glitter, pastel spring).
- Faux leather strips in trending colors (sage, blush, mustard).
See the full article that shows how to make these DIY keyrings along with other variation ideas and complete list of supplies needed!
Mini Canvas Art or Affirmation Signs

Mini canvases are quick to paint and endlessly giftable. Whether you sell them as décor, motivational desk art, or seasonal wall pieces, they’re the kind of little craft that feels boutique yet takes under 30 minutes.
Materials Needed:
- Mini canvases (4×4 or 5×7)
- Acrylic paints and brushes
- Paint pens or stencils
- Optional: vinyl decals
- Mini wooden easels for display
Instructions:
- Paint Base – Apply a solid or ombré background color.
- Add Words or Design – Use paint pens or stencils for neat lettering.
- Detail It – Add simple accents like stars, flowers, or hearts.
- Seal (Optional) – Spray with a clear sealer for durability.
Why These Sell: Inspirational art is always popular people love picking up small décor that feels meaningful.
Suggested Price Point:
- Single mini: $8–$12
- Set of 3: $20–$25
Batching Tip: Paint all your backgrounds first, then add lettering once dry for faster turnaround.
Packaging Idea: Wrap in clear cellophane bags (affiliate) tied with ribbon, or display on tiny easels for a premium market setup.
Variations:
- Seasonal quotes (“Merry & Bright” or “Hello Fall”).
- Kids’ art with bright colors and fun shapes.
- Luxe look with metallic accents.
Pro Tip: Use metallic gold or silver paint pens they instantly elevate a canvas to look high-end.
No-Sew Scrunchies (Glue Method)
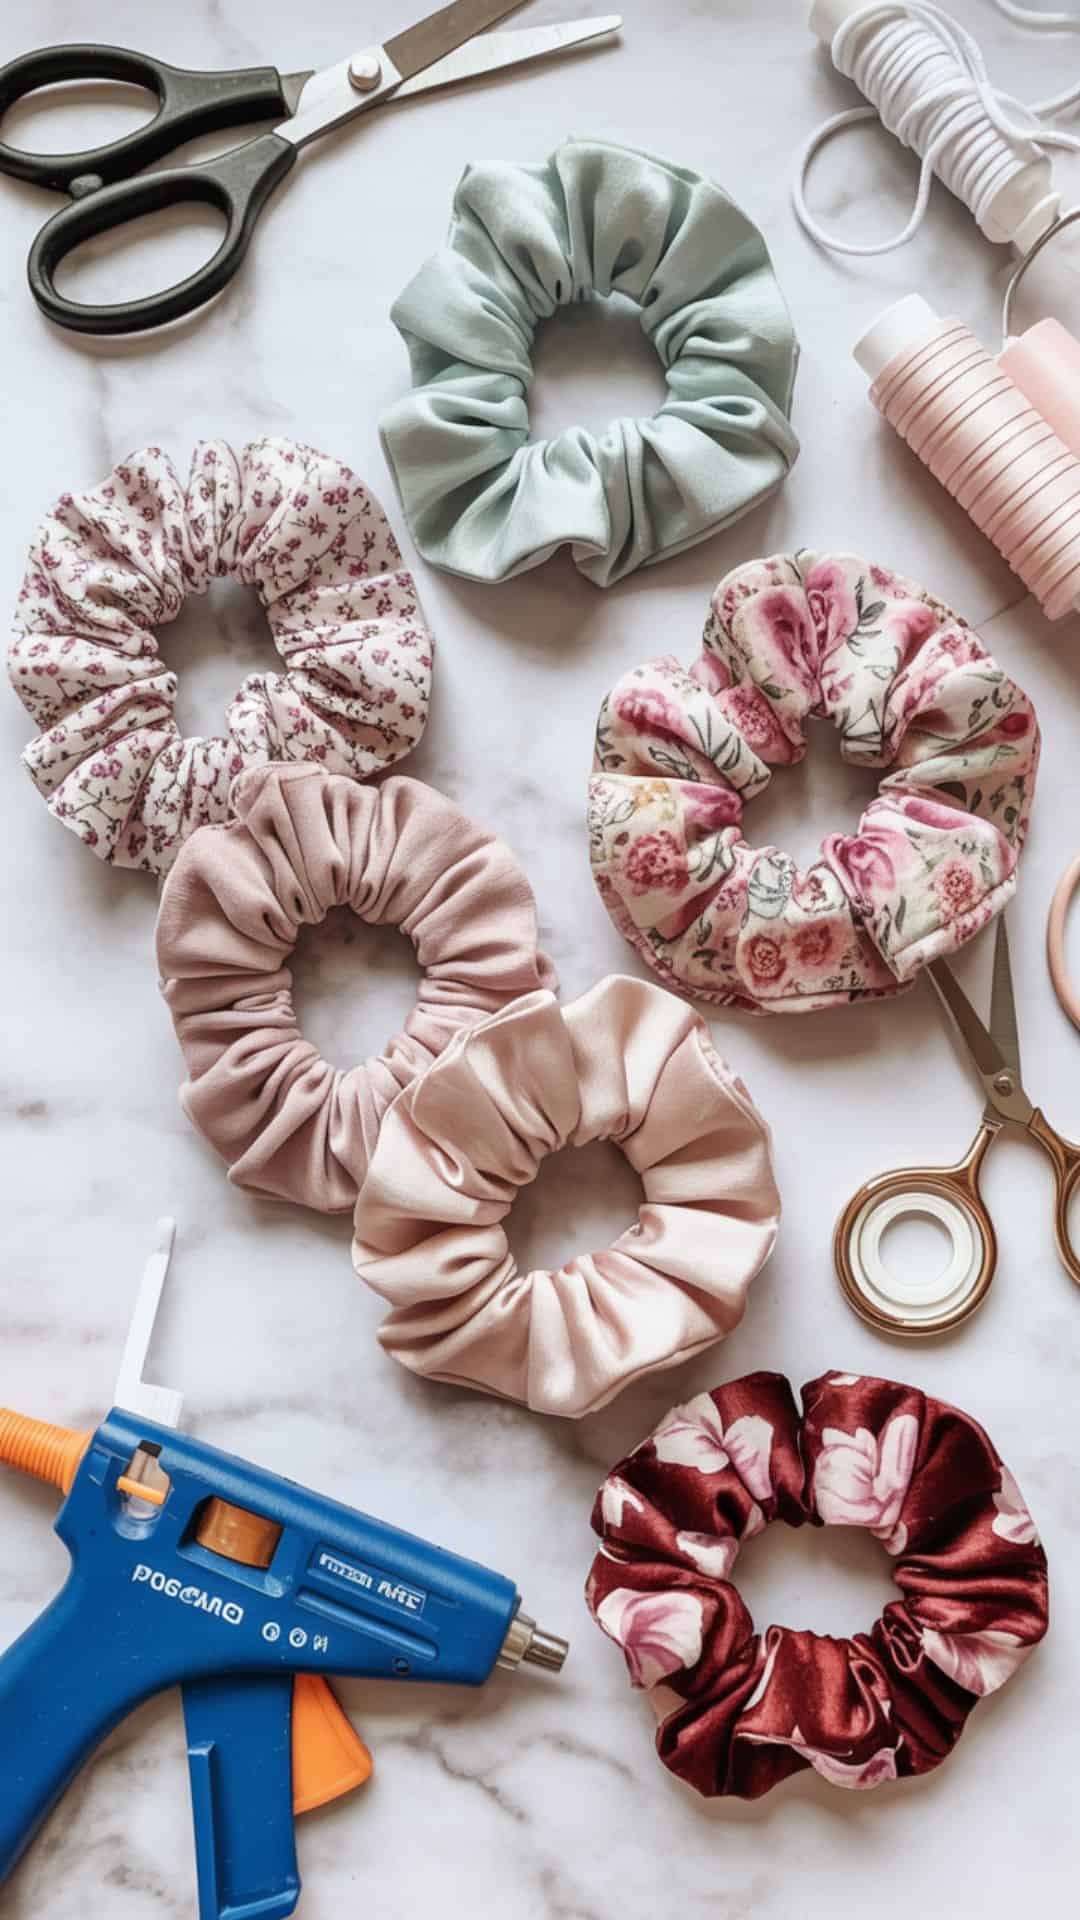
Not into sewing? No problem! These scrunchies can be made with fabric glue or a hot glue gun in minutes. They look just as cute as sewn scrunchies and sell like crazy because they’re lightweight, affordable, and always on-trend.
Materials Needed:
- 1 Yard fabric scraps (cotton, satin, velvet, etc.)
- 3 Yards elastic (¼–½ inch wide)
- Fabric glue or hot glue gun
- Scissors
- Safety pins (for threading elastic)
- Sewing machines
Instructions:
- Cut Fabric – Trim a strip about 18 x 4 inches.
- Fold & Glue – Fold fabric lengthwise (right sides together). Run a thin line of fabric glue or hot glue along the edge, then press firmly to seal into a tube.
- Turn Right Side Out – Flip the tube so the patterned side faces out.
- Thread Elastic – Use a safety pin to guide elastic through the tube, then knot securely.
- Close Ends – Fold raw edges inward, overlap slightly, and glue shut.
Why This Sells: No-sew scrunchies are a lifesaver for beginners they’re easy to batch-make and let you experiment with more fabrics since you don’t need a sewing machine.
Variations:
- Use ribbons for a bow-tie scrunchie effect.
- Make mini scrunchies with thinner strips for kids.
- Create seasonal prints (holiday plaids, spring florals) to encourage repeat buyers.
Pro Tip: Fabric glue works best if you let it set overnight before stretching the elastic. If you need instant results for a market, hot glue is the way to go.
Scrunchies or Hair Ties (Sew Machine)

Scrunchies are stylish, practical, and can be sewn (or no-sew glued) in minutes. They’re cheap to make, lightweight to ship, and always in demand.
Materials Needed:
- 1 Yard fabric scraps (cotton, satin, velvet, etc.)
- 3 Yards elastic (¼–½ inch wide)
- Fabric glue or hot glue gun
- Scissors
- Safety pin (for threading elastic)
Instructions:
- Cut Fabric – Cut a strip about 18 x 4 inches.
- Fold & Stitch/Glue – Fold lengthwise (right sides together) and stitch or glue along the edge.
- Turn Right Side Out – Flip the tube so the fabric faces outward.
- Thread Elastic – Use a safety pin to guide elastic through. Knot ends.
- Close Ends – Tuck raw edges in and stitch or glue closed.
Why This Sells: Scrunchies are fashionable and universal kids, teens, and adults all wear them. They’re also cheap to produce, making them high-margin items.
Suggested Price Point:
- Single scrunchie: $5–$7
- Set of 3: $12–$15
Batching Tip: Cut multiple fabric strips in advance. You can create 10+ scrunchies in under an hour by working assembly-line style.
Packaging Idea: Bundle scrunchies with ribbon or mount them on branded cardstock. Sets themed by color (neutrals, brights, pastels) make great gifts.
Variations:
- Seasonal fabrics (Christmas plaid, Halloween prints).
- Luxe fabrics (velvet, silk).
- Oversized “statement scrunchies.”
Pro Tip: Use high-quality elastic it makes all the difference in durability and repeat buyers.
Bookmarks

Bookmarks are quick to make, low-cost, and perfect to sell as singles or sets. Readers love them, but so do gift-givers they’re thoughtful, lightweight, and easy to slip into greeting cards.
Materials Needed:
- 25 Sheets cardstock, faux leather, or pressed flowers + laminate sheets
- Scissors
- Hole punch
- Ribbon or tassel kit with 100 pieces
- Laminating pouches
- Metallic pens or paint markers
Instructions:
- Cut Base – Trim cardstock or faux leather into 2×6-inch strips.
- Decorate – Paint, laminate flowers, or add hand-lettered quotes.
- Punch Hole – Create a hole at the top for finishing.
- Add Tassel – Thread ribbon or attach a tassel.
Why This Sells: They’re inexpensive to produce and buyers love collecting or gifting them. Perfect for pairing with journals, planners, or books.
Suggested Price Point:
- Single bookmark: $4–$6
- Set of 3: $10–$12
- Premium faux leather with tassel: $8–$10
Batching Tip: Cut and prep a stack of bases at once, then decorate in one sitting.
Packaging Idea: Sell as singles wrapped in clear sleeves or sets tied with twine. Bundled bookmarks with a mini journal make a perfect gift set.
Variations:
- Themed sets: seasonal quotes, floral patterns, or abstract art.
- Use metallic foil or gold ink for luxe designs.
- Mini bookmarks sized for planners.
Pro Tip: Add a layer of clear contact paper if you don’t laminate it makes cardstock bookmarks much more durable.
Personalized Mugs or Tumblers
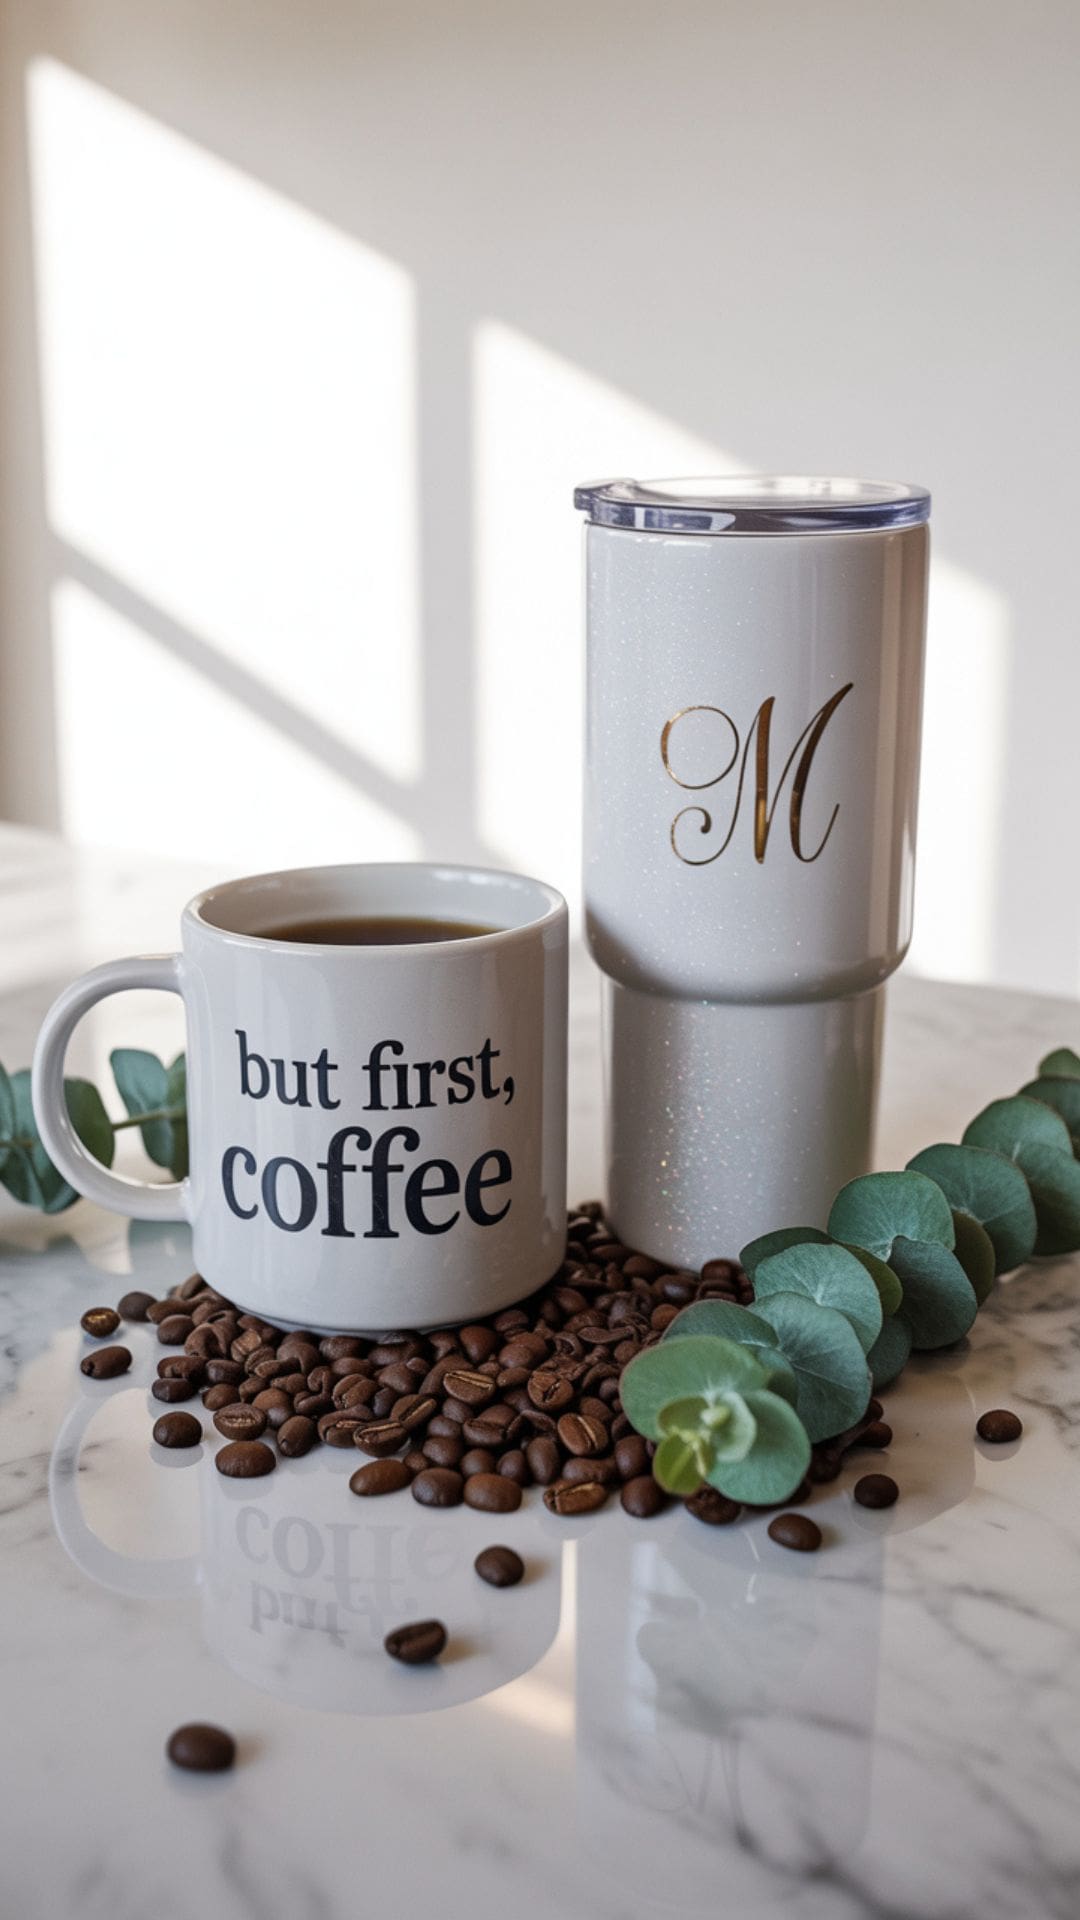
Mugs and tumblers are the kind of everyday item people love customizing. Whether it’s a funny quote, a seasonal design, or a personalized name, these sell year-round and make fantastic gifts.
Materials Needed:
- Set of 6 plain ceramic mugs or tumblers
- Vinyl decals (Cricut/Silhouette) or oil-based paint pens
- Transfer tape for Cricut or Silhouette
- Rubbing alcohol (for cleaning surface)
Instructions:
- Prep Surface – Clean mug/tumbler with rubbing alcohol.
- Apply Design – Add vinyl decals or hand-letter with paint pens.
- Seal – Bake painted mugs at low heat or press vinyl firmly.
- Set – Let dry for 24 hours before handling.
Why This Sells: Practical + personal = always a winning combo. They’re inexpensive to make but can sell for premium prices because they feel custom.
Suggested Price Point:
- Single mug: $12–$18
- Glitter tumbler: $18–$25
Batching Tip: Cut multiple vinyl decals in one go and apply to several mugs at once.
Packaging Idea: Box mugs with tissue paper and include a hot cocoa packet or tea bag it instantly feels like a gift set.
Variations:
- Holiday sayings (“Santa’s Coffee”).
- Monogrammed initials.
- Matching couple sets.
Pro Tip: Always tell buyers to hand-wash only this keeps vinyl or painted designs looking fresh.
Resin or Clay Earrings

A modern jewelry flat lay featuring pastel polymer clay (affiliate) earrings in geometric shapes alongside resin drop earrings flecked with gold foil. Displayed neatly on kraft backing cards ready for sale. Pin It
Clay and resin earrings are everywhere right now they’re trendy, lightweight, and surprisingly simple to make. The profit margins are excellent too, especially when displayed as boutique-style accessories.
Materials Needed:
- Polymer clay or resin with earring molds
- Earring hooks and jump rings
- Jewelry pliers set
- Oven (for clay) or UV lamp (for resin)
- Dried flowers (Optional)
Instructions:
- Shape or Pour – Roll and cut clay shapes, or pour resin into molds.
- Bake or Cure – Bake clay per package instructions or cure resin with UV light.
- Attach Hardware – Use jump rings to connect pieces to hooks.
- Package – Mount earrings on branded kraft backing cards.
Why This Sells: Statement earrings are trending hard, and handmade pairs feel unique buyers love that.
Suggested Price Point:
- Simple studs: $10–$12
- Statement dangles: $15–$25
Batching Tip: Cut and bake multiple clay pieces at once decorate or assemble later to save time.
Packaging Idea: Display on branded earring cards inside clear cello sleeves. At markets, arrange them on jewelry stands for that boutique look.
Variations:
- Seasonal colorways (pumpkin orange, peppermint red).
- Mix clay textures (marbled, speckled, glitter).
- Resin with dried flowers or metallic flakes.
- I have a lot more easy air dried craft ideas.
Pro Tip: Lightly sand edges of baked clay earrings for a polished, professional finish.
Hand-Stamped Gift Tags or Cards
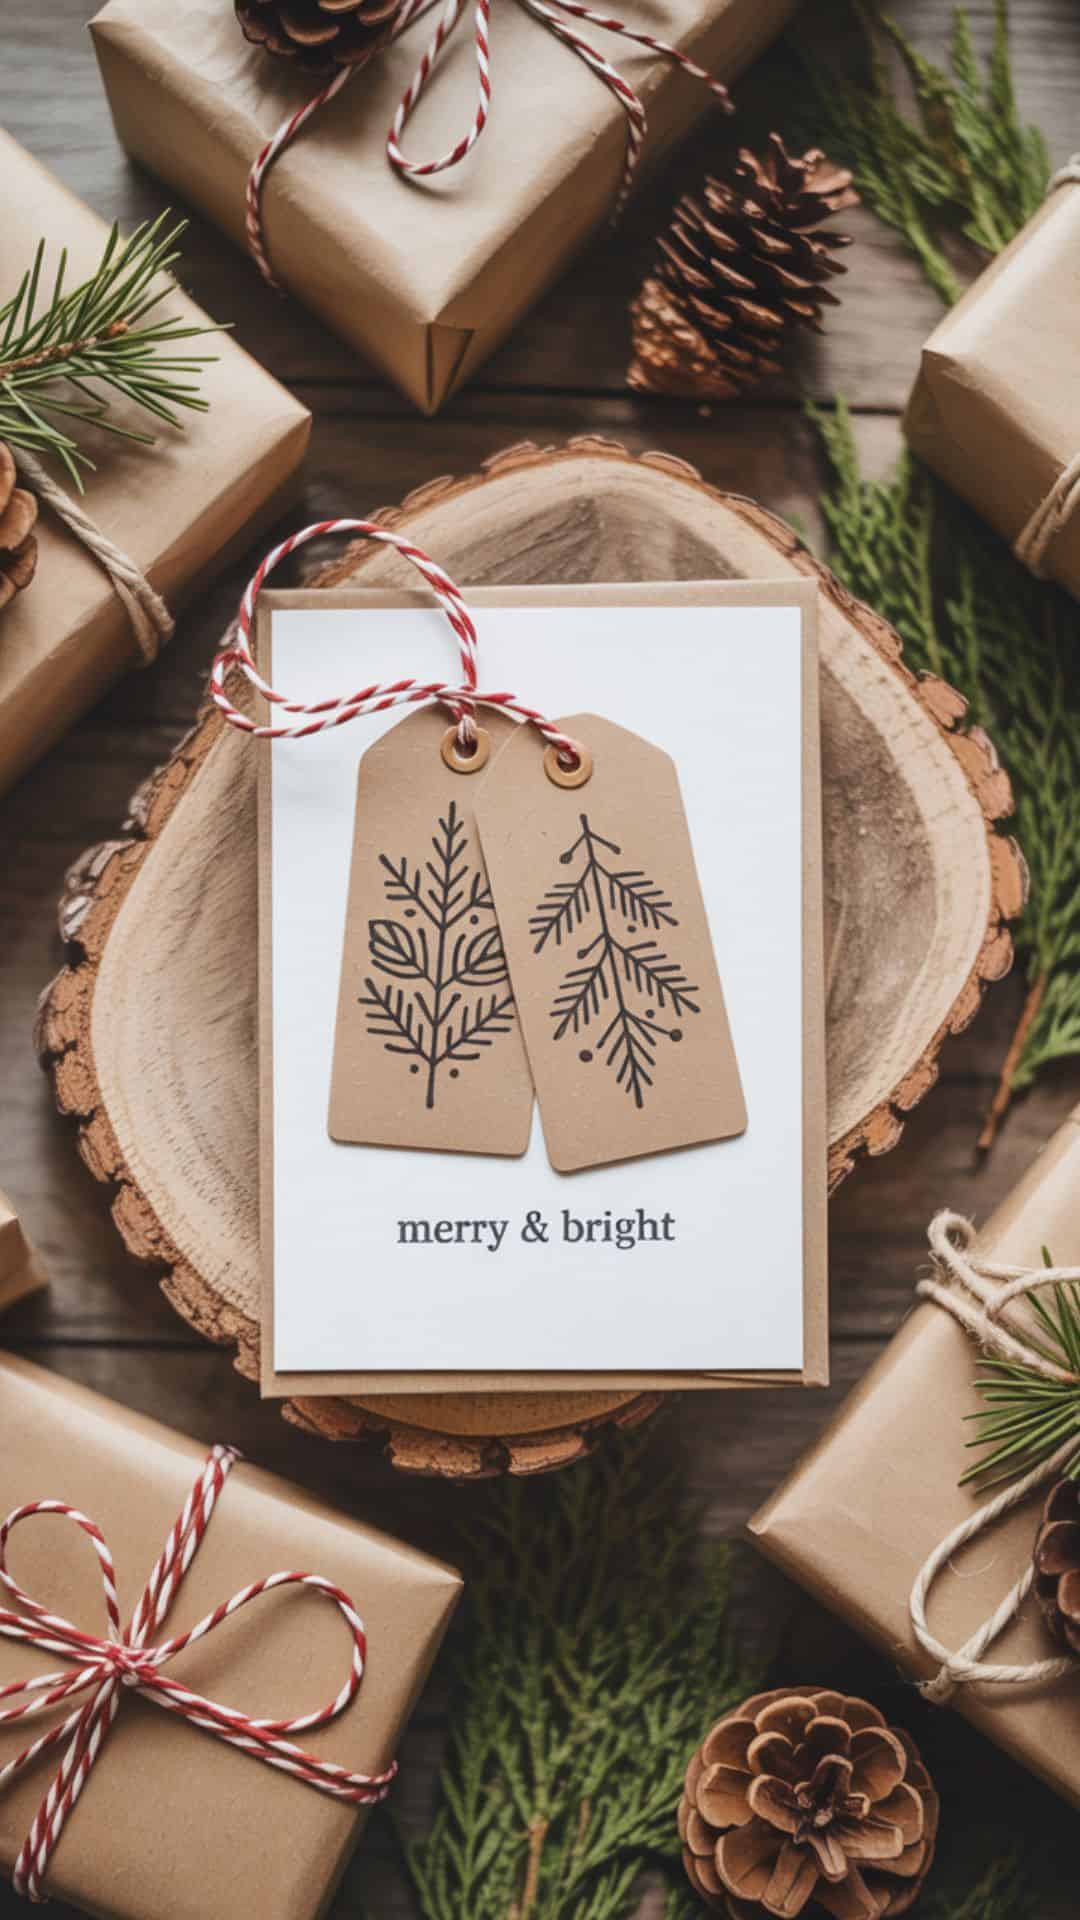
Gift tags are quick, fun, and sell especially well around holidays. They’re lightweight, low-cost, and people love buying them in sets for that extra-special touch on presents.
Materials Needed:
- 100 pre-cut craft paper tags or cardstock
- Stamp set with seasonal designs & Ink pad set (black, red, gold)
- Ribbon, bakers twine in assorted colors, or string
- Hole punch
Instructions:
- Prep Tags – Cut cardstock into tag shapes or use pre-cut tags.
- Stamp Designs – Press designs using themed stamps and ink.
- Add String – Punch a hole and thread twine or ribbon.
- Bundle – Group in sets of 6–10 for easy selling.
Why This Sells: They’re practical but stylish buyers love snagging these as affordable extras during seasonal shopping.
Suggested Price Point:
- Set of 6: $5–$7
- Set of 12: $10–$12
Batching Tip: Stamp a whole sheet at once before cutting it’s much faster.
Packaging Idea: Bundle in clear cellophane sleeves tied with ribbon for a polished look.
Variations:
- Metallic ink for luxe tags.
- Seasonal designs (pumpkins, Christmas trees, hearts).
- Matching mini greeting cards.
Pro Tip: Layer 2 ink colors on a single stamp for a boutique-style gradient look.
Fabric Coasters

A modern farmhouse setup with felt and cork coasters in round and square shapes, styled with a steaming mug of coffee and fresh flowers on a linen table runner. Pin It
Fabric coasters are functional, stylish, and ridiculously fast to make. They’re eco-friendly, customizable, and buyers love snagging them in sets for gifting or everyday use.
Materials Needed:
- 12×12 felt sheet pack, cork board pieces, or cotton fabric
- Scissors
- Fabric glue or sewing machine
- Rotary cutter
Instructions:
- Cut Shapes – Trace and cut 4-inch circles with a circular item to trace like a mug or squares.
- Layer (Optional) – Add contrast fabric for a thicker coaster.
- Glue or Stitch – Secure layers with glue or stitching.
- Set to Dry – Allow glue to fully cure before use.
Why This Sells: Everyone needs coasters they’re practical and stylish, plus easy to brand as eco-conscious.
Suggested Price Point:
- Set of 4: $8–$12
- Set of 6: $12–$15
Batching Tip: Cut stacks of fabric all at once with a rotary cutter (affiliate) for efficiency.
Packaging Idea: Bundle coasters with twine and a branded tag, or tuck them into kraft boxes for premium sets.
Variations:
- Holiday patterns (pumpkins, snowflakes).
- Felt in trending neutrals (taupe, sage, blush).
- Patchwork coasters from scrap fabric.
Pro Tip: Use pinking shears to cut fabric edges this keeps them from fraying and adds a cute zigzag finish.
Make your own coasters with this guide!
Magnets
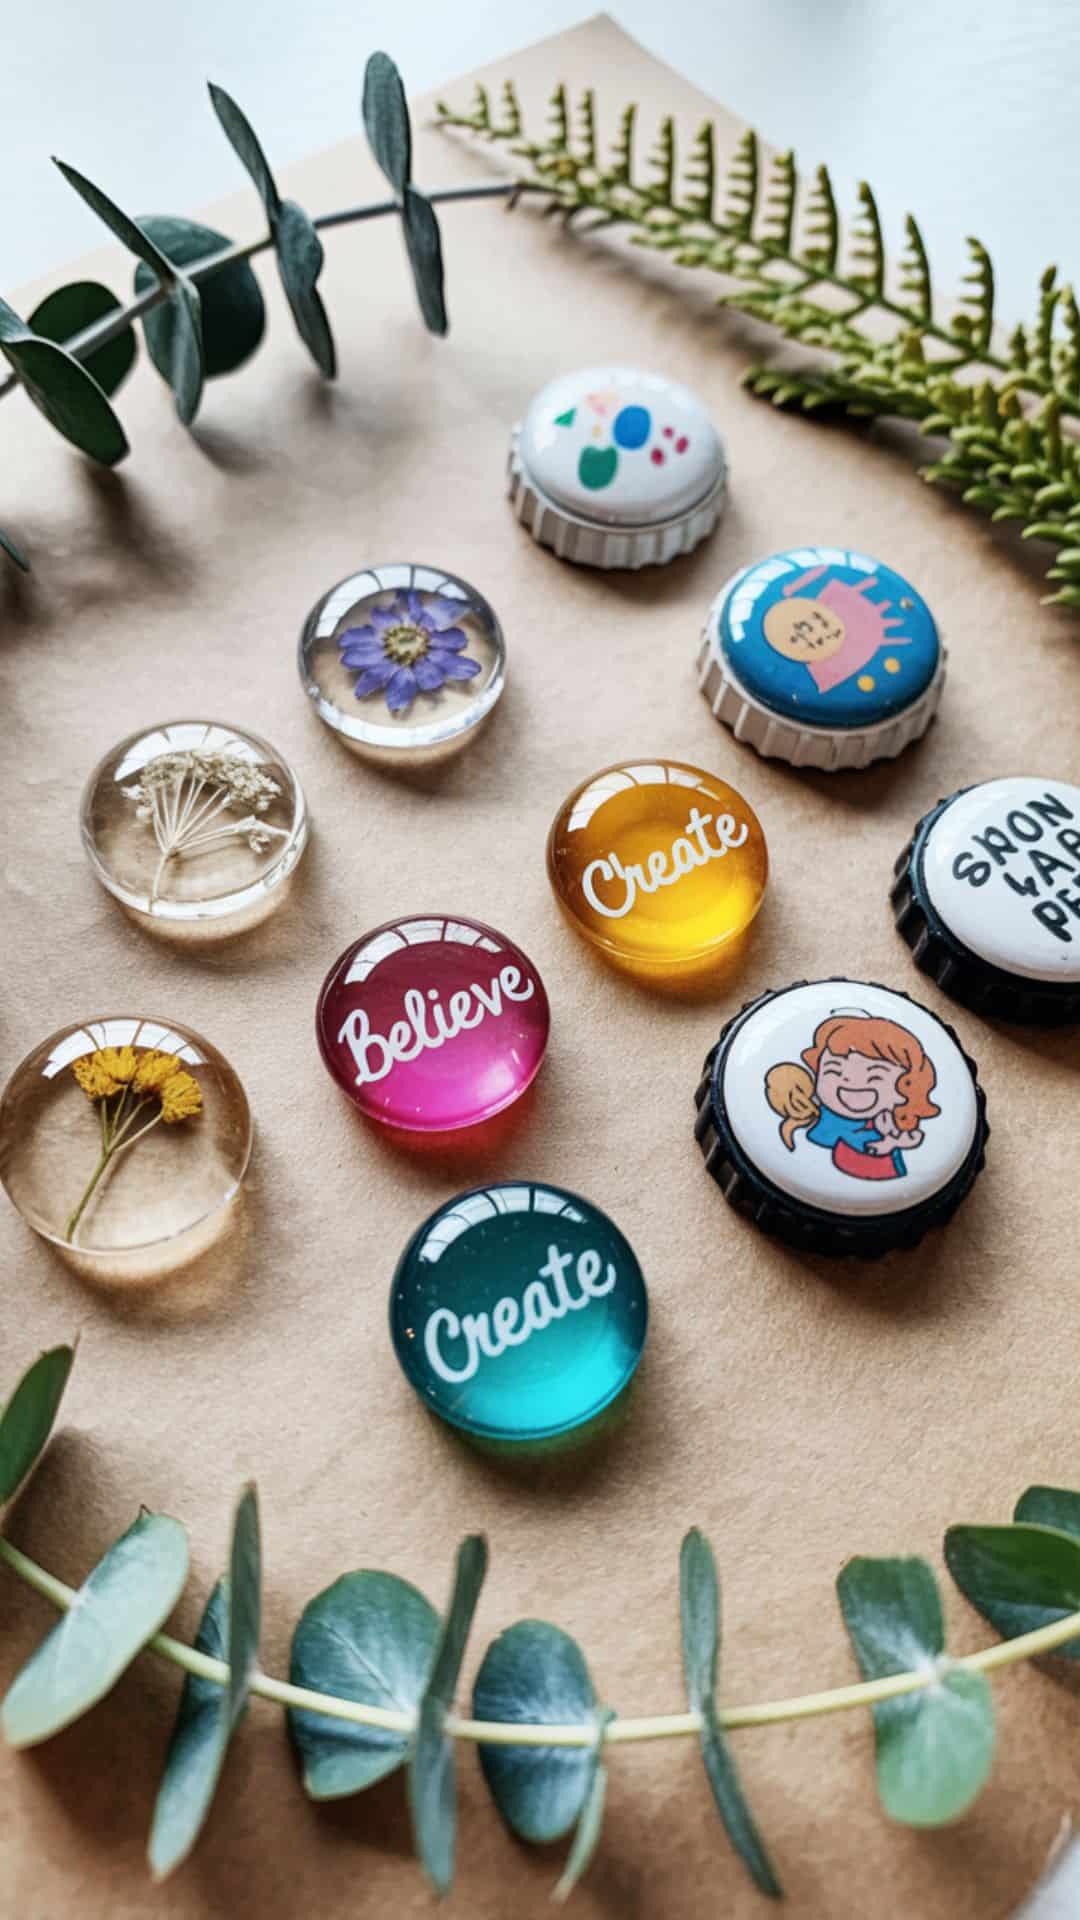
Magnets are playful, inexpensive, and make fantastic “add-to-cart” items online or at markets. They’re tiny but profitable, especially when sold in sets.
Materials Needed:
- Glass gems, resin molds, or bottle caps
- Neodymium magnet pack
- Glue (E6000 or hot glue)
- Decorative inserts (flowers, images, quotes)
Instructions:
- Choose Inserts – Cut out paper graphics or prep dried flowers (affiliate).
- Attach to Base – Place inside resin mold, gem, or bottlecap.
- Glue Magnet – Attach a strong magnet to the back.
- Set to Dry – Let glue cure completely.
Why This Sells: Magnets are collectible, fun, and giftable. People often buy multiple sets at once.
Suggested Price Point:
- Set of 4: $6–$8
- Set of 8: $12–$15
Batching Tip: Create magnets in large batches pour resin or glue multiple at a time.
Packaging Idea: Package sets on kraft cardstock inside cello sleeves for a professional look.
Variations:
- Seasonal holiday sets.
- Motivational quotes.
- Floral pressed flower designs.
Pro Tip: Always use strong neodymium magnets cheap ones won’t hold and can hurt your reputation.
Mini Planters or Painted Pots

A cheerful windowsill scene with mini terracotta pots painted in pastel colors and metallic accents, each holding tiny succulents.
Mini planters are trendy and versatile they double as décor and gifts. Paint them in minutes, pop in a plant, and you’ve got a high-value craft ready to sell.
Materials Needed:
- 12 mini terracotta pots
- Acrylic paint set with metallics
- Brushes
- Pack of faux succulents or faux plants
- Matte clear sealant spray (optional)
Instructions:
- Paint Pots – Apply one or two coats of paint.
- Add Designs – Use stencils or freehand patterns.
- Seal (Optional) – Spray with a clear coat.
- Plant – Add real or faux succulents.
Why This Sells: Plants are timeless gifts, and painted pots make them extra special.
Suggested Price Point:
- Single mini planter: $8–$12
- Set of 3: $20–$25
Batching Tip: Paint all pots at once, let dry, then decorate assembly-line style.
Packaging Idea: Display in sets tied with twine or wrapped in kraft boxes with cutouts.
Variations:
- Metallic dip-dyed look.
- Seasonal colors (pastel Easter, fall oranges, winter white + gold).
- Hand-lettered quotes on pots.
Pro Tip: Faux succulents make your craft long-lasting no watering required, so customers feel safe gifting them.
Crafts to Make Fast and Sell
Selling crafts doesn’t have to mean hours of complicated projects. These quick crafts prove you can create products that are stylish, giftable, and profitable all in 30 minutes or less. The key is to keep your materials affordable, package them beautifully, and find variations that help your items stand out.
Whether you’re preparing for your first market or adding fresh stock to your online shop, these projects are the perfect place to start.