Clay Crafts That Sell: Handmade Pieces Customers Love to Buy
Selling handmade pieces is both exciting and challenging you want to create items that feel beautiful and heartfelt, yet still appeal to what customers are truly looking for. Clay is a timeless medium for that balance: simple to work with, low-cost to produce, and endlessly giftable. Shoppers love pieces that look handmade but refined, the kind of small treasures they can display, use, or tuck into a thoughtful present.
Preparing for a market, filling your Etsy shop, or building a small collection to sell year-round, these ideas are proven favorites. They’re approachable to make, visually appealing, and consistently sell well in every season.
This website contains affiliate links. As an Amazon Associate, I earn from qualifying purchases. Please read our disclaimer.
Clay Crafts That Sell Quickly All Year Round
This curated list of clay crafts that sell quickly all year round will help you create pieces that are thoughtful, giftable, and genuinely profitable.
1. DIY Clay Diffuser Stones (A Low-Cost, High-Appeal Seller)
What They Are + Why They Sell
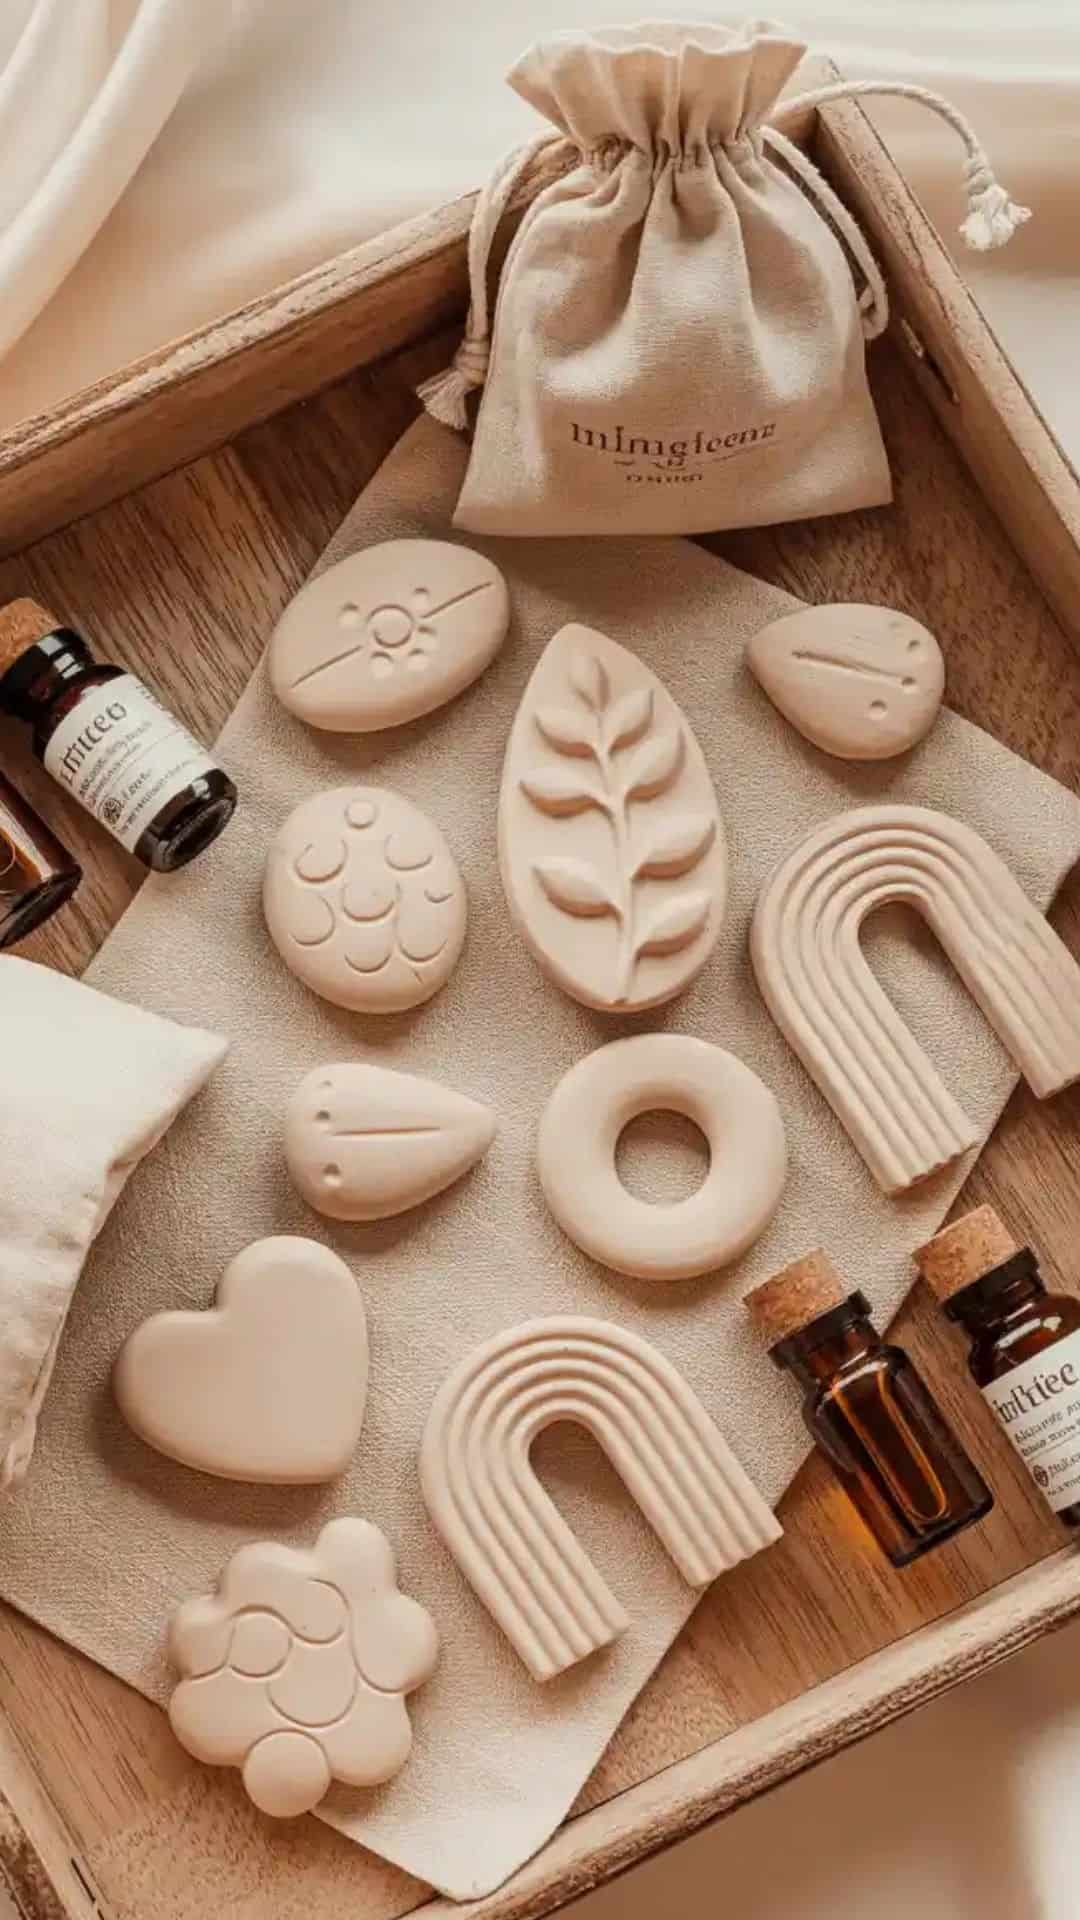
DIY clay diffuser stones are small, porous clay pieces designed to absorb essential oils and gently release fragrance over time. They sell exceptionally well because they combine home fragrance, decor, and wellness three categories shoppers already love. Unlike candles or plug-in diffusers, these require no heat or electricity, making them an attractive option for gift buyers, renters, parents, and pet owners.
Their minimalist, handmade look gives them a boutique feel, while their low production cost makes them ideal for craft fairs, Etsy shops, and gift markets. Customers are drawn to their natural materials, calming aesthetic, and practicality, especially when they’re presented as a reusable, eco-friendly alternative to traditional air fresheners.
Materials / Shopping List
- Air-dry clay
- Essential oils (lavender, eucalyptus, citrus, vanilla sell best)
- Rolling pin or smooth bottle
- Cookie cutters or glass rim
- Wooden skewer or toothpick
- Parchment paper
- Lace, leaves, or rubber stamps for texture
- Twine or ribbon (for hanging styles)
- Small linen or muslin bags (for packaging)
- Mini essential oil bottles (optional add-on)
How to Make Them (Step-by-Step)
- Roll air-dry clay to about ¼ inch thickness on parchment paper.
- Cut shapes using cookie cutters, a glass rim, or organic freehand forms.
- Optional: Press lace, leaves, or stamps into the clay for texture.
- If making hanging stones, add a hole near the top using a skewer.
- Smooth edges with a lightly damp fingertip for a polished finish.
- Allow stones to air-dry fully for 24–48 hours, flipping once halfway through.
- Once dry, they’re ready to sell plain or paired with essential oils.
Selling Tips
Clay diffuser stones typically sell for $10–$18 per set, depending on size and packaging. Sets of three or five perform especially well, as do gift bundles that include a mini essential oil bottle. Neutral tones like white, beige, soft gray, and terracotta are top sellers because they blend seamlessly into any home.
For displays, arrange stones in shallow bowls, hang a few from hooks or branches, and show a finished gift set so customers immediately understand how they’re used. Label them clearly as “Flame-Free Home Fragrance” or “Natural Essential Oil Diffusers” educating buyers increases confidence and boosts sales. When shoppers see both the beauty and the function, these become an easy yes.
Want to make your own diffuser stones? Head over to my full step-by-step tutorial: DIY Clay Diffuser Stones to learn exactly how to shape, dry, and use them from start to finish.
2. Mini Clay Ghosts (A Seasonal Favorite That Sells Every Fall)
What They Are + Why They Sell
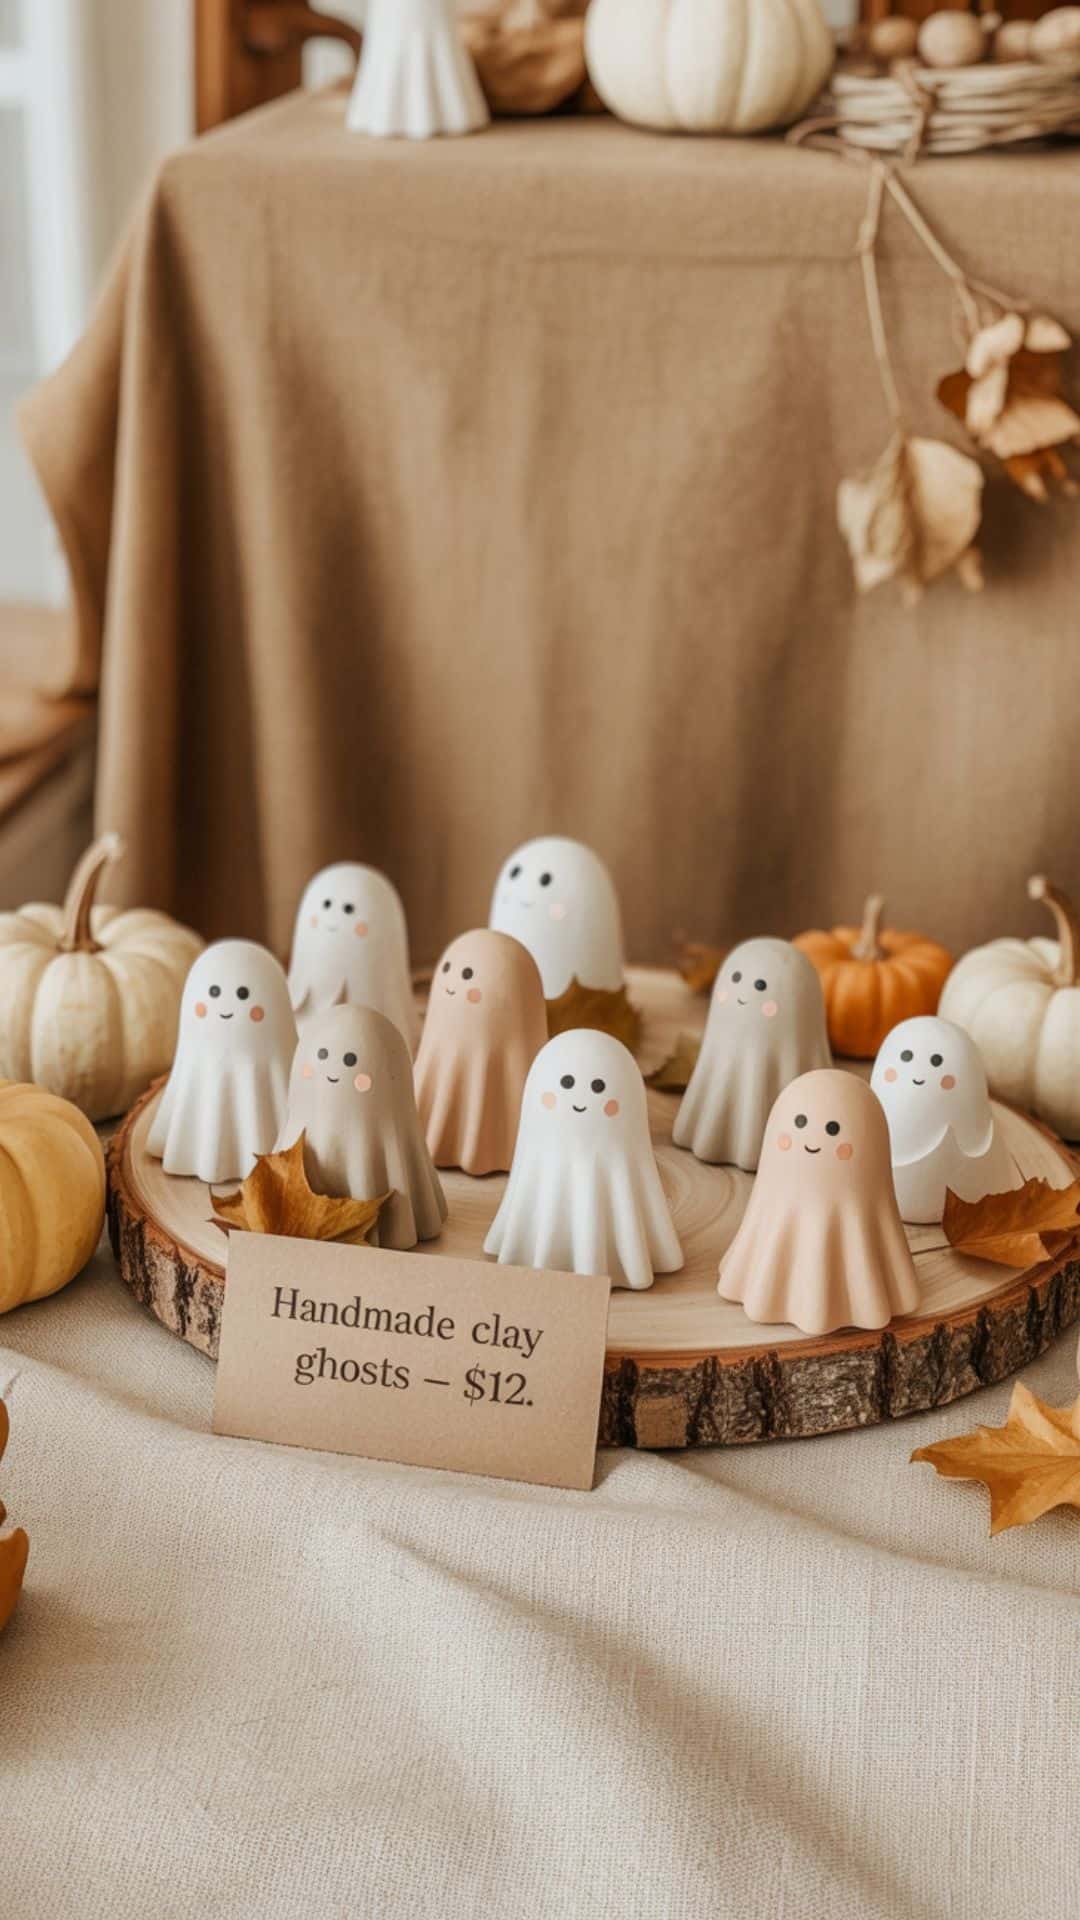
These tiny pastel or white clay ghosts have become a beloved autumn best-seller, year after year. Their soft curves, simple expressions, and charmingly minimal design make them irresistible to shoppers looking for shelf décor, tiered tray accents, or small add-on gifts. Their small size keeps costs low while offering excellent profit margins ideal for makers stocking fall markets.
Materials / Shopping List
- Air-dry clay
- Clay tools set
- Small rolling pin
- Mini circle or shape cutters
- Black acrylic paint
- Blush pigment or paint
- Fine detail brushes
- Kraft boxes or clear cellophane bags (affiliate)
- Twine or ribbon
- Mini pumpkins or faux fall leaves (for booth styling)
How to Make Them (Step-by-Step)
- Roll out air-dry clay to about ¼ inch thickness.
- Cut a small circular or rounded shape this will become the base form.
- Gently pinch and pull upward to form a domed top for the ghost’s “head.”
- Shape the lower edge with your fingers, adding a soft wavy pattern that looks like a floating sheet.
- Use a silicone tool to smooth the surface and soften any lines.
- Allow the ghosts to dry fully (usually 24–48 hours).
- Add tiny eyes with black paint and, if desired, soft rosy cheeks with blush pigment.
- Seal only if needed most shoppers love the matte, natural clay finish.
Selling Tips
These sell beautifully between $8–$12 each or as a set of three for $25–$30. Use kraft boxes filled with shredded paper or clear bags tied with twine for a charming fall-ready presentation. At markets, display them on small risers, cake stands, or amongst mini pumpkins and neutral linens. Clusters always sell better than singles shoppers are naturally drawn to the visual story you create.
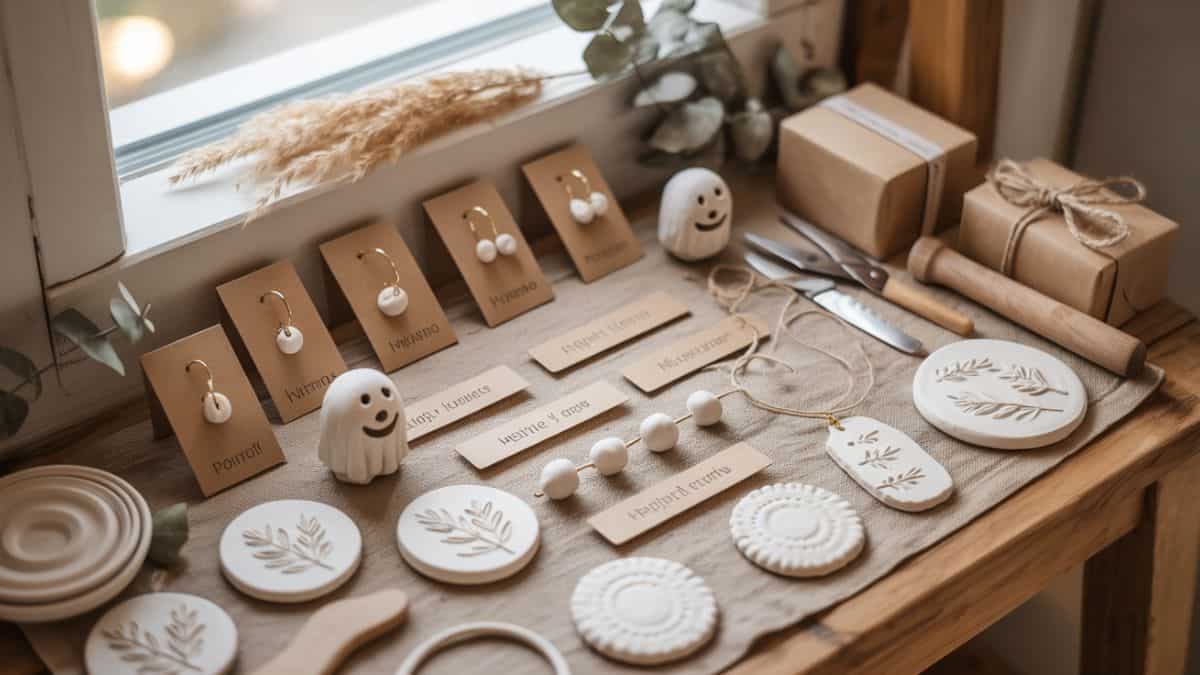
3. Personalized Clay Name Tags (A Bestseller All Year Long)
What They Are + Why They Sell
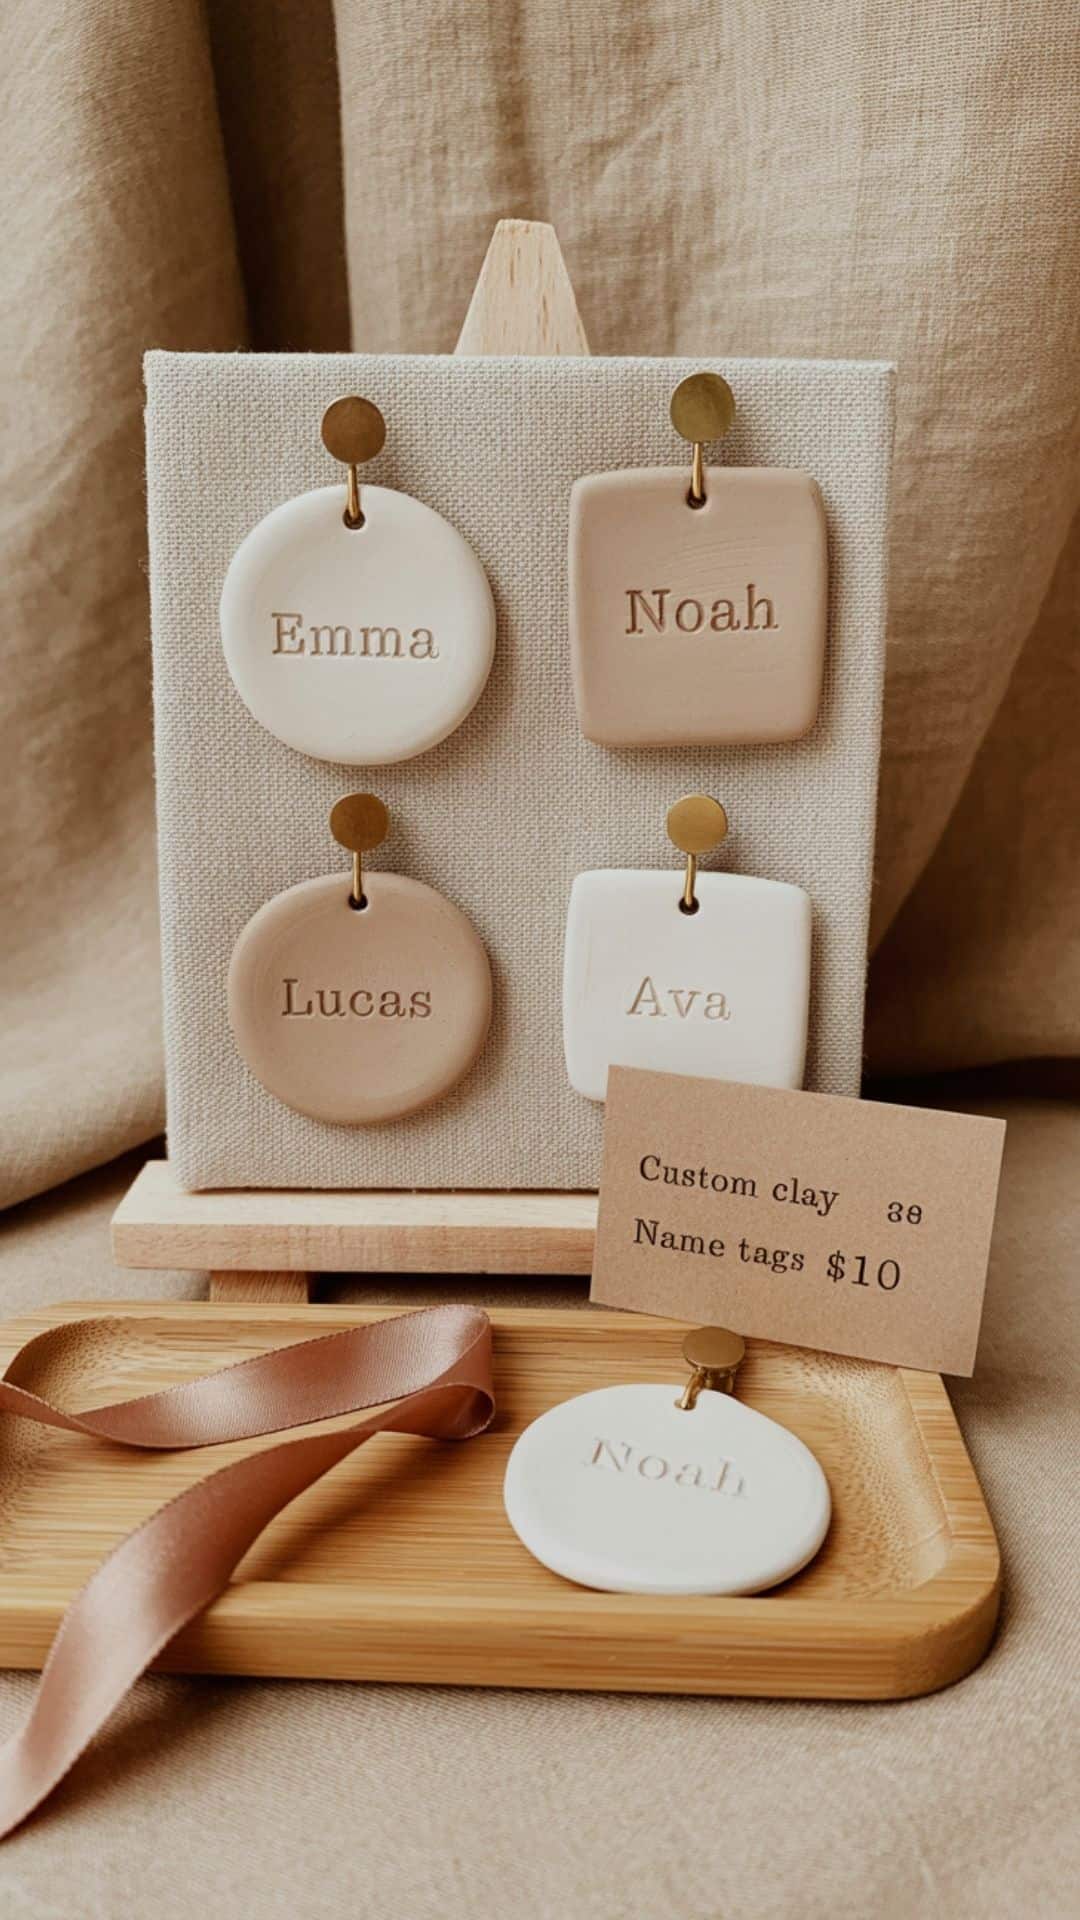
Clay name tags are one of the most reliable year-round sellers because they offer something every shopper wants: personalization. These small clay pieces can be stamped with names, dates, holiday words, or simple sentiments, making them perfect as gift tags, ornaments, stocking labels, wedding place cards, or even pet tags. Their versatility keeps them in demand long after the holiday season ends.
Materials / Shopping List
- Air-dry clay
- Alphabet stamps
- Rolling pin
- Sandpaper
- Twine or velvet ribbon (affiliate)
- Gold paint pen (optional)
- Paint brushes
- Kraft tags for display
- Decorative greenery (for staging)
How to Make Them (Step-by-Step)
- Roll clay to ⅛–¼ inch thickness.
- Cut the desired shape circles, rectangles, or simple tags work best.
- Use alphabet stamps to press in names or short phrases while the clay is still soft.
- Create a small hole at the top with a skewer for threading ribbon or twine.
- Let the tag dry completely (24–48 hours).
- Lightly sand the edges for a refined finish.
- Add optional gold or metallic edging with a paint pen for a boutique-style touch.
- Thread with ribbon or twine and prepare for packaging.
Selling Tips
These typically sell for $8–$15 each, with higher profits on bundles for weddings or holidays. Neutral clay colors white, sand, terracotta sell best because they match any décor. Display them hanging from a branch, pinned to a linen board, or arranged on kraft paper for a visually appealing booth setup. When shoppers see multiple ways they can be used, they buy more.
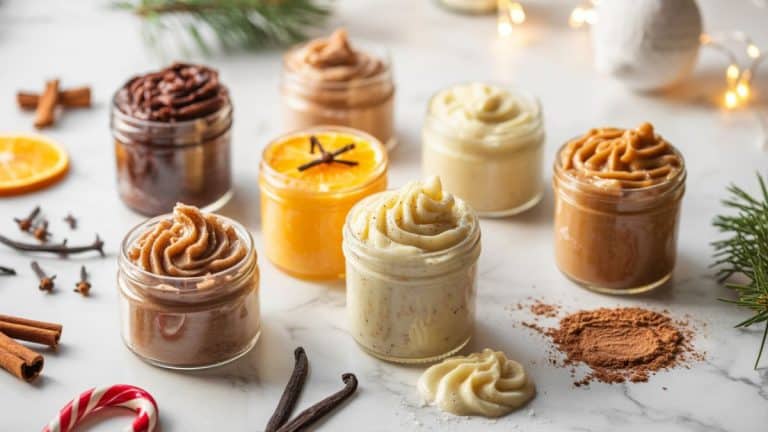
4. Clay Jar Toppers (Simple Pieces That Elevate Any Gift)
What They Are + Why They Sell
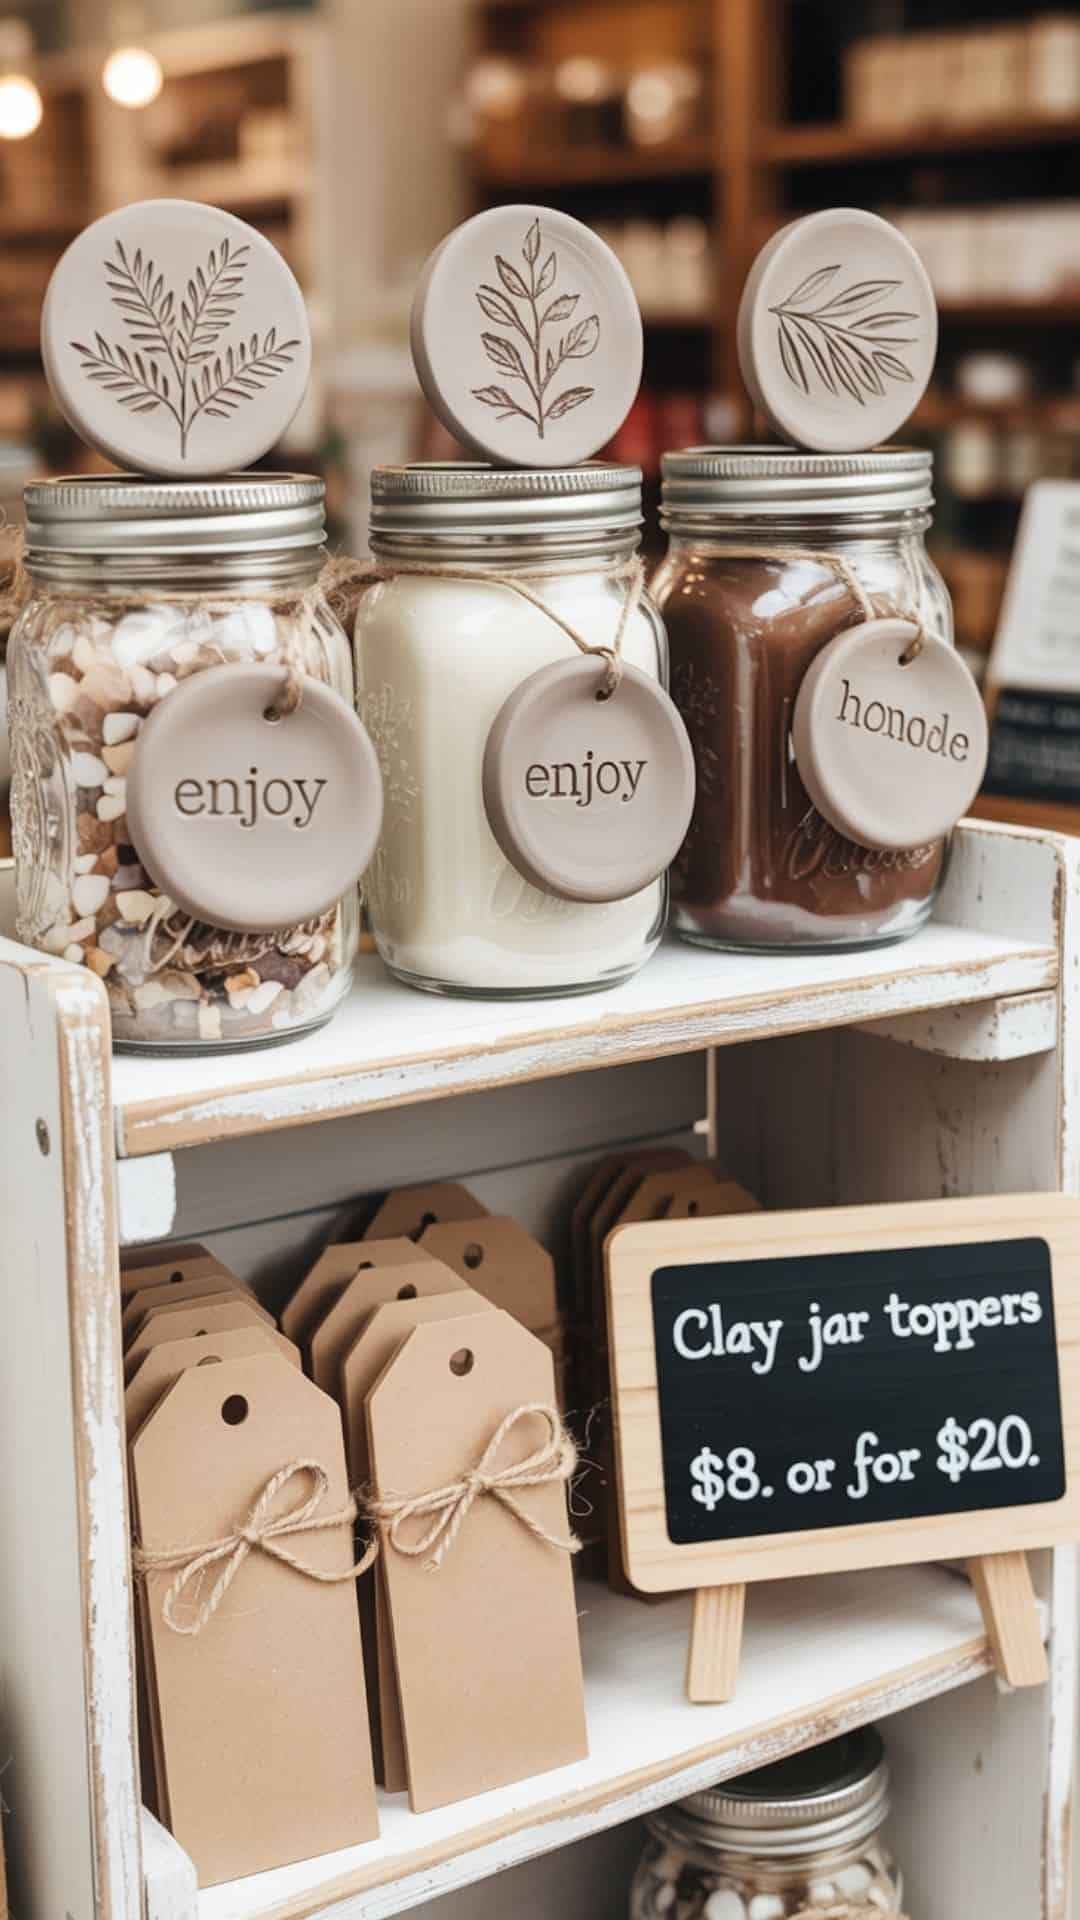
Clay jar toppers instantly transform a plain mason jar into a premium-looking gift. Whether used on candles, jams, bath salts, or cocoa mixes, these handmade lids add a warm, artisanal finish that shoppers love. They’re incredibly inexpensive to produce yet offer a polished, high-end look that boosts both appeal and profit.
Materials / Shopping List
- Air-dry clay
- Rolling pin
- Circle cutters
- Texture stamps or botanicals
- Acrylic paint (optional)
- Matte sealant (optional)
- Mason jars
- Kraft gift tags
- Twine or ribbon
How to Make Clay Jar Stoppers (Step-by-Step)
- Roll clay to a smooth, even thickness.
- Use a circle cutter or jar lid to create a perfect disc that fits your jar.
- Press texture stamps, leaves, or botanicals into the clay for a subtle pattern.
- Allow pieces to dry completely.
- Optionally paint with soft neutral colors or leave raw for a natural aesthetic.
- Seal only if needed for durability.
- Tie a kraft tag around the jar to explain the handmade topperthis boosts perceived value.
Selling Tips
Sell jar toppers individually for $6–$10, or pair them with filled jars for higher-ticket, gift-ready items. These photograph beautifully, making them ideal for Etsy listings. At markets, stack them near finished sample jars so buyers immediately understand the purpose.
5. DIY Clay Ornament Kits (A Holiday and Year-Round Favorite)
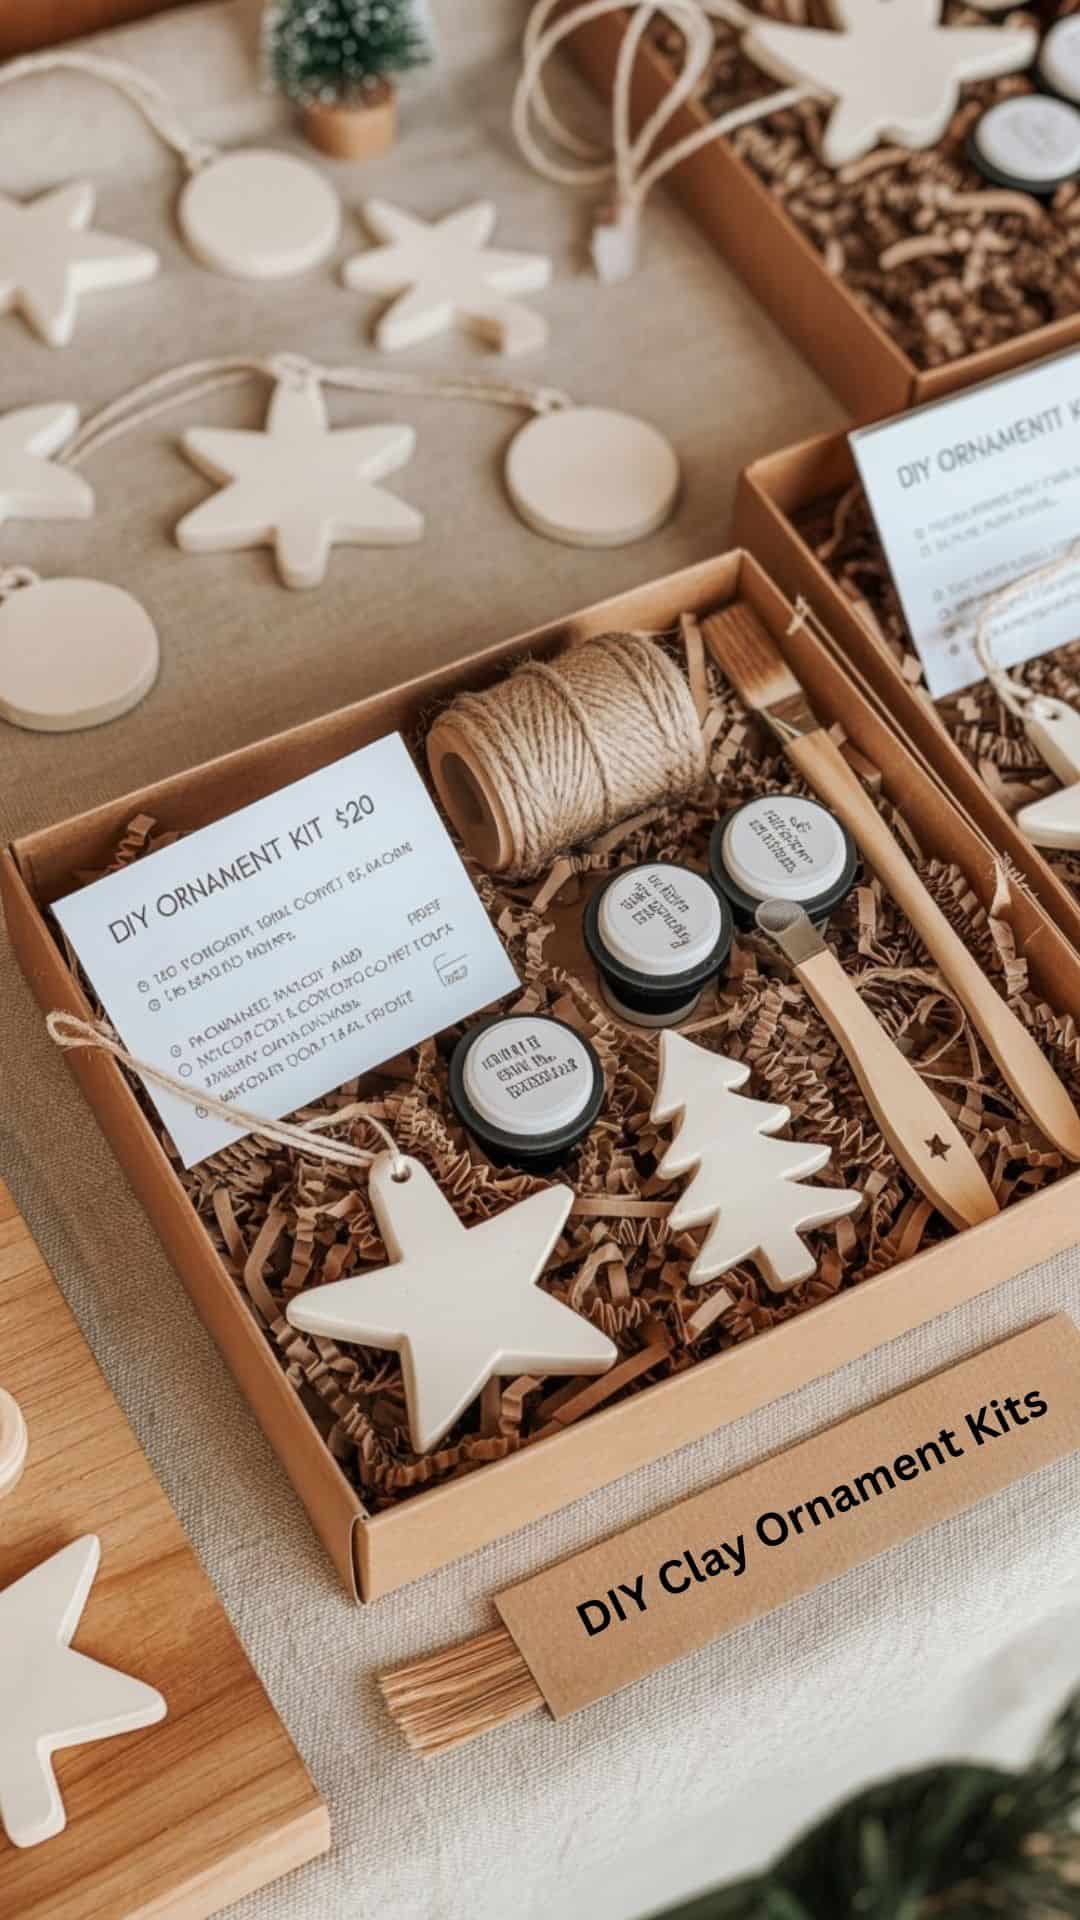
What They Are + Why They Sell
Clay ornament kits are beloved because they offer more than a product they offer an experience. Shoppers buy them for cozy weekend projects, teacher gifts, children’s activities, or thoughtful holiday presents. They’re simple to assemble, visually appealing, and profitable, especially when packaged beautifully.
Materials / Shopping List
- Air-dry clay
- Ornament cutters (stars, trees, circles)
- Rolling pin
- Thickness guides
- Skewer or hole punch
- Mini paint pots
- Small paint brush
- Twine or ribbon
- Clear bags or kraft boxes
- Shredded paper filler
- Instruction cards
How to Make Them (Assembly Steps)
- Cut out 3–5 clay ornaments using your chosen shapes.
- Add a hole for hanging using a skewer.
- Fully dry and lightly sand them for a smooth finish.
- Bundle ornaments with twine, mini paint pots, and a brush.
- Tuck everything neatly into a clear bag or kraft box with shredded filler.
- Add a small instruction card with simple painting steps.
- Seal the kit with ribbon or a small branded sticker.
Selling Tips
Price kits between $15–$25 depending on size and packaging. These sell especially fast when displayed with one finished ornament so shoppers can instantly visualize the project. Holiday markets, school fundraisers, and winter-themed pop-ups are perfect venues for them.
6. Clay Trinket Dish Kits (Beginner-Friendly and Gift-Ready)
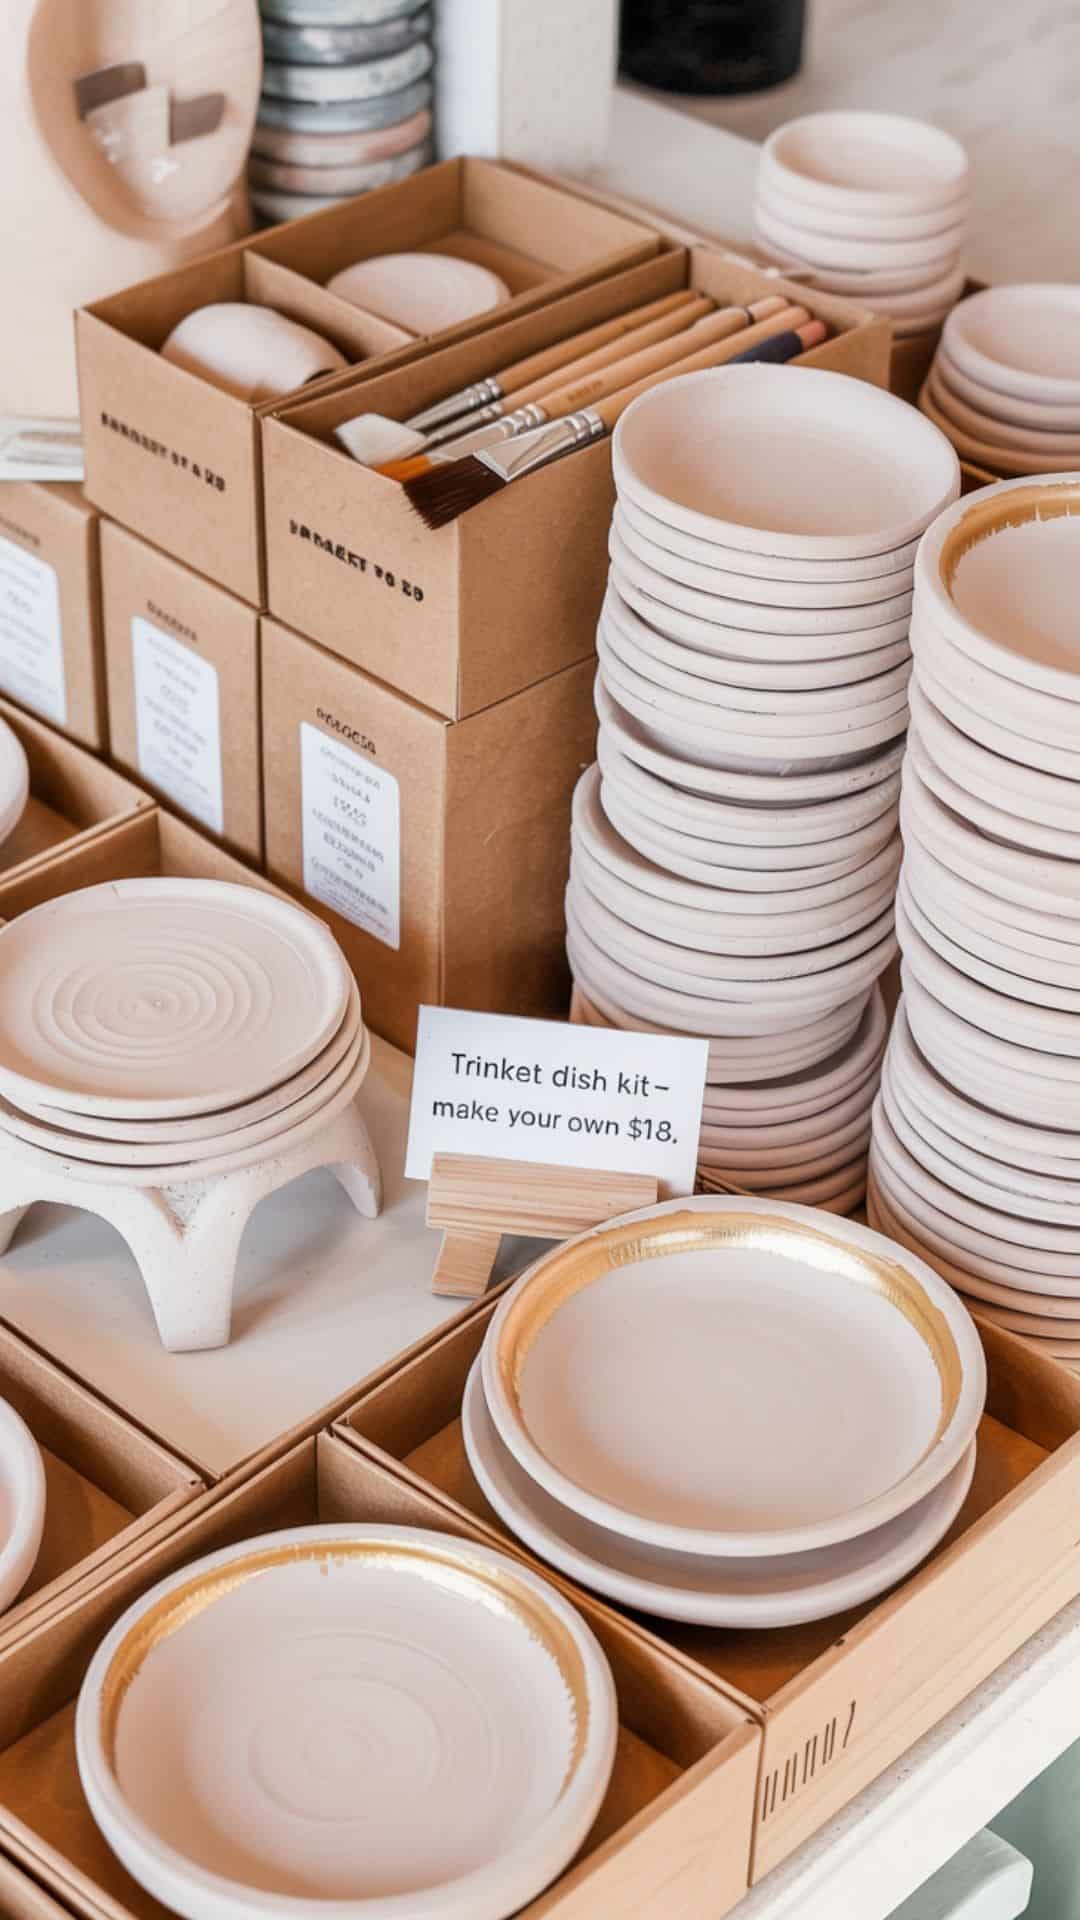
What They Are + Why They Sell
Trinket dish kits are elegant, feminine, and endlessly giftable. They appeal to buyers who love hands-on creativity but want something that feels simple and achievable. Perfect for Mother’s Day markets, bridal showers, or general gift shoppers.
Materials / Shopping List
- Air-dry clay
- Small bowl for shaping
- Gold or metallic paint
- Soft-bristle paint brush
- Sanding sponge
- Twine or ribbon
- Kraft box
- Instruction card
How to Make Them (Assembly Steps)
- Pre-roll clay for your customer and cut it into small circles.
- Place clay circle over an inverted bowl or dish to form a shallow shape.
- Smooth edges with fingers or a damp sponge.
- Let dry completely and lightly sand the rim.
- Package clay circles (unpainted) with a mini paint pot and brush.
- Add instructions for shaping, drying, and painting the rim.
Selling Tips
Kits sell well between $12–$18 depending on size. Display finished sample dishes to show customers how lovely the final product will look. Highlight gift occasions Mother’s Day, teacher appreciation, friendship gifts to encourage multiple sales.
7. Botanical Clay Tags (A Nature-Inspired Bestseller)
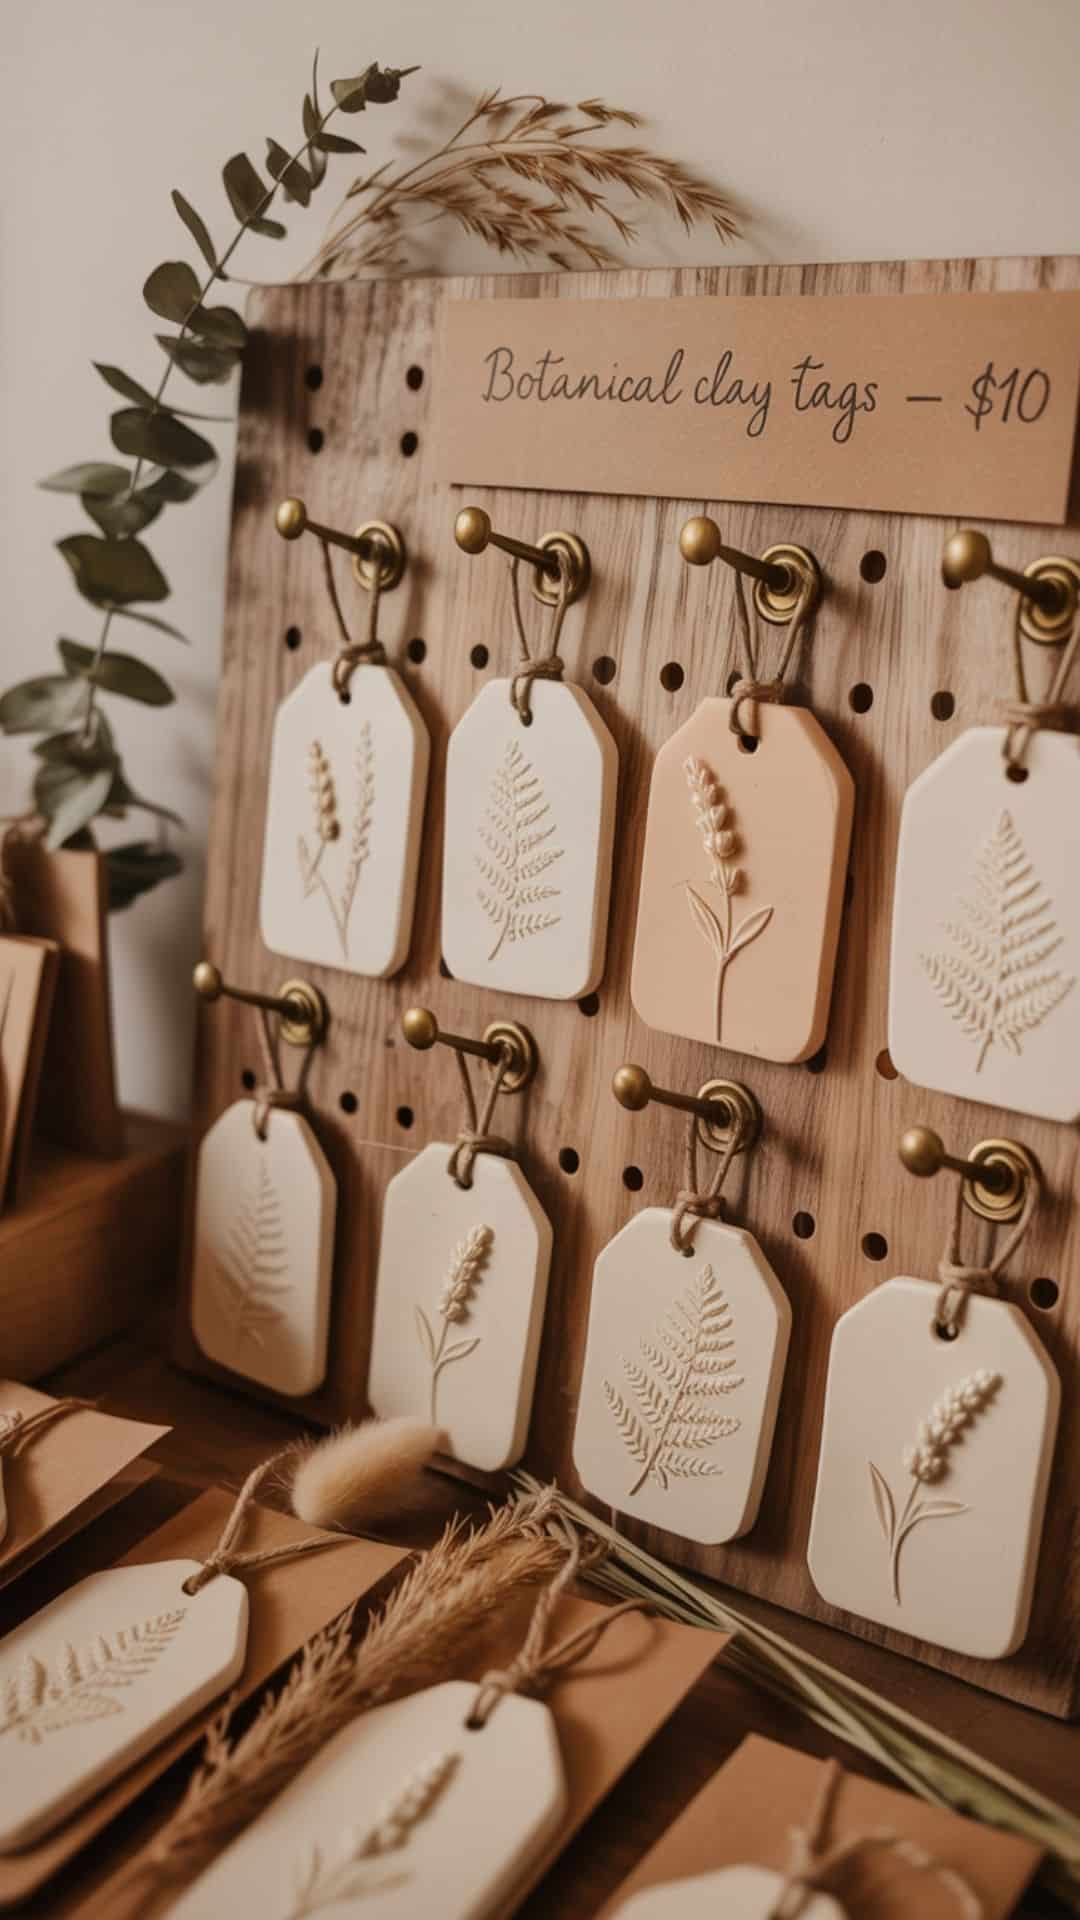
What They Are + Why They Sell
Pressed leaf or floral clay tags are simple, calming, and beautifully textured. Customers use them as gift tags, keepsake ornaments, jar decorations, or drawer sachet labels. Their natural, neutral aesthetic fits every season.
Materials / Shopping List
- Air-dry clay
- Rolling pin
- Fresh botanicals (ferns, lavender, leaves)
- Circle or rectangle cutters
- Twine or ribbon
- Sanding sponge
- Optional white or gold paint
How to Make Them (Step-by-Step)
- Roll clay to about ¼ inch thickness.
- Lay a botanical stem across the surface and gently roll over it to imprint the texture.
- Cut out shapes using your preferred cutter.
- Poke a small hole at the top for twine.
- Let dry fully and lightly sand edges.
- Optionally highlight texture with a dry brush of white or gold paint.
- Thread with ribbon or twine.
Selling Tips
Price around $6–$10 each or $18–$24 for sets of three. Group them in bundles for holidays or weddings. Display them on kraft paper, tied to sample jars, or hung from branches for maximum visual appeal.
8. Clay Gift Toppers (Beautiful Little Extras That Boost Sales)
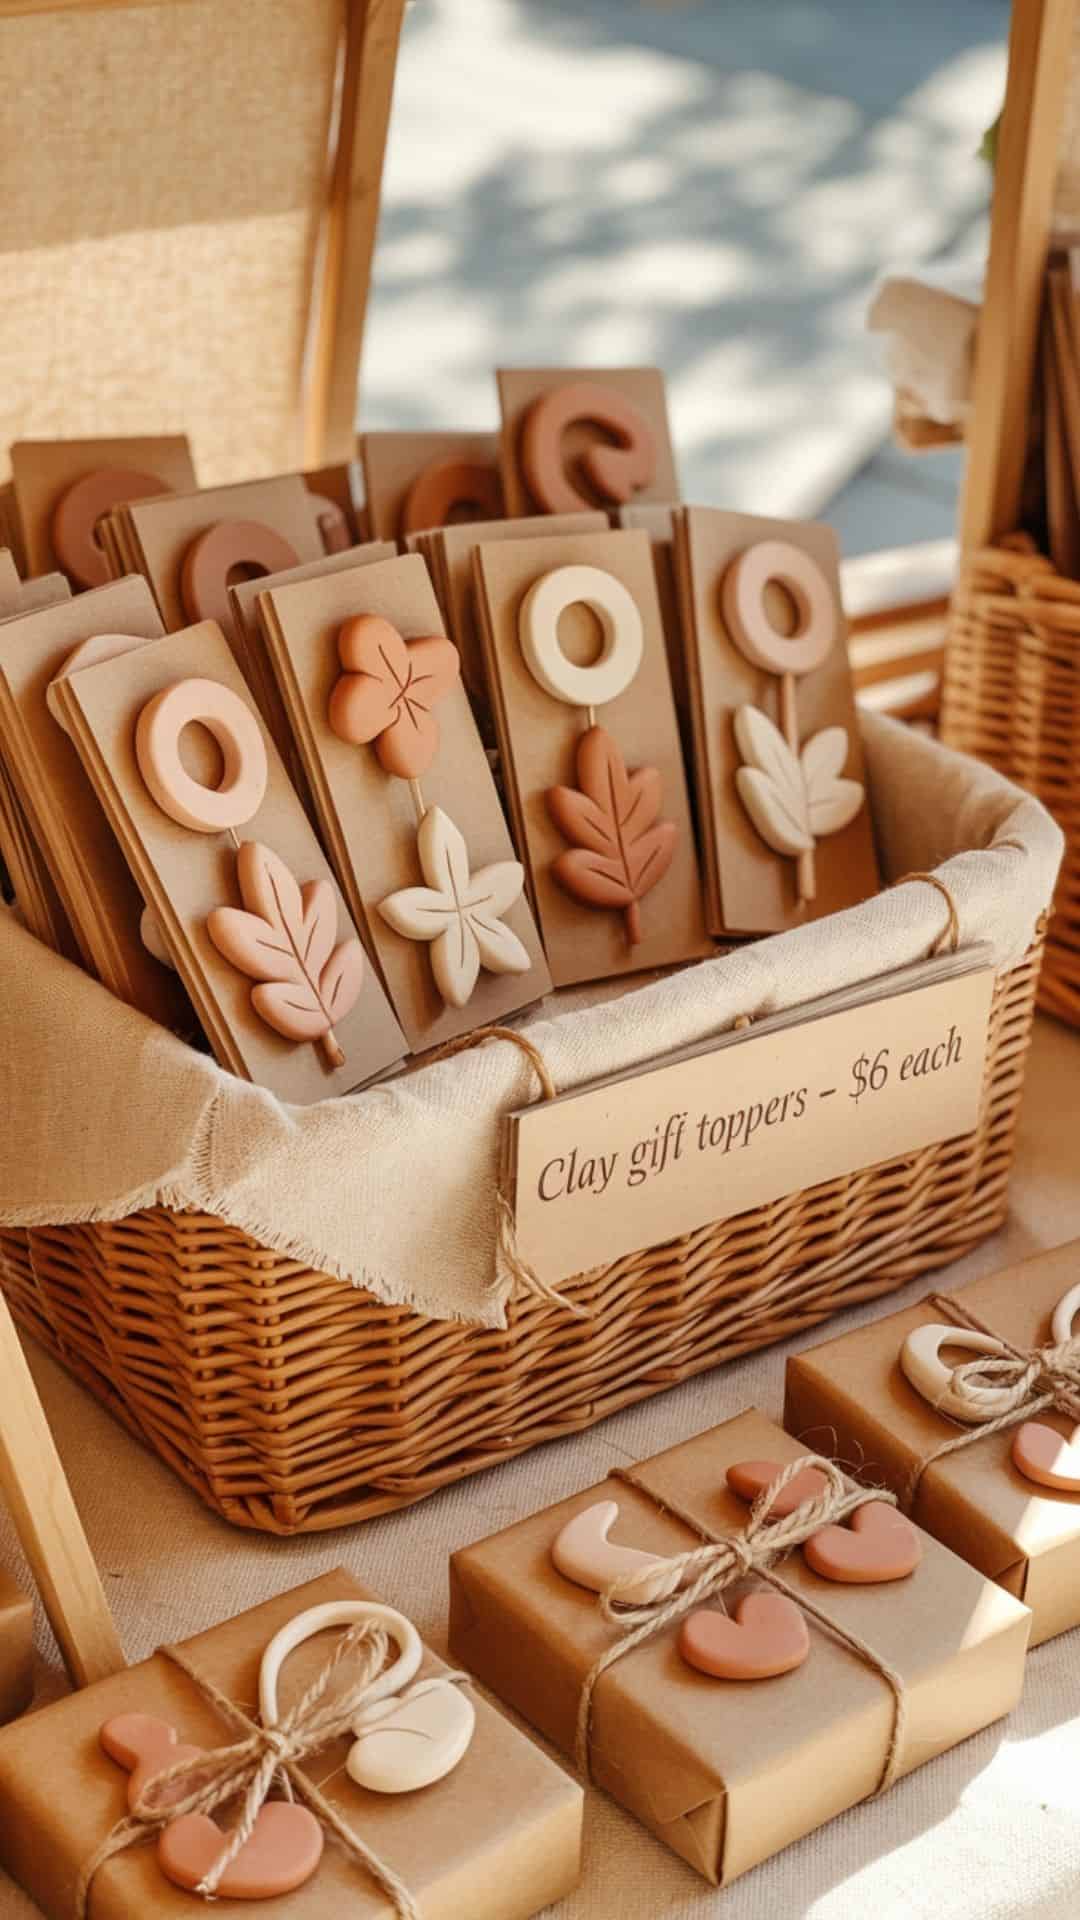
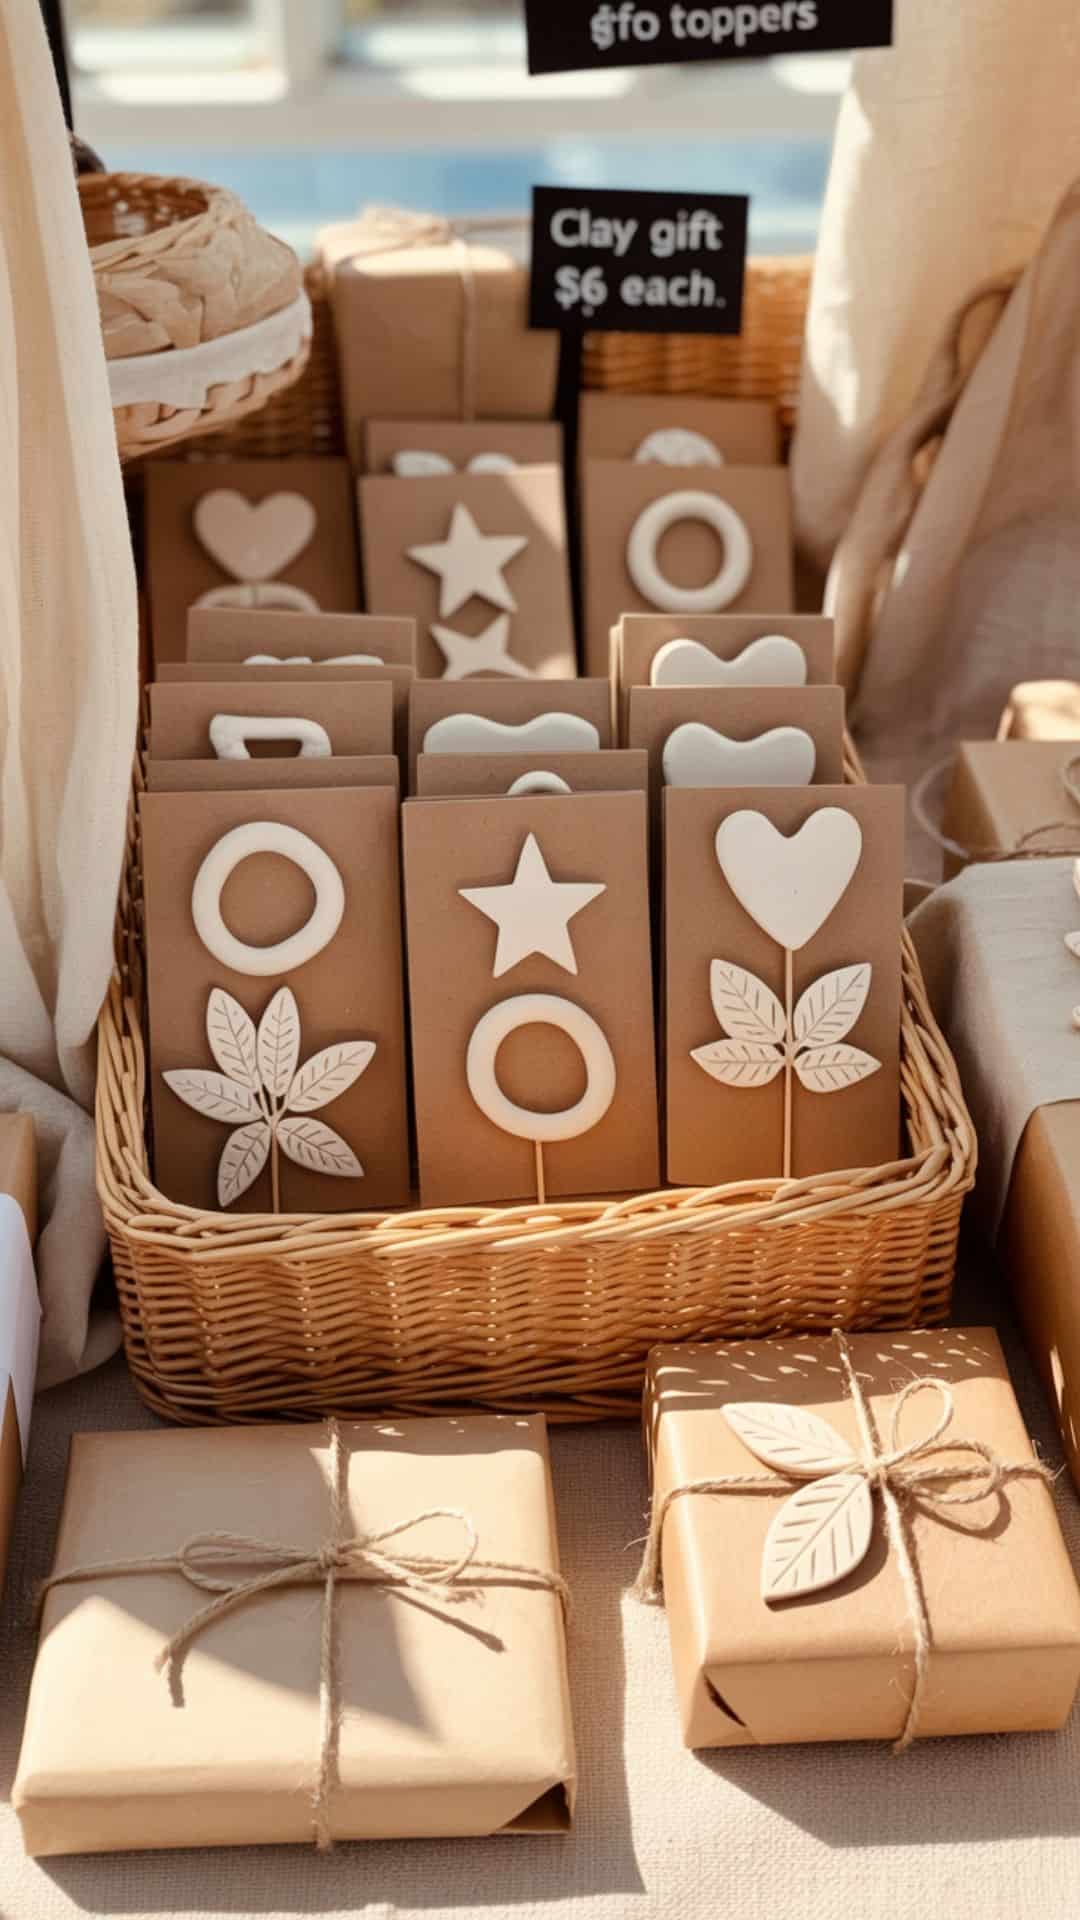
What They Are + Why They Sell
Clay gift toppers turn any wrapped gift into something instantly special. With simple shapes like stars, hearts, leaves, or minimalist discs, they serve as reusable keepsakes long after the wrapping is gone. These are perfect impulse buys small, affordable, and charming.
Materials / Shopping List
- Air-dry clay
- Clay cutters
- Rolling pin
- Hole punch tool
- Ribbon or baker’s twine
- Matte sealer (optional)
- Kraft display cards
How to Make Them (Step-by-Step)
- Roll clay to even thickness.
- Cut out clean shapes stars, hearts, or simple circles sell best.
- Punch a small hole if the buyer wants to use it as an ornament or tag.
- Let dry thoroughly.
- Lightly sand edges and seal if desired.
- Tie ribbon or twine through the hole.
- Mount the topper on kraft cards for an elevated presentation.
Selling Tips
Typically priced at $4–$8 each, these make wonderful add-on items that increase your average sale. Display them clipped to a wire board or arranged in small baskets beside your checkout area.
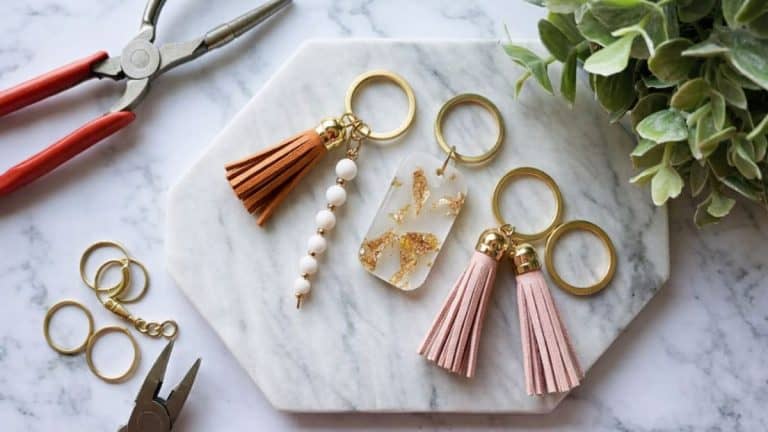
9. Minimalist Clay Earrings (Always in Demand at Markets)
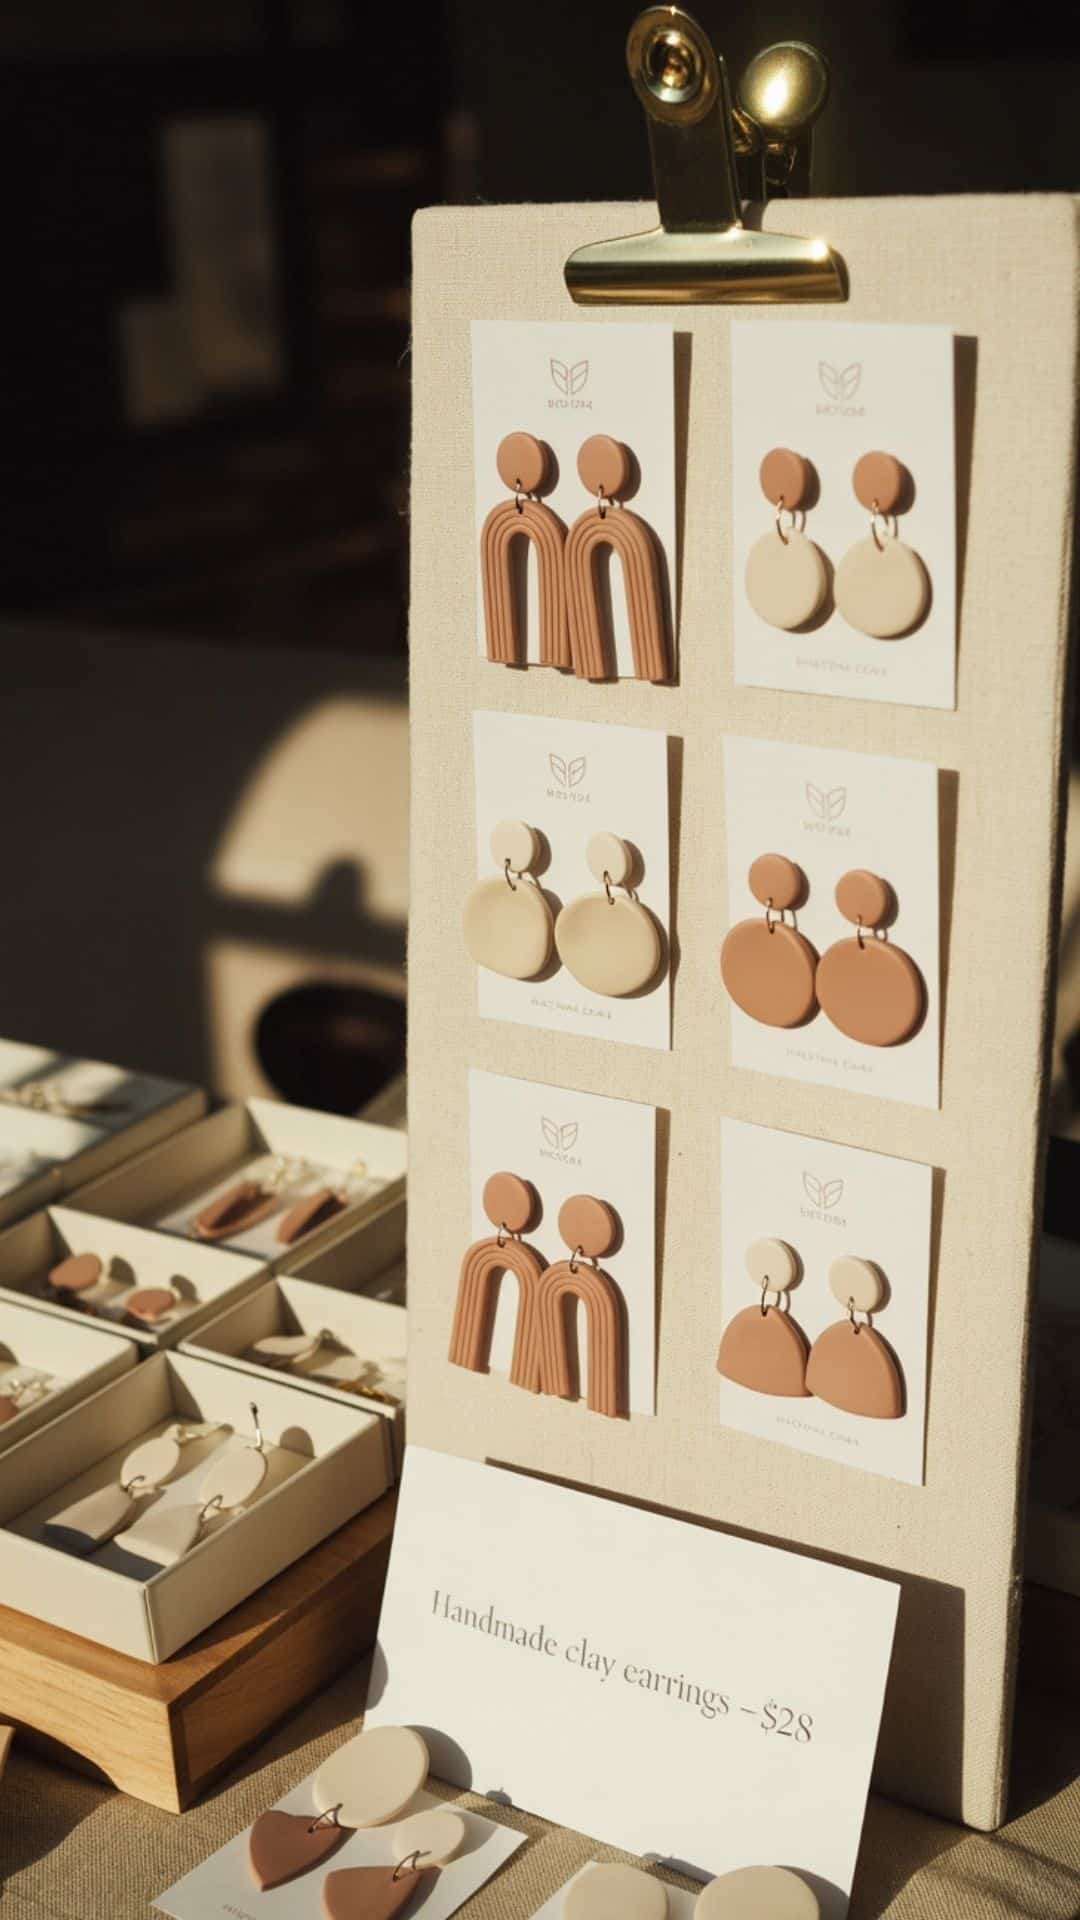
What They Are + Why They Sell
Minimal clay earrings are lightweight, modern, and beautifully neutral—everything shoppers look for in everyday jewelry. Simple arches, half-moons, discs, and organic shapes remain evergreen sellers. Their boutique look pairs perfectly with gift-giving moments all year.
Materials / Shopping List
- Polymer clay (neutral colors: sand, terracotta, black, cream)
- Clay cutters
- Earring posts or hooks
- Jump rings
- Jewelry pliers
- Sanding sponges
- Matte sealer (optional)
- Display cards
How to Make Them (Step-by-Step)
- Condition polymer clay (affiliate) until soft and smooth.
- Use cutters or hand-shape simple, clean forms.
- Create small holes for jump rings before baking.
- Bake clay on a ceramic tile for even curing.
- Sand edges lightly for a professional finish.
- Assemble earrings using jump rings and jewelry pliers.
- Mount on branded display cards for a boutique feel.
Selling Tips
Price ranges from $18–$35 depending on style. Neutral palettes always sell best. Display vertically on earring stands, corkboards, or framed linen to help shoppers picture them as “boutique quality.” Pair with soft neutral props for Instagram-worthy product photos.
10. Clay Pendants (Elegant Add-Ons to Your Jewelry Line)

What They Are + Why They Sell
Clay pendants are a gentle, approachable way to expand your jewelry offerings. Shoppers love their soft matte finish and understated shapes, making them ideal for gifting or everyday wear. These pair well with minimalist metal chains and feel elevated without being expensive to make.
Materials / Shopping List
- Polymer clay
- Circle, oval, or organic shape cutters
- Jump rings
- Necklace chains (gold or brass tones)
- Sanding sponges
- Clay blade
- Small drill or pin tool
- Display cards
How to Make Them (Step-by-Step)
- Roll polymer clay to a smooth, even thickness.
- Cut simple, flattering shapes such as small ovals or circles.
- Use a pin tool to create a small hole for the jump ring.
- Bake according to clay instructions.
- Sand edges gently to refine.
- Assemble pendant with a jump ring and chain.
- Package in small jewelry boxes (affiliate) or clear sleeves for a polished look.
Selling Tips
Pendants sell well between $15–$28. Offer matching sets (earrings + necklace) to encourage bundle purchases. Shoppers love neutral, nature-inspired palettes sand, sage, terracotta, cream.
How to Choose What to Make
Choosing the right clay pieces to create begins with understanding what shoppers naturally gravitate toward. Customers love items that feel useful, beautiful, and easy to gift small treasures that look handmade in the best possible way. When you’re planning your product lineup, focus on pieces that photograph well, package easily, and offer options for personalization or seasonal touches.
Here’s a gentle checklist to guide your creative decisions:
- Consider the time it takes to make each piece versus the profit it brings.
- Choose colors and shapes that align with your brand’s aesthetic.
- Think about seasonality some items sell steadily all year, while others shine during holidays.
- Prioritize pieces that ship easily and won’t break in transit.
- Pay attention to the crafts shoppers pick up first in your booth.
- And most importantly, make items you genuinely enjoy creating.
If your craft feels intentional, gift-ready, and aligned with your style, it’s the right one to make.
Wrapping Up
Handmade clay pieces carry a special kind of beauty one shaped by patience, creativity, and the warmth of your hands. When shoppers buy from you, they’re choosing something meaningful, something they can’t find in big-box stores. That quiet connection is what makes handmade work so powerful.
As you craft and prepare for your next market or shop update, remember that every small piece tells a story. Create slowly, package thoughtfully, and trust that the right customers will recognize the heart behind your work.