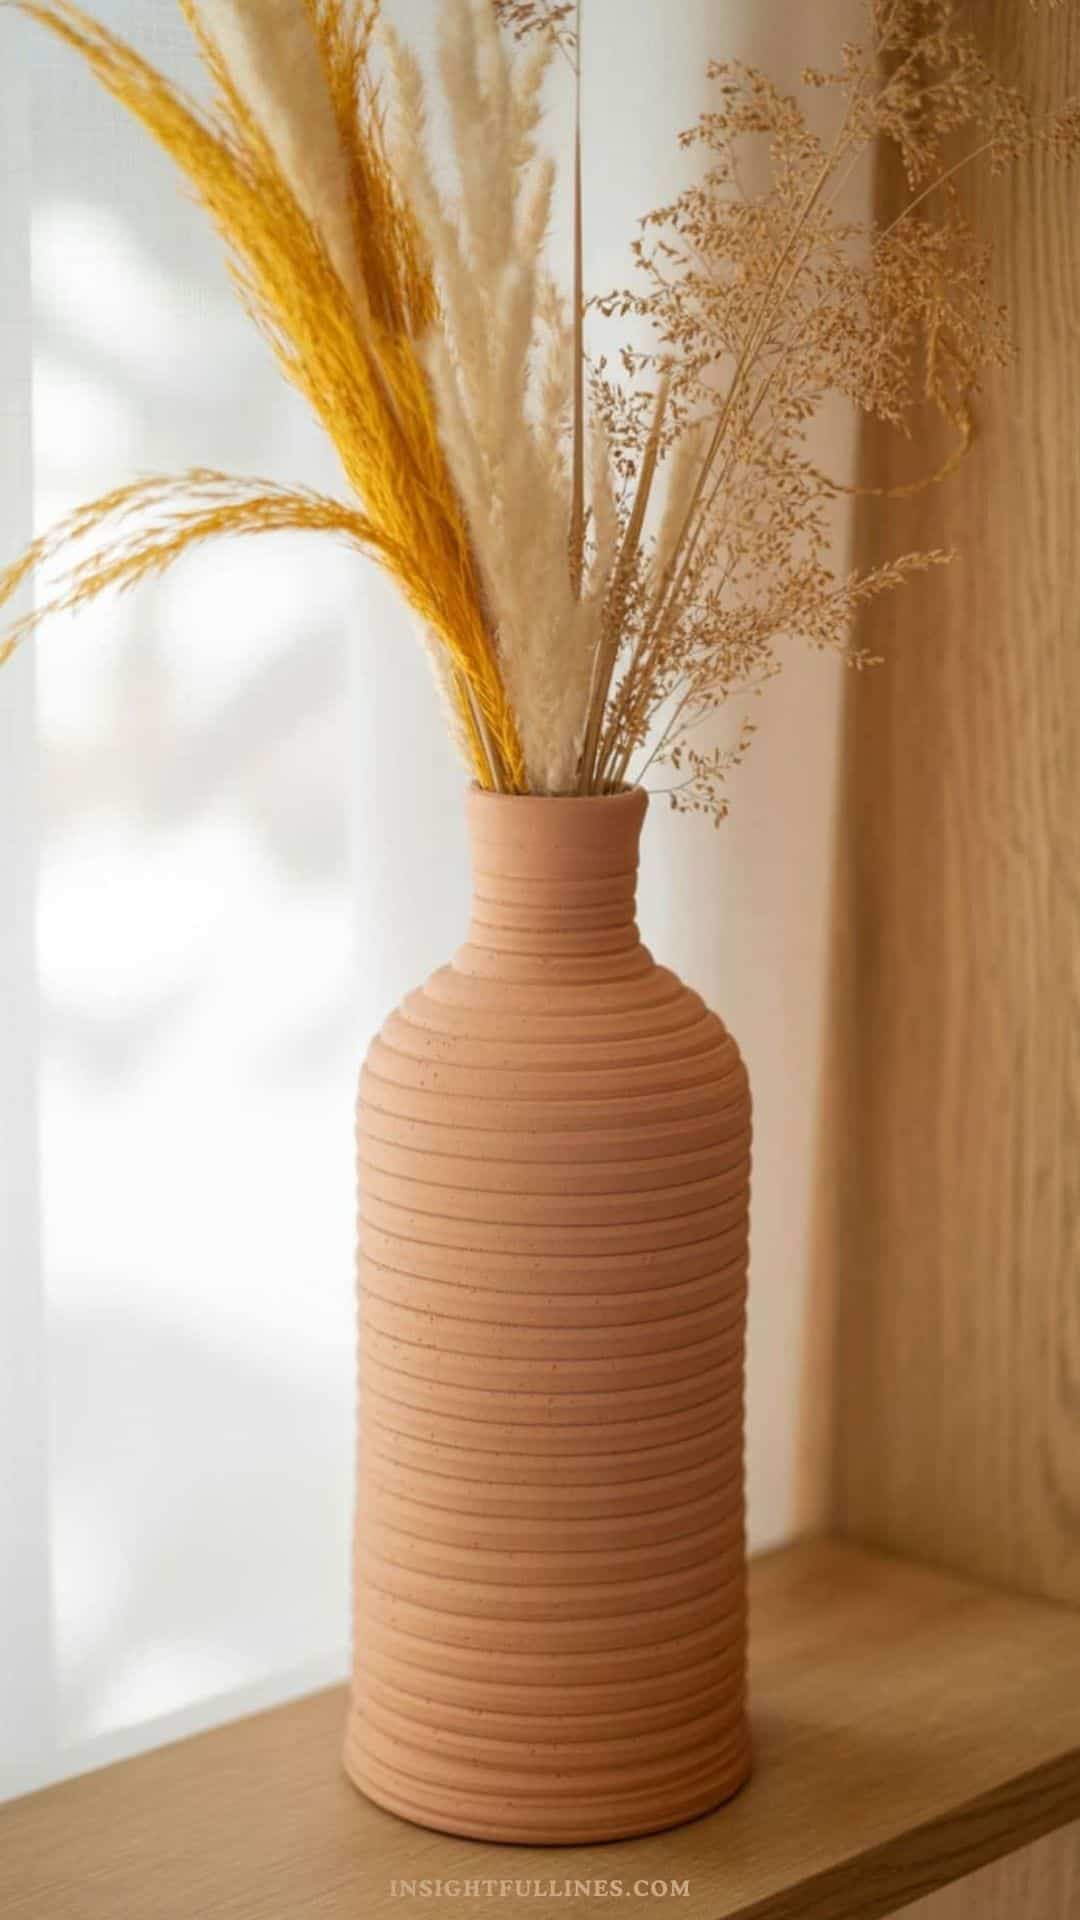
Air Dry Clay Coil Built Vase That Looks High-End and Handmade
If you’re looking for a clay project that feels relaxed, rewarding, and a little more elevated than the basics, the coil-built bottle vase is a wonderful place to land. This is the kind of craft you can ease into, taking your time and enjoying the process as the shape slowly comes together in your hands.
Coil building has a natural rhythm to it. Instead of rushing toward a finished piece, you build gradually, adding one layer at a time and watching the form grow. It’s simple to learn, forgiving if you make small mistakes, and perfect for working with air dry clay (affiliate) at home. You don’t need special tools or experience just a willingness to slow down and let the piece develop naturally.
What makes this air dry clay coil built vase especially appealing is its texture. The subtle ridges create depth and interest, giving the vase a handmade look that feels intentional and timeless. You can leave the coils visible for a more organic style or soften them slightly for a cleaner finish, depending on the look you love.
Crafting for your own space or creating pieces to sell, this vase fits beautifully into modern homes. Styled with dried florals or left empty on a shelf, it feels calm, sculptural, and thoughtfully made exactly the kind of piece that draws people in.
This website contains affiliate links. As an Amazon Associate, I earn from qualifying purchases. Please read our disclaimer.
Materials & Tools
Before you begin, take a few minutes to gather your supplies. One of the best parts of this project is how simple it is you don’t need specialty equipment or a long shopping list. Everything here is beginner-friendly and easy to work with, so you can focus on enjoying the process rather than managing complicated tools.
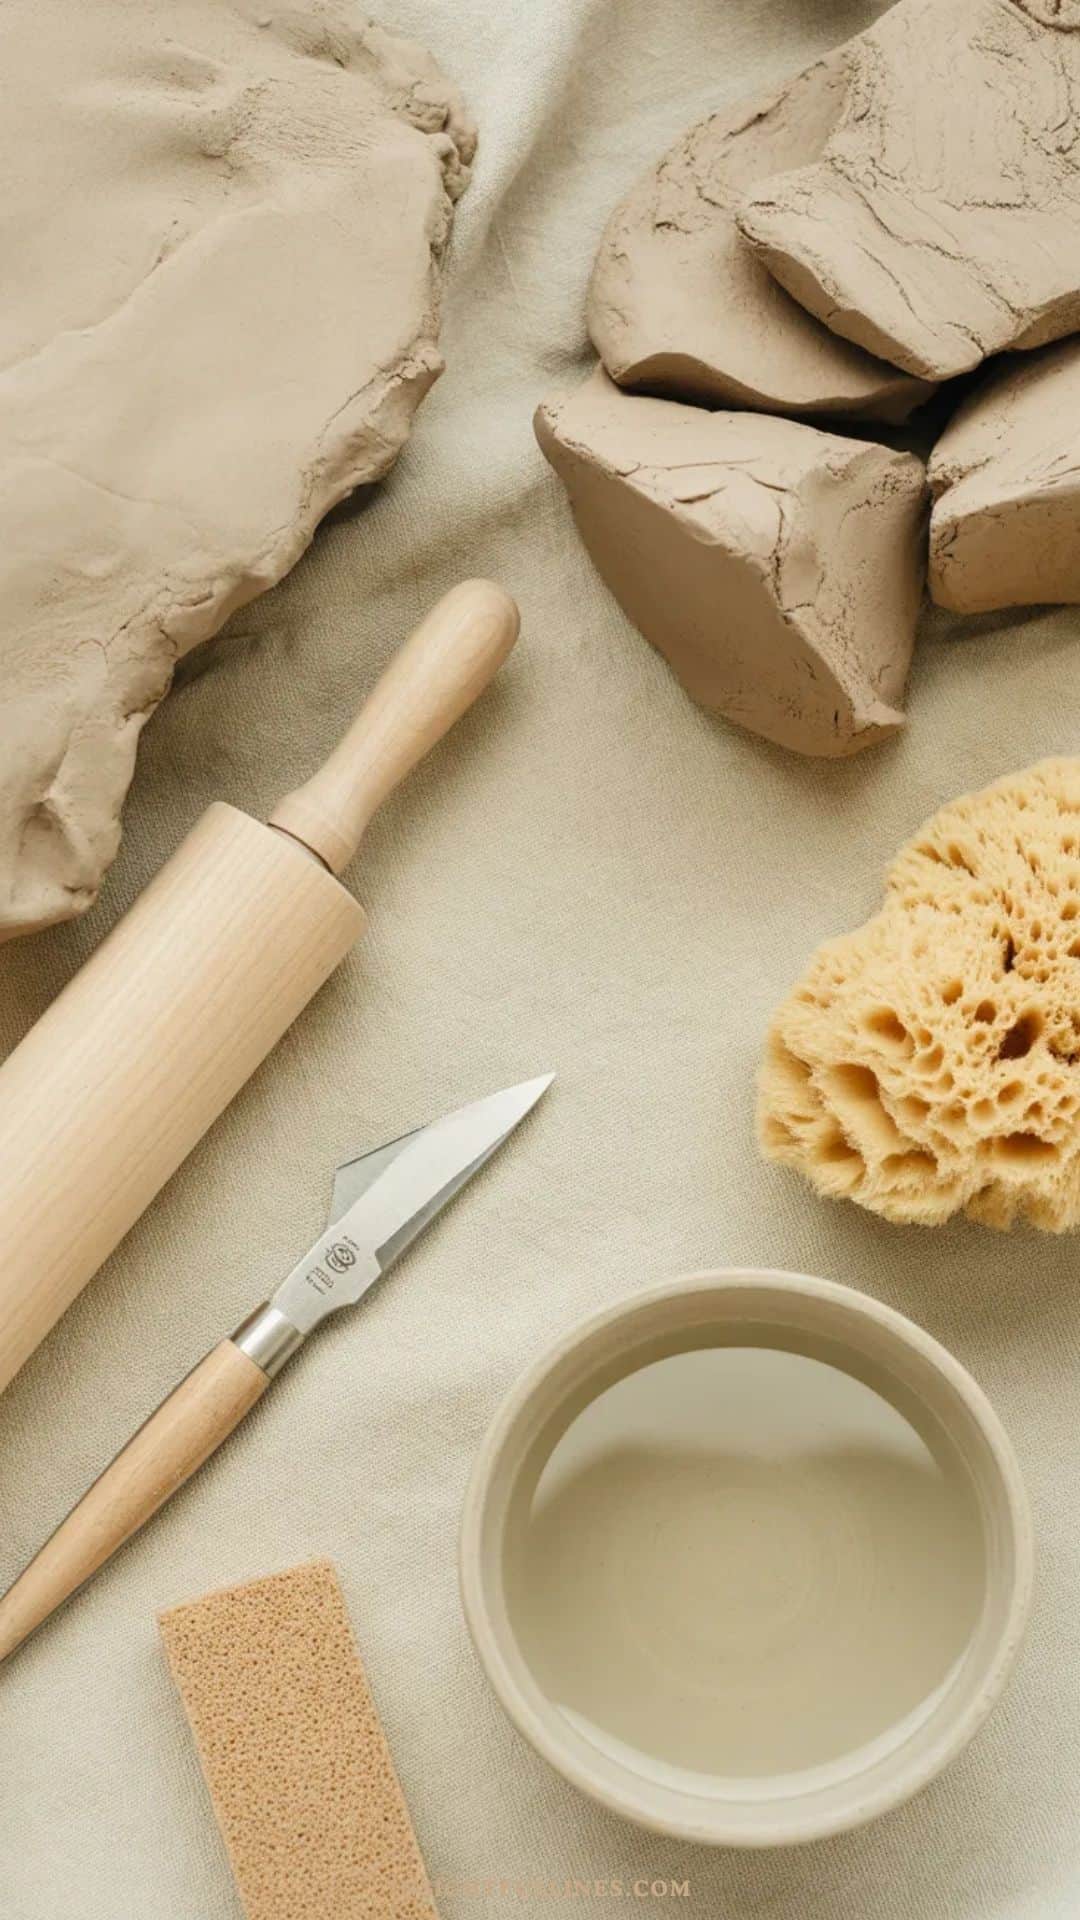
Materials
- Air dry clay (about 1½–2 pounds for a medium vase)
- Water (small bowl for slip and smoothing)
- Optional: acrylic paint (white, cream, or soft neutral tones)
- Clear satin or matte varnish or sealant
Tools
- Rolling pin or smooth bottle
- Craft knife (affiliate) or clay cutter
- Cup or lid (for cutting the base)
- Small bowl for slip
- Damp sponge
- Sandpaper (fine grit, 220–320)
- Soft cloth or dry brush for dusting
Step-by-Step Instructions: Coil-Built Bottle Vase
This vase is built slowly and intentionally, so there’s no rush. Follow the steps below at your own pace, allowing the clay to guide the shape as it grows. Each step is simple on its own, and together they create a finished piece that feels thoughtful, balanced, and beautifully handmade.
Step 1: Create the Base
Roll out a small slab of clay about ¼ inch thick. Using a cup or lid, cut a clean circle. This base sets the tone for your entire vase, so take a moment to smooth the edges and surface with your fingers or a damp sponge.
Step 2: Roll Your First Coils
Take a handful of clay and roll it between your palms, then on your work surface, to form a long, even coil about ½ inch thick. Consistent thickness helps the walls build evenly, but don’t stress minor variations add character.
Step 3: Attach the First Coil
Score the edge of the base and one side of the coil. Apply a small amount of slip, then press the coil firmly around the base edge. Gently blend the inside seam with your finger or a damp sponge to create strength.
Step 4: Build the Walls
Continue stacking coils, scoring and slipping between each layer. As the vase grows taller, subtly adjust the shape slightly wider at the bottom and gradually narrowing toward the top to achieve a bottle silhouette. Smooth only the inside seams to keep the exterior coil texture visible.
Optional variation: For a softer look, lightly drag a damp sponge over the outside coils to blur the ridges without removing them completely.
Step 5: Let the Clay Rest
If the clay starts to feel soft or slouchy, pause. Let it rest uncovered for 30–60 minutes. This step is key to preventing collapse and keeping your form crisp as it rises.
Step 6: Refine the Rim
Once you reach your desired height, focus on the rim. Smooth and even it out with a damp finger or flat tool. Slightly uneven rims add charm and reinforce the handmade feel.
Step 7: Dry Slowly
Allow the vase to dry for at least 48 hours. After the first day, carefully flip it so air can reach the base. Keep it out of direct sunlight to prevent cracking.
Step 8: Sand and Clean
Once fully dry, lightly sand any sharp edges or rough spots. Use a soft cloth or dry brush to remove dust.
Step 9: Finish the Surface
For a natural terracotta look, leave the clay unpainted and seal with clear satin varnish. For a softer ceramic feel, dry-brush white or cream paint over the surface, letting the clay tone show through the ridges.
Step 10: Seal and Style
Apply one or two thin coats of varnish. Once dry, style with dried florals, pampas grass, bunny tails, or leave it empty as a sculptural accent.
Why This Craft Sells So Well
- The coil texture highlights the handmade, artisan look shoppers love
- Neutral tones fit effortlessly into modern, boho, and minimalist homes
- Each piece is one of a kind, which adds perceived value
- Lightweight but statement-worthy for shelves and gift-giving
- Perfect for dried florals, making it low-maintenance for buyers
Suggested Price Point
For a medium-sized coil-built bottle vase, a price range of $28–45 works well depending on size, finish, and local market trends. Painted or specialty finishes can comfortably sit at the higher end.
Batching Tip
Batch your bases first, then roll and stack coils assembly-line style. Building multiple vases to the same height before letting them rest saves time and keeps shapes consistent for selling.
Packaging Idea
Wrap each vase in kraft paper or soft tissue, tie with natural twine, and add a simple neutral tag. Display them in shallow wooden trays at markets for a clean, Pinterest-worthy setup.
Fun Variations to Offer
- Soft whitewashed finish for coastal decor
- Charcoal or clay-blush painted versions
- Taller, slimmer silhouettes
- Subtle carved line accents between coils
- Matching mini vases as a set
Pro Tip
Always smooth the inside seams thoroughly this hidden step is what gives coil-built pieces long-term strength and prevents cracking as they dry.
If you’re ready to keep creating, our air-dry clay projects guide is a great place to find your next calm, creative build.
Wrapping Up: Air Dry Clay Coil Built Vase
The coil-built bottle vase is one of those crafts that grows with you. It’s calming, creative, and endlessly adaptable, making it just as satisfying for beginners as it is for experienced makers.
Whether you’re creating for your own space or building inventory to sell, this air dry clay coil built vase proves that slow, intentional crafting can lead to truly beautiful results.